


.")

In the ever-evolving world of computer networks, efficient and secure communication between devices is absolutely essential. Whether you’re streaming your favorite show, managing a data center, or just browsing the web, countless invisible processes are working behind the scenes to make it all happen smoothly. One of these crucial processes is Network Address Translation, commonly known as NAT. It’s a foundational technology that plays a major role in how devices communicate across different networks especially between private local networks and the vast public internet.
But why do we even need NAT? The answer lies in the shortage of public IPv4 addresses. With billions of devices requiring internet access daily, it’s impossible to assign a unique public IP address to each one. NAT solves this problem by allowing multiple devices on a private network to share a limited number of public IP addresses. At the same time, it provides a basic layer of security by hiding internal IP structures from the outside world. It’s one of the unsung heroes of modern networking quietly enabling global connectivity while conserving valuable IP resources.
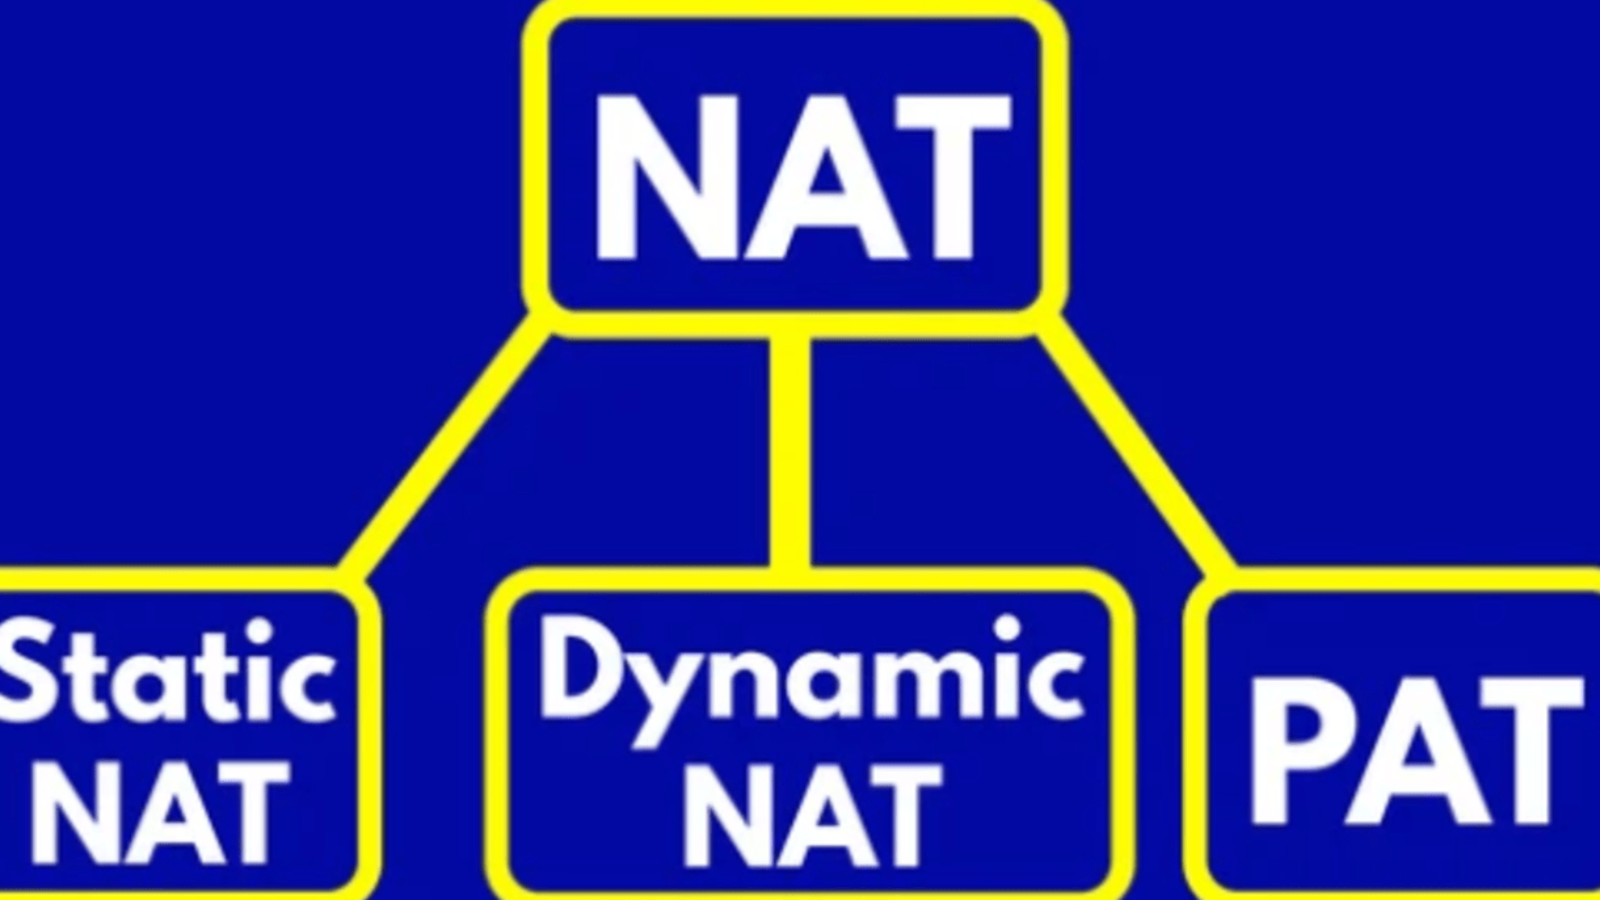
Yet, NAT isn’t a monolithic or one-size-fits-all solution. In fact, there are three main types of NAT, each tailored to different needs and scenarios: Static NAT, Dynamic NAT, and Port Address Translation (PAT). While all three serve the core purpose of translating IP addresses, they differ in how they do it, the resources they consume, and the specific problems they’re best suited to solve.
Static NAT provides a consistent, one-to-one mapping between internal and external IPs, often used when a device inside the network must always be reachable from the internet—think email servers or web servers. Dynamic NAT, on the other hand, uses a pool of public IPs to assign addresses on the fly, perfect for internal devices that need internet access without requiring a fixed address. Finally, PAT, commonly known as NAT overload, is the most widely used form of NAT. It allows hundreds or even thousands of devices to share a single public IP using port numbers, making it ideal for home networks and small businesses.
Each type of NAT has its strengths and limitations, and understanding these differences is key to building efficient, scalable, and secure network architectures. Whether you’re a networking student, a system administrator, or just a curious tech enthusiast, knowing how NAT works and when to use each type can give you valuable insight into the invisible mechanisms powering our digital lives.
In this blog, we’ll break down the differences between Static NAT, Dynamic NAT, and PAT in simple terms. We’ll explore how they work, when to use them, and why they matter in both everyday and enterprise-level networking. By the end, you’ll not only understand the technical distinctions between these NAT types but also gain a deeper appreciation for the role NAT plays in the background of nearly every internet connection.
So, let’s dive in and uncover how NAT helps bridge the gap between private networks and the public internet one translated address at a time.

Network Address Translation (NAT) is a technique used in networking that enables multiple devices on a private network to access the internet using a single or a few public IP addresses. In simple terms, NAT acts as a bridge between internal (private) networks and external (public) networks, such as the internet. It translates the private IP addresses used within a local network into public IP addresses that can be routed on the internet. When data packets travel from a device inside the local network to the internet, NAT modifies the source address in the packet header from a private IP to a public IP. When a response is received, NAT reverses the translation, delivering the data to the correct internal device.
NAT was originally introduced as a solution to the IPv4 address exhaustion problem. Since IPv4 has a limited number of unique addresses (approximately 4.3 billion), it quickly became clear that not every internet-connected device could have its own unique public IP. NAT allows organizations, homes, and data centers to use private IP address ranges internally like 192.168.x.x, 10.x.x.x, or 172.16.x.x and share a much smaller number of public IPs for internet access. This drastically reduces the need for public addresses while still enabling global communication.
Beyond address conservation, NAT also adds a basic layer of security. Because internal IP addresses are not directly exposed to the public internet, it becomes harder for external attackers to initiate unsolicited connections to internal systems. That said, NAT is not a security tool by design, but its masking effect does provide some privacy and protection.
NAT is typically implemented on routers, firewalls, or gateways that connect a local network to the internet. It keeps track of each outgoing and incoming connection, ensuring that data gets routed to the right internal device. NAT is a fundamental building block in both home and enterprise networking. Without it, the internet as we know it filled with billions of connected devices would be practically impossible to manage under IPv4.
NAT is like a receptionist at a busy office. Internal employees (devices) don’t contact the outside world directly. Instead, the receptionist (NAT) handles all external communication on their behalf, keeping track of who said what and routing replies back to the correct person.
Static NAT (Static Network Address Translation) is a type of NAT that creates a one-to-one mapping between a private (internal) IP address and a public (external) IP address. Unlike other forms of NAT that dynamically assign addresses, static NAT uses a fixed translation, meaning each internal device always uses the same public IP address whenever it accesses the internet. Likewise, any incoming traffic to that public IP is always forwarded to the same internal host. This consistency is what makes static NAT highly useful for scenarios where a device must be consistently reachable from outside the network.
A common use case for static NAT is hosting servers or services such as web servers, mail servers, or VoIP systems on a private network. These servers need to be accessible to external users via a known public IP address, and static NAT ensures that all requests to that IP are reliably routed to the correct internal server. This is also useful in remote management scenarios, where administrators need to connect to a specific internal device from the outside.
Static NAT is typically configured manually on a router or firewall, and each mapping consumes one public IP address. As a result, it’s not scalable for large networks where hundreds or thousands of internal devices need internet access. Because of the one-to-one nature, the number of available public IP addresses becomes a limiting factor. For organizations with limited public IP resources, this can be inefficient and costly.
From a security standpoint, static NAT does not inherently block incoming connections, which means publicly accessible devices are exposed to the internet. Without proper firewall rules or access controls, this can become a potential security risk. For this reason, static NAT should always be deployed alongside robust perimeter security measures.
static NAT offers a predictable and reliable way to make internal devices accessible to the outside world, making it ideal for specific use cases like hosting or remote access. However, due to its need for dedicated public IP addresses and its exposure to the internet, it’s best used selectively where consistency, not scalability, is the priority.
Dynamic NAT (Dynamic Network Address Translation) is a type of NAT that translates private IP addresses to public IP addresses from a predefined pool, but unlike static NAT, the mapping is not fixed. Instead, the translation occurs dynamically, meaning that whenever a device inside the network initiates a connection to the internet, the NAT device assigns it an available public IP from the pool. Once the session ends, that public IP becomes available again for use by another internal device. This approach allows for more efficient utilization of public IP addresses than static NAT, especially in networks where not all internal devices are active at the same time.
The key benefit of dynamic NAT is that it supports a larger number of internal hosts with a smaller pool of public IPs, though not to the same extent as PAT. It provides a middle ground between the permanence of static NAT and the high scalability of PAT. Dynamic NAT is especially useful in environments where temporary outbound access is needed, but where there is no requirement for external systems to initiate connections back to internal devices.
However, dynamic NAT still has its limitations. Since it operates on a many-to-many model, the total number of simultaneous outbound connections is limited by the size of the public IP pool. If all public IPs are in use and a new internal device tries to access the internet, its request will be denied until a public IP becomes available. This can be a concern in busy networks or during peak usage hours.
Unlike static NAT, dynamic NAT does not provide a consistent IP mapping, so it’s not suitable for hosting services that require a fixed public address. Additionally, while it masks internal IPs from the outside world, it does not inherently offer strong security, and should be combined with a firewall for better protection.
dynamic NAT is ideal for networks with occasional outbound traffic and a limited pool of public IPs. It offers flexibility and moderate scalability without the complexity of port management. However, it’s not designed for environments where internal devices need to be reachable from the internet or where high volumes of concurrent connections are expected.
Port Address Translation (PAT), commonly referred to as NAT Overload, is the most widely used form of NAT in modern networks. Unlike Static and Dynamic NAT, which require a separate public IP address for each internal device or session, PAT enables multiple devices on a private network to share a single public IP address. It does this by translating not just the IP address, but also the port number associated with each session. This way, the NAT device can keep track of multiple simultaneous connections from different internal devices, even if they all use the same public IP.
Here’s how it works: when a device from inside the network initiates a connection to the internet, PAT assigns it a unique source port number on the public IP address. The NAT router maintains a translation table that records which internal IP and port are mapped to which public IP and port. When a response comes back from the internet, the router consults this table to forward the traffic to the correct internal device. This mechanism allows thousands of internal devices to access the internet using just one public IP address.
PAT is especially useful in home networks, small businesses, and even some enterprise environments where public IP addresses are limited or expensive. It’s a highly scalable and cost-effective solution that extends the usability of scarce IPv4 address space. Because of its efficiency, PAT has become the default NAT method for most consumer-grade routers and firewalls.
Another benefit of PAT is the basic security it offers. Since internal devices do not have publicly routable IP addresses and unsolicited inbound traffic is typically dropped unless explicitly allowed, it provides a layer of protection from external threats. However, PAT is not a replacement for a firewall and should be used in conjunction with other security measures.
Despite its advantages, PAT can run into limitations in certain scenarios. Applications that require incoming connections, like online gaming, VoIP, or peer-to-peer services, may require additional configuration (like port forwarding or UPnP) to function correctly. Additionally, if the number of outbound connections grows too large, the router might run out of available ports, causing temporary connection issues.
PAT (NAT Overload) is a smart, efficient way to connect multiple internal devices to the internet using a single public IP. It’s flexible, scalable, and ideal for everyday network environments, though it may require tuning for specific use cases.
| NAT Type | Mapping | Public IPs Needed | Common Use Case |
|---|---|---|---|
| Static NAT | 1-to-1 | One per device | Hosting internal servers |
| Dynamic NAT | Many-to-many | A pool of public IPs | Temporary connections |
| PAT | Many-to-one (via ports) | One (or few) | Home/office internet sharing |
While NAT’s primary job is address translation, it also offers a layer of basic security. Devices behind a NAT aren’t directly exposed to the public internet, making it harder for external threats to reach them especially with PAT.
However, it’s important to remember that NAT is not a firewall, and shouldn’t be your only line of defense. Combine NAT with proper firewall rules for best results.

Understanding the different types of NAT Static, Dynamic, and PAT is essential for network engineers, system admins, and even tech-savvy users. Each has its pros, cons, and ideal use cases.
Whether you’re running a home Wi-Fi network or designing infrastructure for a business, choosing the right NAT type can optimize IP address usage and help secure your network.

In the modern enterprise, networks are evolving at a rapid pace. From traditional on-prem infrastructure to hybrid cloud deployments, mobile workforces, IoT devices, and containerized applications the number of connected endpoints is exploding. At the heart of this digital sprawl lies one constant: the IP address. Every device, service, and user interaction on a network relies on IP addressing to function. And yet, many organizations still manage this critical layer of infrastructure manually using spreadsheets, static records, or outdated systems. The result? Increased risk of IP conflicts, network outages, security blind spots, and hours of wasted troubleshooting.
That’s where IP Address Management (IPAM) comes in.
IPAM provides the centralized visibility, control, and automation your network needs to operate efficiently and securely. It bridges the gap between your DNS and DHCP services, giving you a holistic view of every IP assignment, lease, and reservation. Instead of reacting to IP-related issues after they disrupt your operations, IPAM empowers teams to plan, track, and optimize IP space proactively.
In an era where cloud adoption, IPv6 migration, and remote work are the norm not the exception manual IP tracking is no longer sustainable. As networks become more dynamic and distributed, the need for scalable and intelligent IP management becomes urgent. IPAM isn’t just a “nice to have” anymore; it’s a core network service that supports everything from uptime to security posture to digital transformation initiatives.
This blog will explore what IPAM really is, how it works, and most importantly why your organization needs it to stay resilient, agile, and future-ready.

In today’s hyper-connected digital landscape, managing a network is more complex than ever. Organizations are no longer operating within the bounds of a single data center or office LAN. Instead, they’re navigating a web of interconnected environments: hybrid cloud architectures, multi-site branches, virtual networks, remote endpoints, IoT ecosystems, and an ever-growing mobile workforce. Each of these environments relies on one fundamental building block IP addresses the numerical labels that allow devices to communicate and be identified across the network. Every server, laptop, phone, router, container, virtual machine, and sensor needs a valid IP address to function. As the number of devices continues to grow exponentially, so does the complexity of managing IP space.
Traditionally, network administrators have tracked IP assignments using static tools like spreadsheets or basic network diagrams. While these might suffice for small, static networks, they quickly become unmanageable in dynamic or large-scale environments. Manual tracking leads to errors, IP conflicts, misconfigured devices, and network downtime all of which come at a cost. Lost productivity, poor user experiences, and increased security vulnerabilities are just some of the consequences. Worse, when something goes wrong, teams often lack the real-time visibility to quickly identify the root cause or determine which device was using an IP at a given time.
This is where IPAM, or IP Address Management, plays a critical role. At its core, IPAM is a centralized solution that helps organizations plan, track, and manage their IP address space. It works hand-in-hand with DNS (Domain Name System) and DHCP (Dynamic Host Configuration Protocol) services, ensuring that IP addresses are assigned, resolved, and reclaimed accurately and efficiently. But beyond basic tracking, IPAM provides rich automation, role-based access controls, historical logging, integration with security and orchestration tools, and the ability to visualize and optimize IP utilization across environments.
Imagine being able to see, at a glance, how every subnet in your organization is allocated. Imagine resolving IP conflicts before they happen. Imagine responding to a security event with confidence, knowing exactly which device had a particular IP at a specific moment. That’s the operational power that IPAM unlocks.
In an age where digital transformation, remote work, and cloud-first strategies are redefining IT infrastructures, the old ways of managing IPs just don’t scale. Your network must be agile, secure, and resilient. And for that, IP address management can’t be an afterthought it needs to be a strategic priority.
This blog will explore what IPAM is, how it works, and why it has become a mission-critical component for any modern IT environment.
What is IPAM?
Many organizations still manage their IP address space using spreadsheets or homegrown tools. That might work in a small office with a flat network. But once you start dealing with:
… manual tracking becomes a liability. Mistyped entries, IP conflicts, or outdated data can lead to outages, security blind spots, and serious headaches for your network team.
A modern IPAM solution offers:
Centralized IP Address Inventory
Get a real-time view of all IP addresses across your network used, reserved, available, and more.
DHCP and DNS Integration
Automate the provisioning of IP addresses and names, and keep everything in sync to avoid conflicts and misconfigurations.
Subnet Planning & Allocation
Plan and scale your network logically with proper subnetting, IP grouping, and role-based control.
Audit & Compliance
Track changes, monitor usage, and generate reports to meet internal policies or regulatory requirements.
Security & Incident Response
Quickly identify which device had a specific IP at a specific time critical for investigating security events.
Here are a few key reasons why IPAM is essential for modern IT environments:

IPAM might not be the flashiest part of your IT infrastructure, but it’s one of the most foundational. As your network grows in size and complexity, so does the need for intelligent IP address management.
Still using spreadsheets to manage your IP space? It might be time to consider an IPAM solution that offers automation, visibility, and peace of mind.

Containerization has revolutionized the way developers build, package, and deploy applications. Instead of worrying about operating system inconsistencies or software dependencies, teams can now ship applications as portable, self-contained units that run anywhere Docker is supported. But while Docker is incredibly powerful on its own, its real strength shines when applications grow in complexity especially when they require multiple services, redundancy, scaling, or deployment across multiple machines. This is where container orchestration becomes critical.
Among orchestration tools, Docker Swarm stands out for its simplicity and native integration with the Docker ecosystem. Unlike Kubernetes, which can be overwhelming for newcomers, Docker Swarm is easy to understand, fast to deploy, and uses the same Docker CLI you’re already familiar with. It’s a great first step into orchestration perfect for developers, small teams, or projects that don’t yet require the full complexity of Kubernetes.
In this guide, we’ll demystify Docker Swarm and walk you through the process of setting up a fully functional Swarm cluster from scratch. You’ll learn how to initialize a swarm, add worker nodes, deploy services, scale them with a single command, and perform rolling updates without downtime. The best part? You’ll go from nothing to a working multi-node Docker Swarm cluster in just minutes.
Whether you’re a developer looking to explore orchestration for the first time, a DevOps engineer seeking a lightweight alternative to Kubernetes, or a hobbyist experimenting with container-based infrastructure, Docker Swarm provides a powerful yet approachable solution. The concepts you’ll learn here will not only help you manage containers at scale but also serve as a foundational step toward more advanced orchestration strategies in the future.
As we dive in, we’ll keep things practical and command-line focused no complicated theory, no unnecessary abstractions. This is all about getting hands-on experience and seeing results quickly. By the end of this tutorial, you won’t just understand what Docker Swarm is you’ll have built your own cluster, deployed real services, and gained the confidence to explore more advanced topics like networking, secrets management, and monitoring in a Swarm environment.
So, if you’re ready to level up your Docker game and take the first step into container orchestration without the overhead of complex tooling this post is for you. Let’s get started on your journey from zero to Swarm cluster.

Docker Swarm allows you to group multiple Docker hosts into a single virtual host. You can then deploy and manage containers across this group, with built-in features for load balancing, rolling updates, scaling, and service discovery all using familiar Docker CLI commands.
Unlike Kubernetes, Swarm is much simpler to get started with, making it ideal for small to medium-sized applications, quick demos, or Dev environments.
To follow along, you’ll need:
For simplicity, we’ll use 3 nodes:
On your manager node, run:
docker swarm init --advertise-addr 192.168.1.10
This initializes the swarm and outputs a join token. You’ll see something like:
docker swarm join --token SWMTKN-1-abc123... 192.168.1.10:2377
Keep this safe you’ll need it for your workers.
On each worker node, run the docker swarm join command from above:
docker swarm join --token SWMTKN-1-abc123... 192.168.1.10:2377
To confirm everything’s working, return to the manager and run:
docker node ls
You should see something like:
ID                            HOSTNAME        STATUS    AVAILABILITY  MANAGER STATUS
abcd1234...                   swarm-manager   Ready     Active        Leader
efgh5678...                   swarm-worker1   Ready     Active
ijkl9012... swarm-worker2 Ready Active Let’s deploy a simple web server across our Swarm:
docker service create --name hello-web --replicas 3 -p 80:80 nginx
This command does the following:
Check its status with:
docker service ls
And inspect individual tasks:
docker service ps hello-webScaling is easy. Just run:
docker service scale hello-web=6
Swarm will automatically distribute the new replicas across available nodes.
Swarm also supports rolling updates. For example:
docker service update --image nginx:alpine hello-web
This gradually replaces containers with the new version zero downtime if configured correctly.
To remove the service:
docker service rm hello-webTo remove nodes from the swarm:
On worker nodes:
docker swarm leaveOn manager:
docker swarm leave --force
Docker Swarm is a lightweight yet powerful tool for managing container clusters. While Kubernetes often steals the spotlight, Swarm remains a great option for simpler use cases or teams already comfortable with Docker.
You’ve now learned how to:
In just minutes, you’ve taken a huge step into container orchestration and you’re just getting started.

In the world of modern software development, change is constant technologies evolve, expectations rise, and delivery timelines shrink. In this fast-paced environment, developers are expected not only to write functional code but to ensure that their applications are reliable, scalable, secure, and fast to deliver. Traditional development models, where developers throw code “over the wall” to operations, are no longer effective in a world driven by cloud-native architectures, microservices, and continuous delivery. This is where DevOps thinking comes into play.
More than just a buzzword or a set of tools, DevOps is a mindset shift that transforms how developers approach their craft. It encourages developers to look beyond the code itself and consider the entire software delivery lifecycle from writing and testing code, to deploying it, monitoring it in production, and learning from how it behaves in the real world.
By adopting a DevOps mindset, developers start to think in terms of automation, collaboration, and continuous feedback. They learn to work closely with operations, QA, and security teams not as handoff points, but as partners in delivering value to users.
DevOps thinking promotes shared responsibility, where developers take ownership of the stability, performance, and user experience of their applications. It introduces the importance of CI/CD pipelines, containerization, and infrastructure as code as everyday tools not just ops concerns. It brings attention to the need for observability, monitoring, and alerting as part of the development process, not just post-deployment add-ons.
This transformation doesn’t mean developers must become full-time DevOps engineers. Rather, it means learning to think holistically about how software runs, how it scales, and how it fails. It means caring about logs, metrics, and uptime not just whether your function returns the correct value. It means recognizing the value of automated testing, code quality gates, and deployment workflows that reduce risk and speed up delivery. It’s about building resilient systems, writing code that’s production-ready, and deploying it with confidence.
DevOps thinking also encourages developers to integrate security practices into their workflow, aligning with DevSecOps principles to ensure vulnerabilities are addressed early. It fosters cross-functional communication, breaking down silos that often lead to delays, finger-pointing, and inefficient handoffs. Ultimately, this mindset enables developers to ship software that’s not only functional, but also robust, maintainable, and aligned with business goals.
In this blog, we’ll explore how DevOps thinking changes the way you write, test, and ship code. We’ll look at how it improves collaboration, enhances ownership, and empowers developers to build systems that can thrive in production. Whether you’re new to DevOps or trying to level up your understanding, embracing this mindset will fundamentally change how you approach your work and make you a better, more complete software engineer in the process.

DevOps thinking is the mental shift from focusing only on code to owning the entire lifecycle of software: from development to deployment to production monitoring. It emphasizes collaboration, automation, feedback loops, and shared responsibility.
Instead of viewing “Ops” as someone else’s problem, developers who embrace DevOps thinking start to ask:
Traditional development workflows isolate teams:
This handoff-heavy model creates bottlenecks, blame games, and slow delivery cycles.
DevOps thinking breaks down these walls. Developers become involved in:
It’s not about doing everything, but understanding and contributing to the whole system.
A core tenet of DevOps thinking is automation. Instead of spending time on repetitive, manual tasks (like deploying code or spinning up environments), developers learn to:
This mindset shift doesn’t just save time it increases consistency, reduces human error, and gives you confidence in every commit you push.
DevOps thinking introduces tight, fast feedback loops:
This continuous feedback allows you to iterate faster, catch bugs earlier, and deploy with greater confidence. You’re no longer flying blind you’re guided by data.
DevOps thinking asks you to consider: What happens when this goes wrong?
Developers often write code assuming everything works. But systems fail. APIs break. Network issues happen. Embracing resilience engineering, circuit breakers, timeouts, and fallbacks early in development prevents chaos later.
It’s a mindset of designing for failure, not reacting to it.
In traditional workflows, security is a gate at the end. In DevOps thinking, security is integrated from the start also known as DevSecOps.
When developers think like DevOps practitioners, they think like security engineers too.
DevOps isn’t about daily standups or more Jira tickets. It’s about real collaboration between developers, operations, security, and QA teams.
You start to:
The result? Faster delivery, fewer bugs, and more cohesive teams.
Adopting DevOps thinking leads to:
And in the process, you grow from being just a code writer to a product-focused engineer who delivers value end-to-end.

DevOps thinking isn’t a job title. It’s not a toolset. It’s a mindset and one that can completely transform how you approach software development.
It encourages you to stop thinking of code as the finish line and start thinking of delivery, reliability, and user experience as part of your job. By embracing DevOps thinking, you become more than a developer you become a problem solver, systems thinker, and collaborative engineer.
Start small. Learn to write a basic CI/CD pipeline. Use Docker for your next project. Set up monitoring. Talk to your ops team. DevOps thinking is a journey but it’s one that will make you a better, smarter, and more effective developer.

In the rapidly evolving world of software and systems engineering, the way we manage infrastructure has undergone a quiet but revolutionary transformation. Not long ago, setting up infrastructure meant logging into physical or virtual servers, manually configuring firewalls, installing software packages one-by-one, and hoping that you remembered to document every step.
Infrastructure was treated as a one-time setup, an art as much as a science often relying on tribal knowledge, internal wikis, or long-forgotten runbooks buried deep in a shared drive. This manual approach worked sort of when environments were small, teams were co-located, and deployments happened a few times a year.
But those days are gone. In today’s cloud-native era, businesses scale faster, systems grow more complex, and deployments happen multiple times a day. Speed, consistency, and repeatability aren’t just nice-to-haves they’re critical for survival.
Enter Infrastructure as Code (IaC), a paradigm shift that treats infrastructure the same way we treat application code: as something that should be version-controlled, tested, automated, and deployed through pipelines. With IaC, we can describe entire cloud environments networks, virtual machines, databases, load balancers, security groups in code. That code can be reviewed, shared, reused, and rolled back, just like any other piece of software.
This evolution didn’t happen overnight. It was driven by pain: pain from outages caused by misconfigured servers, pain from the infamous “works on my machine” syndrome, and pain from fragile snowflake environments that no one could replicate. Traditional infrastructure approaches simply couldn’t keep up with the demands of modern software delivery.
Every manual task introduced room for human error. Every undocumented change became a liability. Every inconsistent environment increased the chances of failure in production. As companies moved to microservices, CI/CD pipelines, and global cloud platforms, the cost of these inconsistencies only grew.
IaC emerged as the solution to this chaos not just a tool or trend, but a philosophy. A commitment to treating infrastructure not as a side project, but as a first-class citizen in the software lifecycle.
It enables automation at scale, makes environments predictable, and helps teams collaborate through code. It empowers developers and operators alike to version and validate changes, reducing the risk of outages and improving deployment speed.
Most importantly, IaC introduces the idea that infrastructure can and should be managed with the same rigor and discipline as any other form of code.
So, how exactly does IaC stack up against traditional infrastructure practices? What are the real-world benefits and what tradeoffs should you expect? In this post, we’ll break down the differences between these two approaches, and show you why, in almost every case, code wins.

Infrastructure as Code is the practice of provisioning and managing infrastructure using machine-readable definition files usually written in languages like YAML, JSON, or domain-specific languages like HCL (used in Terraform).
With IaC, you can define and deploy everything from servers and databases to networks and DNS zones all from version-controlled code.
Popular IaC tools include:
Before IaC, infrastructure was usually:
This worked until it didn’t.
Let’s compare IaC and traditional methods across key areas:
| Feature | Traditional Infrastructure | Infrastructure as Code |
|---|---|---|
| Speed & Repeatability | Manual, slow, and error-prone | Automated, fast, and reliable |
| Version Control | Rare or non-existent | Git-backed, auditable |
| Documentation | Often outdated or missing | Living documentation (code) |
| Testing & Validation | Manual verification | Can use linting, tests, plans |
| Environment Consistency | Drift-prone, snowflake servers | Consistent across environments |
| Collaboration | Limited, often siloed | Git-based, collaborative |
| Audit & Compliance | Manual, hard to trace | Logged and auditable |
With IaC, your infrastructure can be spun up or torn down in minutes, across any environment—test, staging, or production. The same code creates the same resources, every time.
No more “works on dev, breaks in prod” problems.
IaC lives in Git (or your favorite VCS), so:
New engineers can bootstrap an entire infrastructure stack by running a few commands no more needing to decipher outdated docs or Slack threads from 2021.
IaC brings developers and ops together. Code is a shared language, and using Git workflows (PRs, branches, reviews) encourages collaboration across teams.
IaC eliminates configuration drift by treating environments like cattle, not pets. If you destroy and rebuild your infrastructure from code, you get exactly the same result every time.
IaC tools like Terraform and Pulumi offer plan and preview modes that show what will change before you hit “apply.” That means fewer surprises in production.
Before IaC:
A production database is created manually. Six months later, no one remembers which flags were set. A recovery scenario fails because the staging DB was never configured the same way.
After IaC:
The database is defined in code, version-controlled, and deployed through CI/CD. Recovery environments are created with a single command using the same definition.
IaC helps with compliance because:
IaC solves many problems, but:
But when used properly, IaC becomes a powerful enabler of fast, safe, and scalable infrastructure.

The days of manually provisioning servers and hoping for the best are over. Whether you’re running on AWS, Azure, GCP, or your own data center Infrastructure as Code brings consistency, speed, and safety to your operations.
It’s not just a trend it’s the new baseline.

In today’s fast-paced digital world, the way software applications are developed, deployed, and managed has undergone a dramatic transformation. The rise of containerization technology has revolutionized application development by allowing developers to package software and its dependencies into lightweight, portable units called containers.
Containers ensure consistency across multiple environments from a developer’s laptop to testing and production servers making it easier to build, ship, and run applications efficiently. However, as organizations adopt container-based architectures, they quickly face challenges related to managing and orchestrating these containers, especially when applications grow in size and complexity.
This is where container orchestration tools become essential. These tools automate the deployment, scaling, networking, and management of containerized applications across clusters of servers. Among the most popular orchestration platforms are Kubernetes, Docker Swarm, Apache Mesos, Nomad, and OpenShift, each offering unique capabilities tailored to different use cases and organizational needs.
Container orchestration solutions address critical challenges such as high availability, load balancing, fault tolerance, service discovery, and resource optimization, enabling businesses to deliver reliable and scalable services. By leveraging orchestration, organizations can implement continuous integration and continuous deployment (CI/CD) pipelines, accelerating software delivery cycles while maintaining stability and security.
These tools also provide vital monitoring and logging features that allow teams to gain visibility into container health, performance, and resource utilization. Furthermore, orchestration platforms integrate with modern cloud environments, supporting hybrid and multi-cloud strategies, which provide flexibility and resilience. As digital transformation continues to accelerate across industries, mastering container orchestration has become a key competency for developers, DevOps engineers, and IT professionals.
With the increasing adoption of microservices architectures, the need for efficient container management only grows, making orchestration tools indispensable for modern application infrastructure. This introduction explores the fundamental concepts of container orchestration, highlights the benefits these tools bring to organizations, and sets the stage for a deeper dive into the top orchestration platforms shaping the future of cloud-native application deployment.

Overview:
Kubernetes, often called K8s, is the most popular and powerful open-source container orchestration platform. Originally developed by Google and now maintained by the Cloud Native Computing Foundation (CNCF), Kubernetes has become the industry standard for managing large-scale container deployments.
Key Features:
Pros:
Cons:
Best For:
Large enterprises and teams that need robust, scalable orchestration with advanced features
Overview:
Docker Swarm is Docker’s native clustering and orchestration tool. It integrates seamlessly with Docker Engine and offers a simpler alternative to Kubernetes for managing container clusters.
Key Features:
Pros:
Cons:
Best For:
Small to medium-sized teams and projects already using Docker who want quick setup and straightforward orchestration.
Overview:
Apache Mesos is a distributed systems kernel that abstracts CPU, memory, storage, and other resources, enabling efficient resource sharing across distributed applications, including containers.
Key Features:
Pros:
Cons:
Best For:
Organizations with complex, large-scale infrastructure needing unified resource management for diverse workloads
Overview:
Nomad, developed by HashiCorp, is a simple and flexible orchestrator that supports containerized, non-containerized, and batch workloads.
Key Features:
Pros:
Cons:
Best For:
Teams looking for a simple, versatile orchestrator that can handle both containers and traditional applications.
Overview:
OpenShift is a Kubernetes-based enterprise container platform developed by Red Hat. It adds developer-friendly tools, security features, and support for hybrid cloud environments on top of Kubernetes.
Key Features:
Pros:
Cons:
Best For:
Enterprises that want a supported Kubernetes platform with enterprise tools, security, and integration.

Choosing the right container orchestration tool depends on your project requirements, team expertise, and scale. Kubernetes stands out for its flexibility and rich ecosystem, making it ideal for complex and large-scale deployments.
Docker Swarm is great for simplicity and ease of use, perfect for smaller projects. Apache Mesos and Nomad serve organizations with specialized or mixed workloads, while OpenShift offers an enterprise-ready Kubernetes platform with added features and support.
By understanding these tools’ strengths and limitations, you can make an informed decision that accelerates your container adoption and streamlines your application management.

In the rapidly evolving digital landscape, delivering content quickly and reliably to users worldwide has become a critical priority for businesses and organizations. Whether you are visiting a news website, streaming your favorite video, or shopping online, the speed and performance of a website significantly impact your overall experience. This is where Content Delivery Networks (CDNs) come into play, revolutionizing how digital content is distributed across the globe.
A CDN is a geographically distributed network of servers that work together to deliver internet content such as web pages, images, videos, scripts, and stylesheets to users with high availability and high performance. By caching copies of content closer to users at various locations called edge servers, CDNs minimize the distance data must travel, dramatically reducing latency and load times.
This not only improves the speed but also enhances the reliability of websites and applications by distributing traffic evenly across multiple servers, preventing overload and potential downtime. As the internet continues to expand, the importance of CDNs grows, supporting billions of devices and handling massive amounts of data transfer every second.
Beyond performance, CDNs also provide crucial security benefits, including protection against Distributed Denial of Service (DDoS) attacks, securing data transmission through SSL/TLS encryption, and mitigating cyber threats with built-in Web Application Firewalls (WAF). The ability of CDNs to optimize bandwidth usage and reduce server load leads to significant cost savings for businesses by decreasing the amount of data served directly from origin servers.
Moreover, with the rise of mobile internet users and demand for high-definition streaming content, CDNs have become indispensable in ensuring seamless experiences regardless of the user’s location or device. Popular CDN providers such as Cloudflare, Akamai, Amazon CloudFront, and Fastly offer a range of services tailored to different business needs, from simple static content delivery to dynamic site acceleration and edge computing capabilities.
Whether you manage a small blog, a large e-commerce platform, or a global streaming service, understanding how CDNs work and their benefits can empower you to optimize your online presence effectively.
In this introduction, we will explore the fundamental concepts behind CDNs, how they function, their various advantages, and why they are essential for modern digital infrastructure. By harnessing the power of CDNs, businesses can not only improve user satisfaction through faster load times but also enhance security, scalability, and operational efficiency. As the internet landscape becomes increasingly competitive, adopting CDN technology is no longer optional but a necessary strategy to stay ahead and provide exceptional digital experiences worldwide.

A Content Delivery Network (CDN) is a network of servers distributed across multiple geographical locations. These servers work together to deliver web content such as images, videos, stylesheets, scripts, and web pages to users based on their location. The main goal of a CDN is to reduce the distance between the user and the content, resulting in faster loading times and a smoother browsing experience.
Imagine a website hosted on a single server in New York. If a user tries to access the website from Tokyo, their request has to travel halfway around the world, causing delays and slower load times. A CDN solves this problem by caching copies of the website’s content on multiple servers located in various cities worldwide. When a user requests content, the CDN delivers it from the nearest server, minimizing latency.
By serving content from servers closer to users, CDNs significantly reduce latency, making websites load faster.
Fast-loading websites keep visitors engaged and reduce bounce rates, leading to better user satisfaction.
CDNs cache content and reduce the amount of data an origin server needs to deliver, cutting bandwidth consumption and costs.
Many CDNs offer additional security features such as DDoS protection, Web Application Firewalls (WAF), and SSL/TLS encryption to protect websites from cyber threats.
CDNs improve website uptime by distributing traffic across multiple servers. If one server goes down, others can handle the load seamlessly.
Some of the well-known CDN providers include:
Any website or online service that aims to deliver fast, reliable content to a global audience can benefit from using a CDN. This includes e-commerce sites, streaming platforms, news websites, and SaaS applications.

In summary, a Content Delivery Network (CDN) is a powerful technology that helps deliver web content quickly and securely to users worldwide. By caching data on multiple edge servers, CDNs minimize latency, reduce bandwidth costs, and enhance both security and user experience. Whether you run a small blog or a large enterprise website, leveraging a CDN is a smart way to keep your audience happy and engaged.

tarting your journey in UI/UX design can be exciting but overwhelming, especially when choosing the right tools to bring your creative ideas to life. Among the many design platforms available today, Figma stands out as one of the most popular and user-friendly options for both beginners and experienced designers.
Figma is a powerful cloud-based design tool that allows you to create, prototype, and collaborate on digital interfaces all in one place. Unlike traditional software that requires installation and frequent updates, Figma runs directly in your browser, making it accessible anytime, anywhere, on any device.
This accessibility combined with its intuitive user interface and extensive feature set makes it the go-to choice for individuals, startups, and large organizations alike. Whether you’re designing a website, a mobile app, or a simple wireframe, Figma offers a seamless workflow with tools like vector editing, components, auto layout, and interactive prototyping.
One of the key strengths of Figma is its real-time collaboration capability, enabling multiple designers, developers, and stakeholders to work simultaneously on the same file, providing instant feedback and reducing the back-and-forth in the design process. Additionally, Figma supports an active community where designers share templates, UI kits, and plugins, helping beginners accelerate their learning curve and create professional-grade designs quickly.
In this step-by-step guide, we’ll explore how to set up your first project, understand the Figma workspace, create your first frames and components, and prototype an interactive design. You’ll also learn essential tips like organizing layers, working with text and shapes, and sharing your projects for review or handoff to developers.
Whether you have no prior design experience or are transitioning from other tools like Adobe XD or Sketch, this guide will help you build confidence in using Figma’s powerful features. As you follow along, you’ll discover how design principles merge with practical tools, empowering you to craft user-friendly interfaces that look great and function smoothly.
By mastering Figma basics, you open doors to designing engaging user experiences, improving communication across teams, and speeding up product development cycles. As the demand for skilled UI/UX designers grows, learning Figma is not just about creating visuals but understanding how to solve real user problems through design.
With Figma’s ever-evolving updates and feature enhancements, staying current will keep you competitive in the rapidly changing design industry. So, let’s dive into this beginner-friendly tutorial and start creating your very first design in Figma a tool that’s revolutionizing the way designers work worldwide.

The first step is simple head over to Figma’s website and sign up for a free account. Figma runs entirely in the browser but also offers desktop apps for Windows and Mac if you prefer. Your work is saved automatically in the cloud, allowing you to access your files anywhere.
Once logged in, click “New File” to start a blank canvas. Familiarize yourself with the main areas of the interface:
In Figma, frames act like artboards. Click the Frame tool (F) and choose a device preset like iPhone 14 or Desktop to start designing within a specific screen size. Frames help keep your designs organized and ready for prototyping.
Start by adding shapes to your frame:
Add text by selecting the Text tool (T) and clicking anywhere inside your frame. Type in your button labels, headers, or paragraphs. Use the properties panel to adjust:
As your design grows, use the Layers panel to organize elements. Group related items using Ctrl + G (Cmd + G on Mac) for easier management. Rename layers and groups descriptively for clarity.
Components are reusable elements like buttons or icons. Select an element or group, right-click and choose “Create Component”. This allows you to maintain consistency across your design, and any change to the master component updates all instances automatically.
You can drag and drop images directly onto your canvas or use the “Place Image” option. For icons, Figma integrates well with plugins like Feather Icons or Iconify, which allow you to search and insert icons without leaving your file.
Switch to the Prototype tab to link different frames or elements together. For example, link a button to another screen to simulate navigation. Set interaction triggers like On Click, and choose transitions such as Slide In or Fade to make your prototype interactive.
Figma shines in collaboration. Click the Share button to invite team members or clients to view or edit your design in real-time. You can also generate shareable links or embed prototypes into websites or presentations.

Getting started with Figma is easier than ever thanks to its intuitive interface and powerful features. By following these simple steps creating frames, adding shapes and text, using components, prototyping, and sharing you’ll be well on your way to crafting your first stunning UI design. As you practice, explore advanced tools like auto layout, variants, and interactive components to take your skills to the next level.
So open Figma today, and start designing! Your next great project is just a few clicks away.

In today’s fast-paced digital world, UI/UX design plays a critical role in shaping how users interact with technology. A well-crafted user interface (UI) combined with a seamless user experience (UX) can make or break digital products, from websites and mobile apps to software and smart devices. UI/UX designers focus on creating intuitive, aesthetically pleasing, and efficient interfaces that meet users’ needs while aligning with business goals.
The field of UI/UX design involves multiple disciplines, including interaction design, visual design, user research, information architecture, and usability testing. These professionals leverage tools like Figma, Sketch, Adobe XD, and InVision to prototype and iterate design solutions. Understanding user behavior through user personas, journey mapping, and design thinking principles is fundamental to the design process.
Today’s UI/UX designers must also consider accessibility standards, responsive design, and mobile-first approaches to ensure inclusivity and adaptability across various devices and platforms. As companies strive for digital transformation, the demand for skilled UI/UX designers continues to rise, making it a promising career path.
The role blends creativity with analytical thinking, requiring a balance between aesthetic appeal and functional usability. Whether working in startups, tech giants, or freelance environments, UI/UX designers collaborate closely with developers, product managers, and stakeholders to deliver products that delight users and drive engagement.
The evolving landscape of artificial intelligence (AI) and machine learning is also influencing UI/UX design, offering new possibilities for personalized and predictive user experiences. Staying updated with emerging design trends, best practices, and new technologies is crucial for success in this dynamic field. Ultimately, UI/UX design is about solving problems and enhancing human-computer interaction, ensuring that technology serves people in the most effective and enjoyable way possible.

While working on a healthcare app, we received consistent feedback:
“Booking an appointment is confusing and takes too long.”
This issue was impacting user retention, and worse, discouraging patients from completing their bookings something critical in a healthcare context. My goal was to fix this friction by deeply understanding user pain points, not just redesigning the interface.
Using the empathize phase of design thinking, I conducted:
Key insights:
Next, I reframed the problem:
“How might we simplify the appointment booking experience for users who need clarity, confidence, and speed?”
This HMW (How Might We) question became our North Star throughout the design process. I documented a clear problem statement and identified primary pain points: unclear terminology, hidden navigation, and missing feedback.
In a 2-hour remote ideation workshop, I facilitated Crazy 8s, brainwriting, and card-sorting exercises with our team (designers, a PM, and a developer).
Solution ideas included:
We voted on feasibility and user impact, narrowing it down to a few strong concepts.
I used Figma to build a low-fidelity prototype of the new booking flow. Key changes included:
I tested the prototype with 5 users from the original pool.
Results:
We also learned that some users wanted a calendar sync option something we later added in the product roadmap.
The updated design was launched in the next sprint. Within a month, we saw:

If you’re a UX designer, remember: your best work doesn’t come from just pushing pixels. It comes from listening, empathizing, and relentlessly refining until you create something that works for people. Whether you’re designing for healthcare, fintech, or e-commerce, the design thinking process can help you tackle even the messiest challenges.
Have you applied design thinking in a recent project? I’d love to hear your process or give feedback on your case study drop a comment or connect with me!

In today’s hyper-connected world, where almost every aspect of our personal and professional lives depends on digital technology, cybersecurity has become an essential field. From online banking and shopping to communication and entertainment, we rely heavily on the internet and digital devices, making us vulnerable to an array of cyber threats.
For beginners stepping into the vast world of cybersecurity, the landscape might seem overwhelming at first. There are many technical terms, diverse threats, and complex tools involved, which can feel intimidating. However, understanding cybersecurity fundamentals is not only crucial for professionals but also for everyday users who want to protect their personal information and privacy.
Cybersecurity is essentially the practice of protecting computer systems, networks, and data from unauthorized access, theft, or damage. It encompasses a wide range of techniques and technologies designed to safeguard digital information and ensure the smooth functioning of online activities.
As cyberattacks become increasingly frequent and sophisticated, organizations of all sizes and individuals alike must prioritize cybersecurity awareness. For beginners, the question often arises: where do I start? What basic knowledge should I have before diving into more advanced concepts? This introductory guide aims to provide a clear and comprehensive overview to help you take your first steps confidently.
The world of cybersecurity is not limited to just hackers trying to break into systems; it also includes defenders working tirelessly to protect data and maintain trust in digital environments. In fact, cybersecurity professionals play a vital role in securing critical infrastructure, financial systems, healthcare records, and even national security.
For those interested in pursuing a career in this dynamic field, starting with a strong foundation in basic concepts such as network fundamentals, common types of cyber threats, and essential security practices is key. But cybersecurity is not only for professionals it’s equally important for anyone who uses digital technology daily to understand the risks and adopt safe behaviors.
Beginners should be aware of threats like phishing scams, malware, ransomware, and social engineering attacks, which are among the most common and dangerous in today’s cyber landscape. Moreover, learning how to protect personal devices and information by using strong passwords, keeping software updated, and recognizing suspicious activities can go a long way in preventing cyber incidents.
As you embark on your cybersecurity journey, it’s helpful to explore free and paid courses, engage with online communities, and practice your skills through safe, simulated environments. Equally important is the ethical aspect of cybersecurity; aspiring professionals must commit to legal and responsible practices, using their knowledge to protect rather than exploit systems.
While the field may seem technical and complex at first, beginners should approach learning with patience, curiosity, and persistence. The digital world needs more defenders who are knowledgeable, ethical, and passionate about keeping information safe. Whether your goal is to secure your personal data or build a rewarding career in cybersecurity, starting with the basics will set you on the right path.
This guide will help you understand what cybersecurity truly means, why it matters, and how you can begin your journey effectively. Remember, every cybersecurity expert started as a beginner, and with the right mindset and resources, you too can develop the skills needed to thrive in this exciting and ever-evolving field. So, let’s dive in and discover what you need to know before you start your cybersecurity adventure.

At its core, cyber security is the practice of protecting computers, networks, programs, and data from unauthorized access, attacks, or damage. It involves defending systems against hackers, malware, phishing scams, and other threats designed to steal information or disrupt services. With the increasing reliance on digital technology, cyber security has become a critical part of everyday life and business.
Even if you don’t plan to become a cyber security professional, understanding basic cyber security principles is essential. Cyber attacks can affect anyone individuals, small businesses, or large corporations. Knowing how to protect your personal data, recognize common threats, and follow good security practices can save you from identity theft, financial loss, and privacy invasion.
Before diving deeper, it’s helpful to understand some of the most common cyber threats:
If you want to pursue cyber security as a career, there are a few foundational skills to focus on:
Starting your journey in cyber security can seem daunting, but there are plenty of resources tailored for beginners:
As a beginner, it’s vital to understand that cyber security is not about hacking for malicious purposes. Ethical behavior is the foundation of the profession. Ethical hackers, also known as white-hat hackers, use their skills to find vulnerabilities and help organizations improve their defenses legally and responsibly.
Cyber security is a vast and ever-evolving field. It takes time and dedication to become proficient. Start with small goals, keep learning continuously, and don’t be afraid to ask for help or collaborate with others.

Starting your cyber security journey as a beginner can be exciting and rewarding. By understanding the basics, recognizing common threats, and practicing good habits, you lay a solid foundation for either protecting yourself or pursuing a career in this vital field. Remember, every expert was once a beginner so take your first step today, stay curious, and embrace continuous learning. The digital world needs more defenders, and you could be one of them.
