


.")

Amazon RDS (Relational Database Service) is a managed database service provided by Amazon Web Services (AWS). It is a fully-managed database service that supports various popular relational database engines such as MySQL, PostgreSQL, Oracle, and SQL Server .
RDS offers features like automatic failover and multi-AZ (Availability Zone) deployments for high availability. RDS provides automated backups, allowing you to restore your database to a specific point in time. Simplified database administration via the AWS Management Console, CLI, or SDKs.
Reduces the operational overhead of database management. Offers flexibility in database choices. Provides built-in tools for monitoring, scaling, and securing your database.

Now , I will show how to Connecting AWS RDS to EC2.
Step 1 : Navigate EC2 instance , and click on launch instance.
STEP 2 : Enter the instance name.

STEP 3 : Select the ubuntu (AMI).

STEP 4 : Create the Keypair.

Step 5 : Configure security group rules to allow inbound traffic on the appropriate port for the type of database you are using (e.g. port 3306 for MySQL).

Step 1 : Navigate the Amazon RDS.


Step 2 : Select standard create.

Step 3 : Click on Free tire.

Step 4 : Set the Credentials settings.

Step 5 : Select the DB size. Select the EC2 Compute connect as we are going to access our database from EC2.


Step 6 : Select the Password authentication to access the database.

Step 7 : Then next, Click on Create database.

Step 8 : Your new database is Created.

Step 1 : Navigate the IAM and Select the Roles.


Step 2 : Select the AWS service.

Step 3 : Attach the “AmazonRDSFullAccess” policy.

Step 4 : Enter the Role name and Click create role.

Step 1 : Select the instance and Click on Action.

Step 2 : Select your DB.

Step 1 : Go to the RDS console.

Step 2 : Accessing EC2 Instances with SSH.

Step 2 : update your machine.
sudo apt update

sudo apt upgrade
Step 3 : Install mysql-client.
sudo apt-get install mysql-client
Step 4 : Connect to RDS Using MySQL Client with Endpoint, Username, and Password.
mysql --versionmysql -h <endpoint address> -P <port.no> -u <username> -p

You Successfully Connecting RDS to EC2 . AWS RDS makes it easy to manage your database and keep it up to date with the most delinquent security patches and software updates. RDS offers tools like performance insights and provisioned IOPS (Input/Output Operations Per Second) for high-performance workloads.

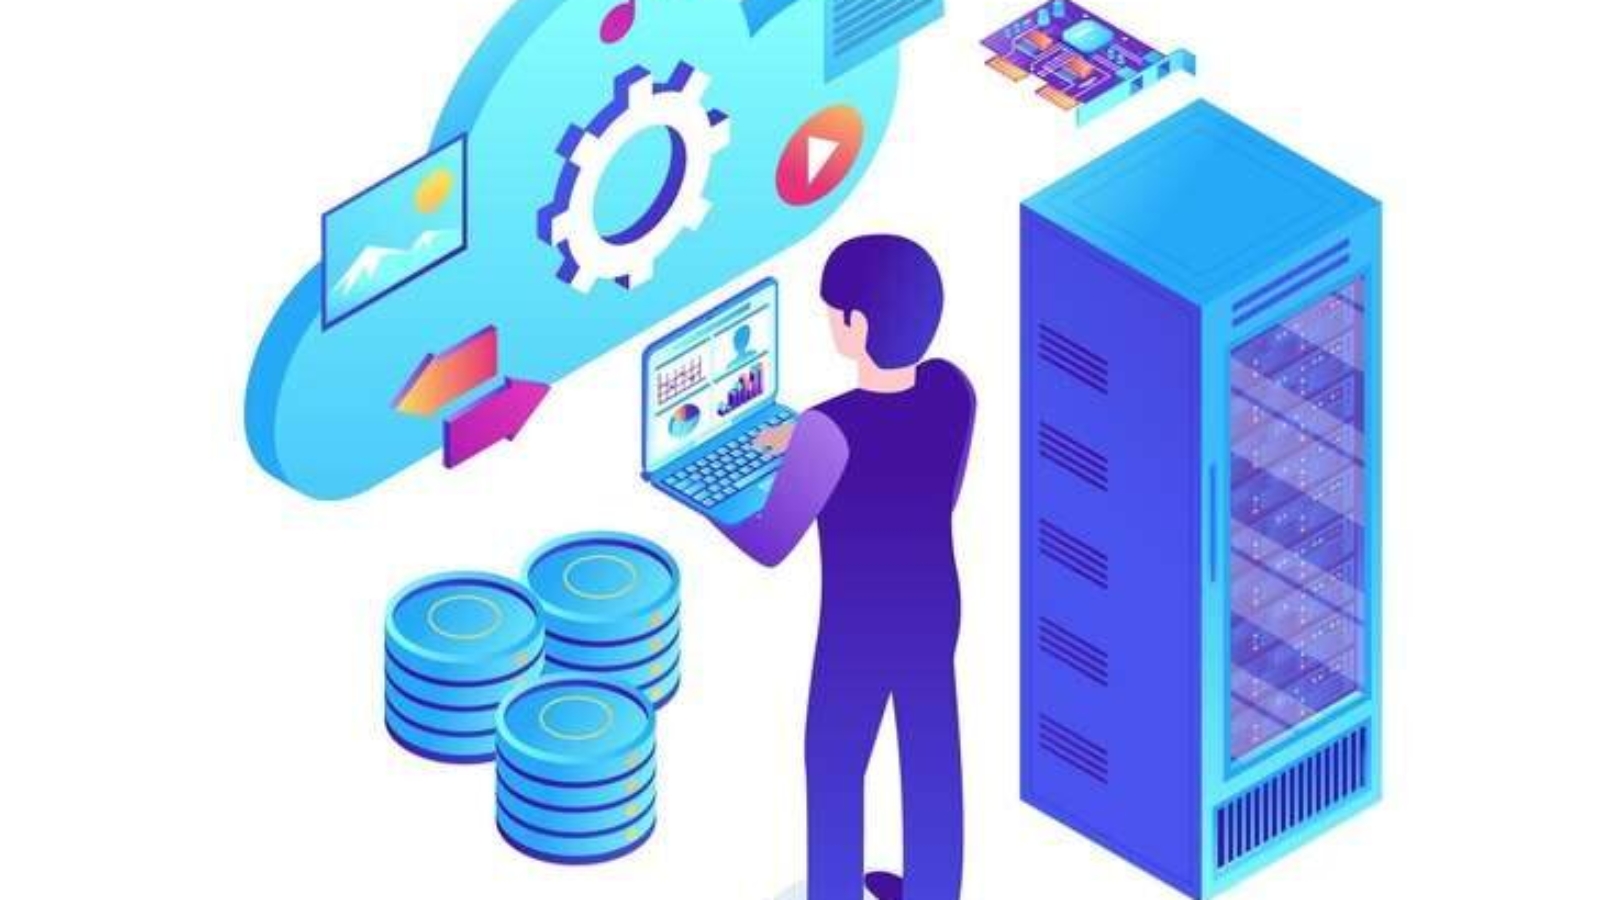
Amazon Web Services (AWS) offers a Free Tier that allows you to explore and use a range of AWS services at no cost, within specific limits. Amazon Web Service (AWS) is the world’s most comprehensive and broadly adopted cloud platform, offering over 200 fully featured services from data centers globally. AWS offers new subscribers a 12-month free tier to get hands-on experience with all AWS cloud services. AWS (Amazon Web Services) offers a vast array of cloud computing services across various categories. Here are some of the key services that AWS provides:

1. Compute Services : Amazon EC2 (Elastic Compute Cloud) , AWS Lambda , Amazon Lightsail , AWS Batch.
2. Storage Services : Amazon S3 (Simple Storage Service) , Amazon EBS (Elastic Block Store) , Amazon Glacier , Amazon FSx.
3. Database Services : Amazon RDS (Relational Database Service) , Amazon DynamoDB , Amazon Aurora , Amazon Redshift.
4. Networking Services : Amazon VPC (Virtual Private Cloud) , Amazon Route 53 , Elastic Load Balancing (ELB) , AWS Direct Connect.
5. Machine Learning and AI Services : Amazon SageMaker , AWS Rekognition , AWS Polly.
6. Analytics Services : Amazon EMR (Elastic MapReduce) , Amazon Kinesis , AWS Data Pipeline , Amazon QuickSight.
7. Security & Identity Services : AWS IAM (Identity and Access Management) , Amazon GuardDuty , AWS KMS (Key Management Service) , AWS WAF (Web Application Firewall).
8. Developer Tools : AWS CodeCommit , AWS CodeBuild , AWS CodeDeploy , AWS CodePipeline.
9. Content Delivery & CDN :Amazon CloudFront , AWS Global Accelerator , Amazon S3 Transfer Acceleration.
10. Internet of Things (IoT) Services : AWS IoT Core , AWS IoT Greengrass , AWS IoT Analytics.
11. Migration & Transfer Services : AWS Migration Hub , AWS DMS (Database Migration Service), AWS Snowball.
12. Business Applications : Amazon Chime , Amazon WorkSpaces , Amazon WorkDocs.
Now , I will guide you how to Create AWS Free Tire Account.
STEP 1 : Open your web browser and copy the link https://aws.amazon.com.
STEP 2 : Click on “Create A Free Account.

STEP 3 : Enter your user email address and AWS account name.
STEP 4 : Provide the details that you want to use to log in to your AWS account and click on Continue.


STEP 5 : Choose “Personal – for your own projects”.
(Note: Make sure to provide proper contact details and mobile number to get the Verification code from AWS.)


STEP 6 : Enter billing details and Click “Verify and Continue”.
STEP 7 : Confirm identity via mobile number or email and Enter verification code.


STEP 8 : Next, select “Basic Support – Free”.
Once you completed all the above steps and processes. You’ll get the confirmation page below. Now your account will be processed for activation. It may take somewhere between 30 minutes to 1 hour for you to receive an email confirmation that your Amazon Cloud Services account has been activated.
STEP 9 : Your AWS account is now active and ready to be used.

By signing up for the AWS Free Tier, you’ve taken the first step toward mastering cloud computing with one of the leading providers. Use the Free Tier wisely to experiment, learn, and build practical skills in cloud technologies—without the worry of running up costs. As you gain more experience, you’ll be able to scale your projects and explore even more advanced AWS services.
Happy cloud building! ☁️

AWS EC2 is one of the core services of the AWS ecosystem that you absolutely must know to be successful in a cloud-related career.It provides scalable computing capacity, enabling businesses and developers to launch and manage virtual machines (VMs) without the need to invest in physical hardware. With EC2, you can quickly scale your computing resources up or down based on demand, making it highly flexible and cost-effective.

Security: EC2 instances can be secured using AWS features such as key pairs for SSH access, IAM roles, security groups, and network ACLs (Access Control Lists).
Elasticity: Scale your infrastructure up or down based on demand. This elasticity helps to ensure that your application performs optimally without over-provisioning resources.
Integration: EC2 integrates seamlessly with other AWS services like Amazon S3 (storage), Amazon RDS (database), and AWS Lambda (serverless computing), making it easy to build complex, multi-tier applications.
Flexibility: EC2 allows you to choose the operating system, instance type, and storage options that best fit your application’s needs. It supports a wide range of use cases from simple web apps to complex big data analytics.
Time to Launch: Let’s Set Up Your EC2 Instance.
Step 1 :First, log into your AWS account and click on “services”.

Step 2 : Select the instance on your left side panel.

Step 3 : Click on launch instance.
Step 4 : Enter the instance name (Myinstance).

Step 5 : Select AMI – Required operating system from the available. There are different types of OS available select the OS as per your requirement.

Step 6 : Then , Next Create Keypair.


Step 7 : Click on edit option.

Step 8 : Select your VPC and Subnet.


Step 9 : Click on Launch instance.

Step 10 : Now , you will see this page.
Your instance is ready.

Step 11 : Next , Select your instance and click the connect button.


Step 12 : The terminal page will load on your screen.


Amazon EC2 is a powerful and flexible service that helps businesses and developers take advantage of the cloud for a wide variety of computing tasks. Whether you’re running a simple website or building a large-scale distributed application, EC2 provides the resources, scalability, and security needed to meet your needs without the complexities of managing physical servers.
VPC: A VPC (Virtual Private Cloud) in AWS (Amazon Web Services) is a logically isolated section of the AWS cloud where you can define and control a virtual network. It’s like a private data center in the cloud, but with the flexibility and scalability that AWS provides.
Subnets: In AWS, a subnet is a range of IP addresses in your VPC (Virtual Private Cloud) that you can use to organize and isolate resources within the network. Subnets allow you to group instances based on security, performance, or application needs, and you can use them to create a tiered architecture, such as separating web servers, application servers, and databases into different subnets.
Route Table: A Route Table in AWS is a set of rules (routes) that determine where network traffic is directed within your Virtual Private Cloud (VPC). It essentially controls the flow of traffic between subnets in your VPC, as well as between your VPC and external networks like the internet, on-premises networks, or other VPCs. Each subnet in a VPC is associated with a route table that defines how traffic is routed. You can customize the route tables to suit your networking needs, and AWS allows you to define routes for various network destinations.
Internet Gateway(IGW): An Internet Gateway (IGW) in AWS is a scalable, redundant, and highly available component that allows communication between resources in your VPC (Virtual Private Cloud) and the internet. It serves as a bridge between the VPC and the public internet, enabling instances in a public subnet to access the internet (for things like downloading updates or communicating with external services) and allowing inbound traffic to reach those instances.


Now, let’s go ahead and create a VPC!
Step 1: Navigate the VPC. Click on create VPC.


STEP 2 : Select the following details.
Resources to create : vpc only.
Name : My VPC.
IPV4CIDR : 10.0.0.0/16.

Step 3 : Click on create VPC.

Public subnet.
Step 1 : Click on subnet on your left side panel.

Step 2 : Click on Create Subnet.

Step 3 : Select your VPC (My VPC).

Step 4 : Subnet Name : Public Subnet.
IPv4CIDR : 10.0.0.0/24.
Then , next click on create subnet.

private subnet.
Step 5 : Now , Click Create Subnet.
Step 6 : Select your VPC (My VPC).
Step 7 : Subnet Name : Private Subnet.
IPv4CIDR :10.0.1.0/24.
Then , next click on Create subnet.

Step 1 : Click on Internet Gateway on your left side panel.
Step 2 : Name : MyIGW.
Step 3 : Click on create internet gateway.

Step 4 : Select your IGW , Click on action and select Attach to VPC.

Step 5 : Select your VPC and attach internet gateway.

Step 1 : Select Route table and click on create route table.

Step 2 : Name : MyRoutetable and select your VPC.
Step 3 : Click on Createroutetable.

Step 4 : Select routes and click on Edit routes.

Step 5 : Add route and select the internet gateway.

Step 6 : Attach your IGW and click on save changes.


Step 7 : Select on subnet associations and click on edit subnet associations.

Step 8 : Select public subnet and save associations.


In conclusion, a Virtual Private Cloud (VPC) is an essential component for creating a secure, isolated network within a public cloud environment. By defining your own VPC, you can control your network’s IP address range, subnets, routing, and security settings to meet the specific needs of your applications and workloads. Whether you’re setting up a simple environment or a complex multi-tier architecture, understanding how to design and manage a VPC is key to building scalable and secure cloud-based systems.

AWS Organizations is an AWS account management service that lets users centrally manage and control groups of AWS accounts, and the workflows and policies that apply to them. The accounts can also share resources, security mechanisms, audit requirements, configurations, and policies between multiple AWS organizations.

Apply logical boundaries to all aspects of policies. Different projects within the organization may be exposed to different security and compliance requirements. For example, by segregating AWS resources within multiple AWS accounts across all of those different projects, you can easily enforce unique identity policies in compliance to the applicable regulatory frameworks.
Simplified Billing: With consolidated billing, you can link multiple AWS accounts under one master account and receive a single, simplified bill for all accounts.
Centralized Governance: Manage policies, access controls, and permissions centrally across multiple accounts, streamlining management and ensuring consistency.
Budgeting and Cost Allocation: Track costs by individual account or organizational unit, allowing for better budgeting and financial control.

Learn How to Create an AWS Organization and Optimize Your Cloud Management.
STEP 1 : Navigate the AWS organization.

STEP 2:Click on create an organization.

STEP 3 : select the policies and enable the service control policies.


STEP 4 : Next, click the add an AWS account.

STEP 5 :Select “create an AWS account”.
STEP 6 :Enter AWS account name and email address.

STEP 7 : Now click create button, you see this page.

Now, you will create account AWS Organization .

In conclusion, AWS Organizations is a powerful tool for businesses and teams managing multiple AWS accounts. By creating and structuring your organization, you can streamline billing, optimize resource management, improve security, and enforce consistent governance across all your accounts.

Cost Explorer is a powerful tool provided by AWS (Amazon Web Services) that helps users analyze and manage their cloud spending. It provides insights into your AWS usage and costs, helping you understand where your money is being spent and how to optimize your resources for cost efficiency. Amazon Cost Explorer provides detailed visibility into your AWS spending, allowing you to understand where your money is going across different services, regions, and usage patterns.
It goes beyond just numbers; it’s about empowering users to make informed decisions and ensuring that cloud budgets remain in check. The integration of the AWS Cost Management console with the Billing console provides a holistic approach to managing ongoing payments and optimizing future costs.


Improve Budgeting: Use historical data to make informed forecasts for future spending.
Cost Forecasting: Estimate spending for the next 12 months.
Cost Explorer API: Programmatic access for automation.
Free User Interface Access: No additional charges for UI usage.
Identify Cost Drivers: Understand which services contribute most to your costs.
AWS Cost Explorer is a powerful tool that helps you visualize, understand, and manage your AWS costs and usage.
Integration with AWS Budgets: Cost Explorer can be integrated with AWS Budgets for a comprehensive cost management strategy, allowing users to track costs and receive alerts.
Cost Monitoring and Visibility: Gain insights into ongoing AWS costs for visibility and control.
Resource Optimization: Utilize Reserved Instances recommendations for strategic cost optimization.
STEP 1 : Navigate to Cost Explorer by clicking on the Services menu.

STEP 2 :Click on Cost Explorer in the left panel.

STEP 3 : It’s open the cost dashboard.

STEP 4 :Cost Explorer offers three different styles for visualizing your cost data.

1.Select a date range and choose ‘1 month’ to filter data from the last month, then click the ‘Apply’ button.

2.Additional filters are available based on dimensions like service, linked account, region, etc.

For a specific service type, input the service name in the service filter and click the ‘Apply’ button.

1.Scroll down to the cost and usage breakdown, then click the ‘Download as CSV’ button to download the report.


We encourage you to delve deeper into Cost Explorer’s features and leverage its capabilities to gain a clearer understanding of your cost management. Identify the main services or resources contributing to your costs. This could include specific AWS services, regions, or usage patterns .Highlight any noticeable trends in your costs over time—whether they are increasing, decreasing, or fluctuating.

Amazon Bedrock is a fully managed service provided by AWS (Amazon Web Services) that allows developers to build and scale generative AI applications using foundation models (FMs) from leading AI companies. Launched in 2023, Amazon Bedrock gives developers access to a range of powerful foundation models, such as text generators, image creators, and more, from companies like Anthropic (Claude), Stability AI (Stable Diffusion), AI21 Labs (Jurassic-2), and Meta (Llama).


STEP 1: Navigate the Amazon Bedrock and get started.


STEP 2: Select the model access.

STEP 3: Scroll Down to Stability AI model and verify the model access is granted.

STEP 4: Make sure you are in the US East (N. Virginia) us-east-1 Region. From the Top Search bar search for Amazon SageMaker and navigate to SageMaker Service.

STEP 5:Click the Notebook and Select the Notebook instance.


STEP 6 : Enter the notebook instancename.

STEP 7:Wait for the notebook instance status to update to ‘InService’, which may take approximately 5 minutes.

STEP 8 : You will see this page.


STEP 9:Click on Files and rename button Enter the rename.

STEP 10: Paste the following code into the designated code cell in the Jupyter Notebook to generate an image using the Stable Diffusion model.
import base64
import os
import random
import boto3
import json

prompt_data = """
A high-red 4k HDR photo of a golden retriever puppy running on a beach.
Action shot, blue sky, white sand, and a big smile. Cinematic film quality.
"""

def main():
    seed = random.randint(0, 100000)
    generate_image(prompt=prompt_data, seed=seed, index=0)

def generate_image(prompt: str, seed: int, index: int):
    payload = {
        "text_prompts": [{"text": prompt}],
        "cfg_scale": 12,
        "seed": seed,
        "steps": 80,
    }

    # Create the client and invoke the model.
    bedrock = boto3.client(service_name="bedrock-runtime")
    body = json.dumps(payload)
    model_id = "stability.stable-diffusion-xl-v1"
    response = bedrock.invoke_model(
        body=body,
        modelId=model_id,
        accept="application/json",
        contentType="application/json",
    )

    # Get the image from the response. It is base64 encoded.
    response_body = json.loads(response.get("body").read())
    artifact = response_body.get("artifacts")[0]
    image_encoded = artifact.get("base64").encode("utf-8")
    image_bytes = base64.b64decode(image_encoded)

    # Save image to a file in the output directory.
    output_dir = "output"
    os.makedirs(output_dir, exist_ok=True)
    file_name = f"{output_dir}/generated-{index}.png"
    with open(file_name, "wb") as f:
        f.write(image_bytes)

    print("Image generated successfully")

if __name__ == "__main__":
    main()

STEP 11: Click on Run button.

STEP 12 :Return to the root folder, where you will find a newly created folder named ‘output’.”

STEP 13 :Click on Output and select the generate.

STEP 14 :Click on the image to view it.

In conclusion, Amazon Bedrock’s integration of the Stable Diffusion XL model into its text-to-image capabilities marks a significant advancement in generative AI. This feature not only enhances creativity and content generation for developers and businesses but also showcases the potential for more sophisticated visual outputs. By leveraging cutting-edge technology, Amazon Bedrock empowers users to easily create high-quality images from text prompts, streamlining workflows and unlocking new possibilities in various industries.


Jenkins is a powerful open-source automation tool that enables developers and DevOps teams to build, test, and deploy code efficiently. It supports continuous integration (CI) and continuous delivery (CD) practices, allowing teams to automate various stages of their software development lifecycle.
In Jenkins, a build refers to the execution of a job. The build process often includes tasks such as fetching code from a repository, running tests, compiling code, and creating artifacts that can be deployed to production or other environments. Each build is tracked and logged, allowing for detailed monitoring and troubleshooting.

Upstream Projects are jobs or projects that serve as triggers for other jobs (called Downstream Projects). It allow you to create a dependency chain. For example, if Project A is an upstream project for Project B, completing a build for Project A can trigger Project B to start automatically.
Downstream Projects are jobs or projects that are triggered automatically after an Upstream Project completes successfully. It allow for the chaining of jobs, where the execution of one job (the upstream) automatically triggers subsequent jobs (the downstream).

In this guide, I will demonstrate how to set up and run build jobs in Jenkins.
STEP1:Select the instance and Copy the public IP of your instance listed in the details.

STEP2:Enter the browser http://<your-ec2-instance-public-ip>:8080.
STEP3:You see this following page.

STEP4:On the initial setup page, enter the administrator password.

STEP5:Select the install suggested plugins.


STEP6:Create the first admin user and click the save and continue.

STEP7:Click save and finish.

STEP8:Click start using jenkins.

STEP9:You will see the jenkins dashboard page and select the create a job.

STEP10:Enter the item name , select the Freestyle project and click the ok button.

STEP11:Scroll down to the Build steps section, click on “Add build step”, and choose “Execute shell”.


STEP12:Type the following commands in the shell, and then select Save to apply your changes.
echo “Hello” >> Message
STEP13:Your first job is now created and visible on the dashboard.

STEP14:Then next you navigate to EC2 instance and then click on Connect.

STEP15 : Run the following commands in the terminal.
cd /var/lib/jenkinslscd workspacels

STEP16:Don’t close the EC2 terminal and now go back to the Jenkins dashboard.
STEP17:“Jenkins 1st job“, click on “Build Now“.

STEP18:After the build is completed, go to the EC2 terminal again and run the following commands .
lscd 'Jenkins first job'lscat Message

STEP19:Click on “New Item” On the left side panel of the Jenkins dashboard and select the new item.
STEP20:Enter the item name and click the freestyle project.

STEP21:choose build triggers from the left side panel and click “Build after other projects are built”.
STEP22:Choose jenkins1st job and click the “Trigger only if build is stable” .

STEP22:Scroll down and expand the build steps tab , Select the execute shell.

STEP23:Type the following command and Click the save button.
echo “This is the current build” >> info

STEP24: Go to dashboard and click on build now for “Jenkins 1st Job”.

STEP25:After the build is successful for ‘Jenkins 1st job’ refresh the page, you will see that the Jenkins 2nd job build will be automatically built.

STEP26:Go to EC2 terminal and enter the following commands.
cd /var/lib/jenkinslscd workspacels
cd 'Jenkins second job'
ls
cat info

You will see that the info file contains the message that we had put in the execute shell.

A “build” represents a sequence of steps or processes defined in a Jenkins job, such as compiling code, running tests, or deploying applications. Jenkins triggers these builds based on predefined conditions, like a code commit or a scheduled time, ensuring that changes are consistently tested and integrated.

Amazon Simple Email Service (Amazon SES) is a scalable, cost-effective, and flexible cloud-based email service designed for businesses to send bulk and transactional emails. Its provides feedback loops, sending analytics, and built-in content filtering to enhance deliverability. SES supports multiple configurations for dedicated IPs, IP warm-up, and domain authentication, ensuring reliable deliverability.
: A Beginner's Guide to Cloud-Based Email. 166")
DIAGRAM:
: A Beginner's Guide to Cloud-Based Email. 167")
Here, I’ll show you how to get started with Amazon SES step-by-step.
STEP1:Navigate the Amazon SES.
: A Beginner's Guide to Cloud-Based Email. 168")
STEP2:Click on get started.
: A Beginner's Guide to Cloud-Based Email. 169")
STEP3:Select the “Identities” on the left side panel.
: A Beginner's Guide to Cloud-Based Email. 170")
STEP4:Click on create identities.
: A Beginner's Guide to Cloud-Based Email. 171")
STEP5:Select email address and enter your email address.
STEP6:Next, click create identities.
: A Beginner's Guide to Cloud-Based Email. 172")
STEP7:Now you will be able to see that the Identity Status on the Email will be Verification Pending.
: A Beginner's Guide to Cloud-Based Email. 173")
STEP8:AWS will send a confirmation email to the email .
STEP9:Check your mailbox, and you’ll find an email from Amazon Web Services.
: A Beginner's Guide to Cloud-Based Email. 174")
STEP10:After clicking the link, you’ll be directed to the success page.
: A Beginner's Guide to Cloud-Based Email. 175")
STEP11:Go to the SES Email Addresses page, refresh it, and check that the Verification Status shows as Active.
STEP12:Then click the send test email.
: A Beginner's Guide to Cloud-Based Email. 176")
Step13:Select formatted and click the custom.
: A Beginner's Guide to Cloud-Based Email. 177")
STEP14:Enter the custom recipient (email address).
Subject :Sending the test email.
Body: “Hello everyone”
STEP15:Click on end test email.
: A Beginner's Guide to Cloud-Based Email. 178")
STEP16:Check your inbox for the verification email. If you don’t see it there, please check your spam folder.
: A Beginner's Guide to Cloud-Based Email. 179")
: A Beginner's Guide to Cloud-Based Email. 180")
Amazon Simple Email Service (SES) is a cloud-based email sending and receiving service provided by Amazon Web Services (AWS). It is designed to help businesses and developers manage their email communications at scale. Its integration with other AWS services makes it a powerful choice for businesses needing secure and flexible email solutions.

Docker is an open-source platform that enables developers to automate the deployment, scaling, and management of applications in lightweight, portable containers. Containers allow you to package an application with all of its dependencies—like libraries, binaries, and configuration files—into a standardized unit that can run consistently in different computing environments.

Prometheus is an open-source monitoring and alerting toolkit designed primarily for reliability and scalability. It is widely used to collect metrics from various systems, applications, and infrastructure to help with performance monitoring, troubleshooting, and alerting. Originally developed by SoundCloud, it is now a part of the Cloud Native Computing Foundation (CNCF), alongside other tools like Kubernetes.
To collect Docker metrics with Prometheus, you can use cAdvisor (Container Advisor), which is a monitoring tool created by Google that collects resource usage and performance characteristics of running containers. Here’s a step-by-step guide on how to set up Docker metrics collection with Prometheus.

By following the steps in this guide, you’ve learned how to configure Prometheus to collect Docker metrics, visualize them, and use them to maintain high system reliability. With this foundation, you can expand your monitoring setup to cover additional services and systems, further enhancing your observability infrastructure. Let’s get started!
STEP1:Select your EC2 Instance and click the connect option.


STEP2: A new tab will open in the browser where you can execute the Linux Commands.

STEP3:Enter the below comments.
sudo susudo nano /etc/docker/daemon.json
STEP4:Enter the following configuration to the daemon.json file and save the file.
{
        "metrics-addr" : "0.0.0.0:9323",
        "experimental" : true
}STEP5:You can restart Docker by executing the following command in PowerShell.
sudo systemctl restart docker.serviceSTEP6:Now, Enter the browser “Your IP address:9323/metrics“

STEP7:Run the following command to create the Prometheus file:
nano /tmp/prometheus.yml
STEP8:Use the following Prometheus configuration and don’t forget to update the targets with your EC2 instance’s IP address.
# Global config
global:
  scrape_interval: 15s
  evaluation_interval: 15s

  external_labels:
    monitor: "codelab-monitor"

# Load rules and evaluate them periodically
rule_files: []

# A scrape configuration containing Prometheus and Docker
scrape_configs:
  - job_name: prometheus
    static_configs:
      - targets: ["localhost:9090"]

  - job_name: docker
    static_configs:
      - targets: ["<Enter_EC2_Public_IP_here>:9323"]
save the file.
STEP9:Launch a Prometheus container using the configuration below.
docker run -d --name my-prometheus --mount type=bind,source=/tmp/prometheus.yml,destination=/etc/prometheus/prometheus.yml -p 9090:9090 prom/prometheus

STEP10:Make sure the Docker target is displayed at http://localhost:9090/targets/ , and add your EC2 instance’s public IP.

STEP11:You will see the following page.

STEP12:In the Prometheus UI, select the ‘Graphs’ link. Then choose a metric from the dropdown next to the ‘Execute’ button, and click ‘Execute’.
Monitor the graph for metrics such as.
engine_daemon_network_actions_seconds_count

STEP13:Launch a container to create network traffic.
docker run --rm alpine apk add git make musl-dev go
STEP14:Once a few seconds have passed (scrape interval is 15 seconds), refresh the graph in the Prometheus UI.
Look for an uptick in the graph, indicating higher network traffic caused by the active container.


You have successfully generated graph metrics. Collecting Docker metrics with Prometheus is a powerful approach to monitoring the performance and health of your Docker containers. By integrating Prometheus with Docker, you can gain real-time insights into key metrics such as CPU usage, memory consumption, and network traffic. This setup enables you to detect issues early, optimize resource usage, and ensure the smooth operation of your applications.
