Introduction.
Jenkins, a popular open-source automation server, is widely used in Continuous Integration (CI) and Continuous Deployment (CD) workflows. It helps automate repetitive tasks such as building, testing, and deploying software, making it an essential tool for modern DevOps practices. One of the most commonly used features of Jenkins is the creation of Freestyle Projects. These projects provide a simple and flexible way to automate tasks within Jenkins, allowing teams to build and deploy software with minimal setup.
A Freestyle Project in Jenkins is a type of job that allows you to define the entire automation process using a simple user interface, making it an excellent starting point for Jenkins users who are new to the tool. Freestyle projects are perfect for straightforward tasks such as compiling code, running tests, or deploying applications. Unlike more complex project types, such as Pipeline jobs, Freestyle Projects are relatively easy to configure and can be customized with various build steps, triggers, and post-build actions.
In this guide, we’ll walk through the process of creating and configuring Freestyle Projects in Jenkins, covering everything from basic setup to advanced configurations. Whether you’re automating your first build or optimizing your existing Jenkins setup, understanding how to work with Freestyle Projects is essential for streamlining your CI/CD pipelines.

Why Use Freestyle Projects?
Freestyle Projects are ideal for simpler workflows where you need to execute a series of commands or scripts in a sequential manner. Their advantages include:
- Simplicity: Freestyle Projects offer an easy-to-use interface, requiring little to no scripting knowledge.
- Customization: You can integrate a variety of build steps and post-build actions, making Freestyle Projects suitable for various use cases.
- Flexibility: They can be configured to interact with other tools, repositories, or systems, allowing Jenkins to serve as the heart of your CI/CD pipeline.
- Quick Setup: Setting up a Freestyle Project is fast, allowing you to focus on your build and deployment process instead of complicated configuration.
What You Need to Get Started
Before diving into the configuration of a Freestyle Project, here’s what you need:
- A Jenkins Instance: Make sure you have a Jenkins instance set up and running. You can either use a local installation or a cloud-based Jenkins service.
- Jenkins Account: Ensure you have access to a user account with the appropriate permissions to create and configure projects.
- Source Code Repository: If you plan to pull code from a repository (e.g., GitHub, Bitbucket), ensure you have access to the necessary credentials.
- Build Tools: Familiarize yourself with the build tools or scripts you plan to use in your project (e.g., Maven, Gradle, shell scripts).
The Power of Configuration
Configuring Freestyle Projects is one of the most powerful aspects of Jenkins. Through the simple interface, you can:
- Define build triggers that automatically initiate builds when changes are detected in your code repository.
- Add build steps such as compiling code, running unit tests, or packaging your application.
- Set up post-build actions to deploy your application, send notifications, or perform cleanup tasks.
In the next sections of this guide, we’ll take you through the step-by-step process of creating and configuring your first Freestyle Project in Jenkins, as well as exploring some advanced features to streamline your CI/CD pipeline. By the end, you’ll be well-equipped to automate tasks efficiently and improve your software delivery process.
Let’s get started on creating your first Freestyle Project in Jenkins!
Prerequisites
Before you start, you’ll need the following:
- A Jenkins instance up and running. You can install Jenkins locally or use a cloud-based Jenkins service.
- A Jenkins user account with appropriate permissions to create projects.
- Access to a source code repository (e.g., GitHub, GitLab, or Bitbucket) if you plan to integrate Jenkins with version control.
- Familiarity with build tools (like Maven, Gradle, or shell scripts) if you plan to use them in your build steps.
Step 1: Install Jenkins (If Not Already Installed)
If you haven’t installed Jenkins yet, follow these quick steps:
- Download Jenkins from the official Jenkins website.
- Follow the installation instructions for your operating system (Windows, macOS, or Linux).
- After installation, open your browser and navigate to
http://localhost:8080to access Jenkins.
Step 2: Log in to Jenkins
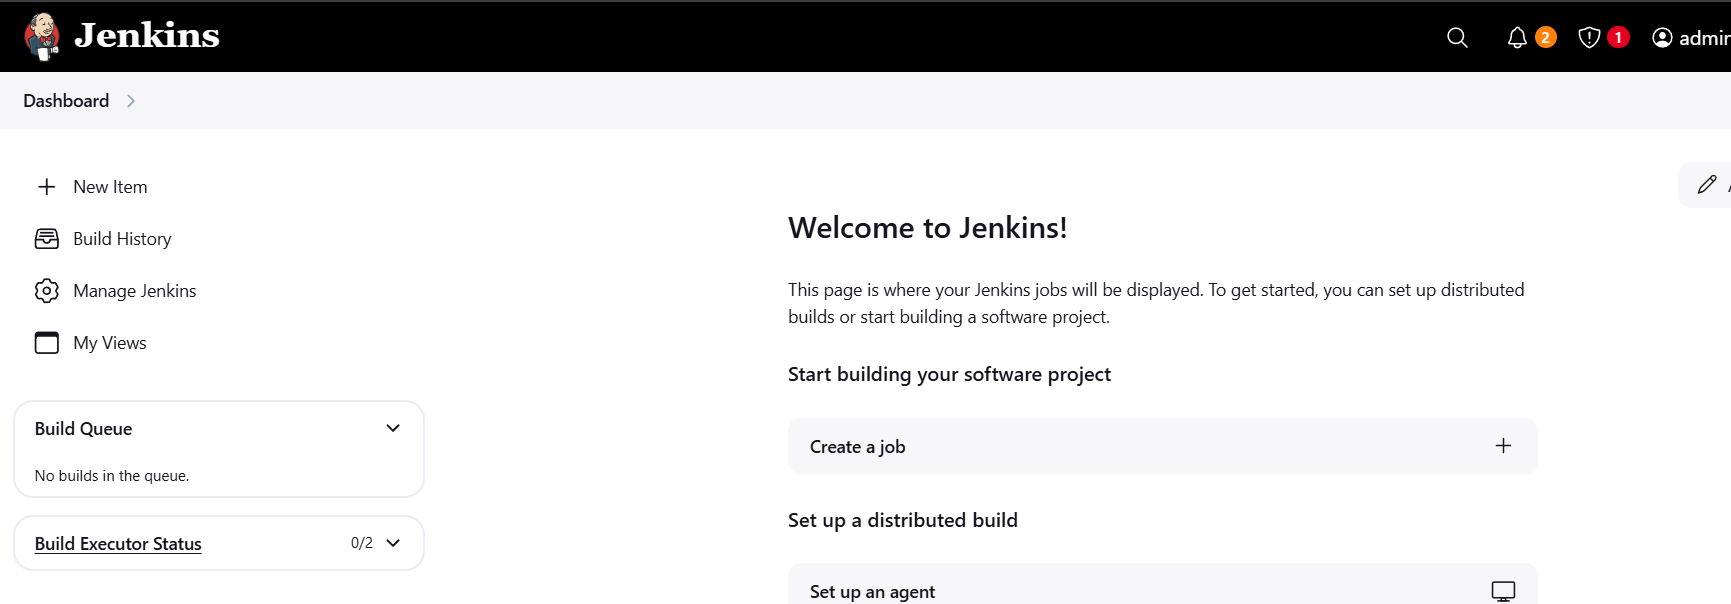
Once Jenkins is installed, log in to your Jenkins dashboard:
- Open a web browser and go to
http://localhost:8080(or your Jenkins server URL). - Enter your Jenkins credentials (username and password).
- Once logged in, you’ll be on the Jenkins dashboard, where you can begin setting up your projects.
Step 3: Create a New Freestyle Project
Now that you’re logged in, it’s time to create your Freestyle Project:
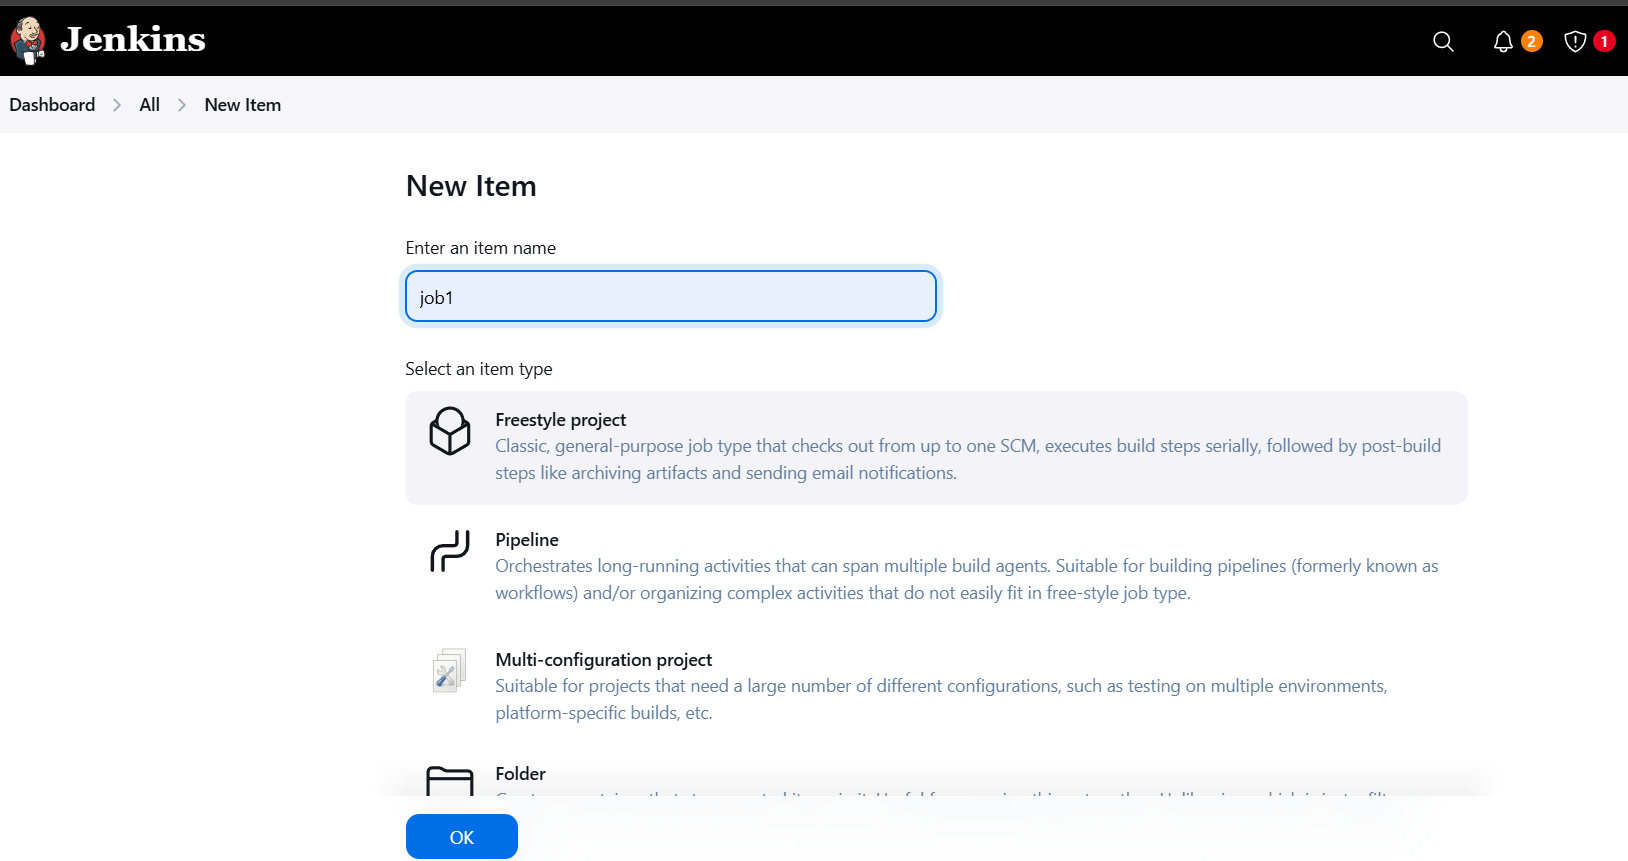
- On the Jenkins dashboard, click on “New Item” in the left-hand menu.
- Enter a name for your project in the “Enter an item name” field.
- Select the “Freestyle project” option.
- Click OK to proceed.
Step 4: Configure Your Freestyle Project
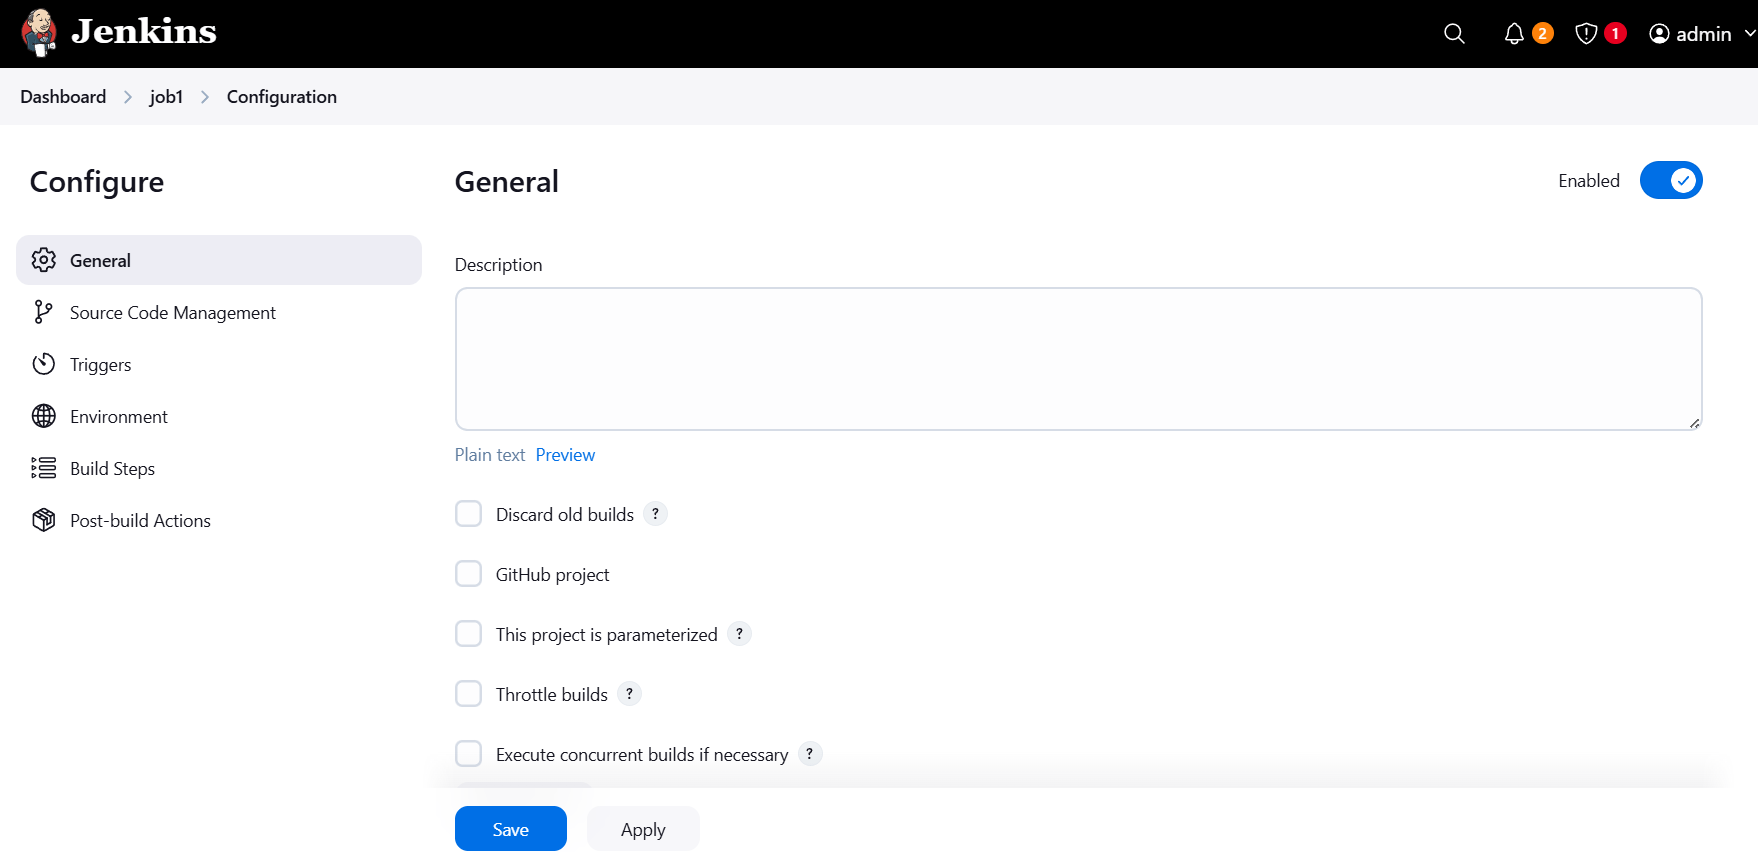
After clicking OK, you’ll be taken to the configuration page of your newly created Freestyle Project. Here, you’ll configure the various aspects of the project. Let’s walk through the main sections:
General Settings
- Description: Add a description of the project to help you and other users understand its purpose.
- Discard Old Builds: If you want Jenkins to automatically clean up old builds after a certain number or days, enable this option and configure the settings accordingly.
Source Code Management
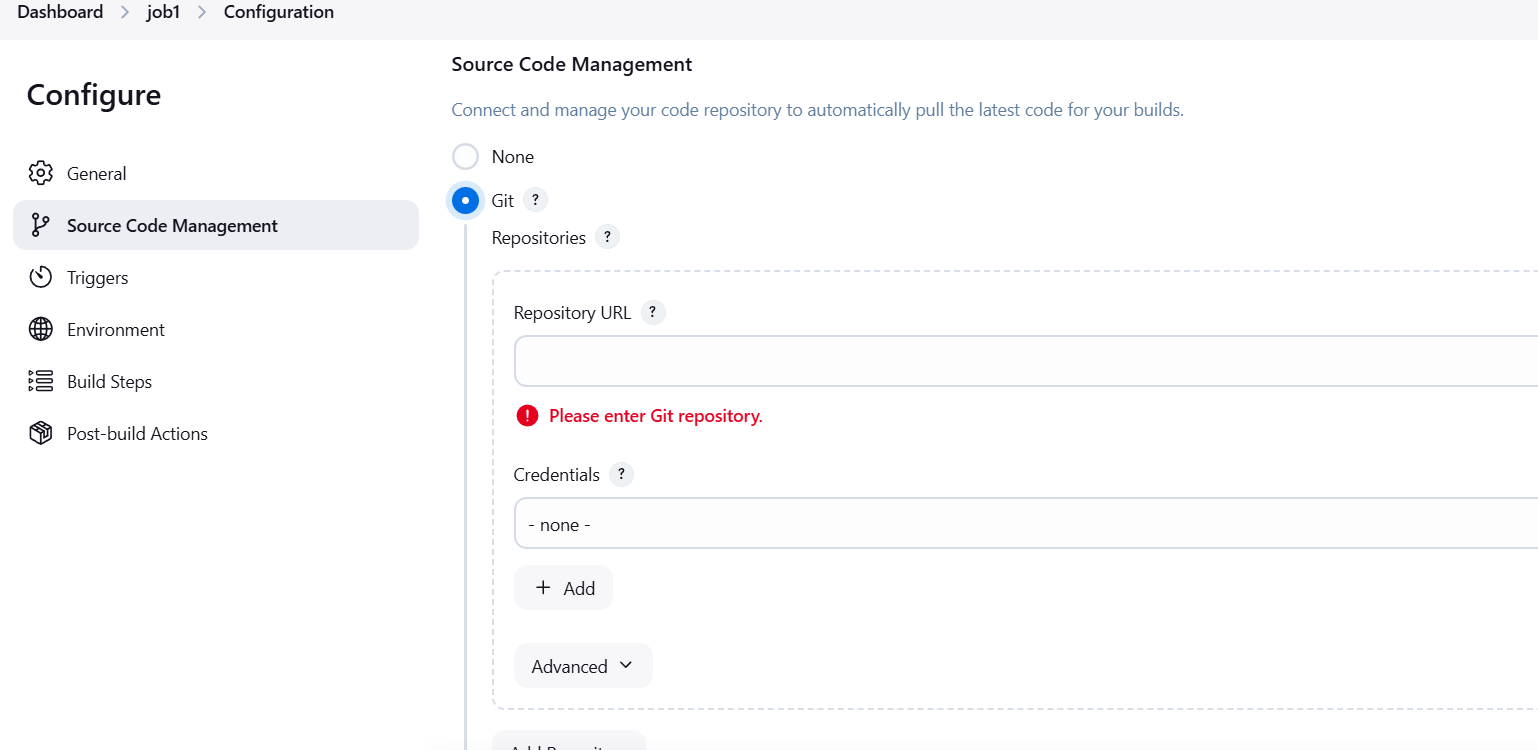
This section allows you to link your Jenkins project to your version control system (VCS), like Git, Subversion, etc.
- Select the “Git” option under Source Code Management.
- In the Repository URL field, provide the URL to your Git repository (e.g.,
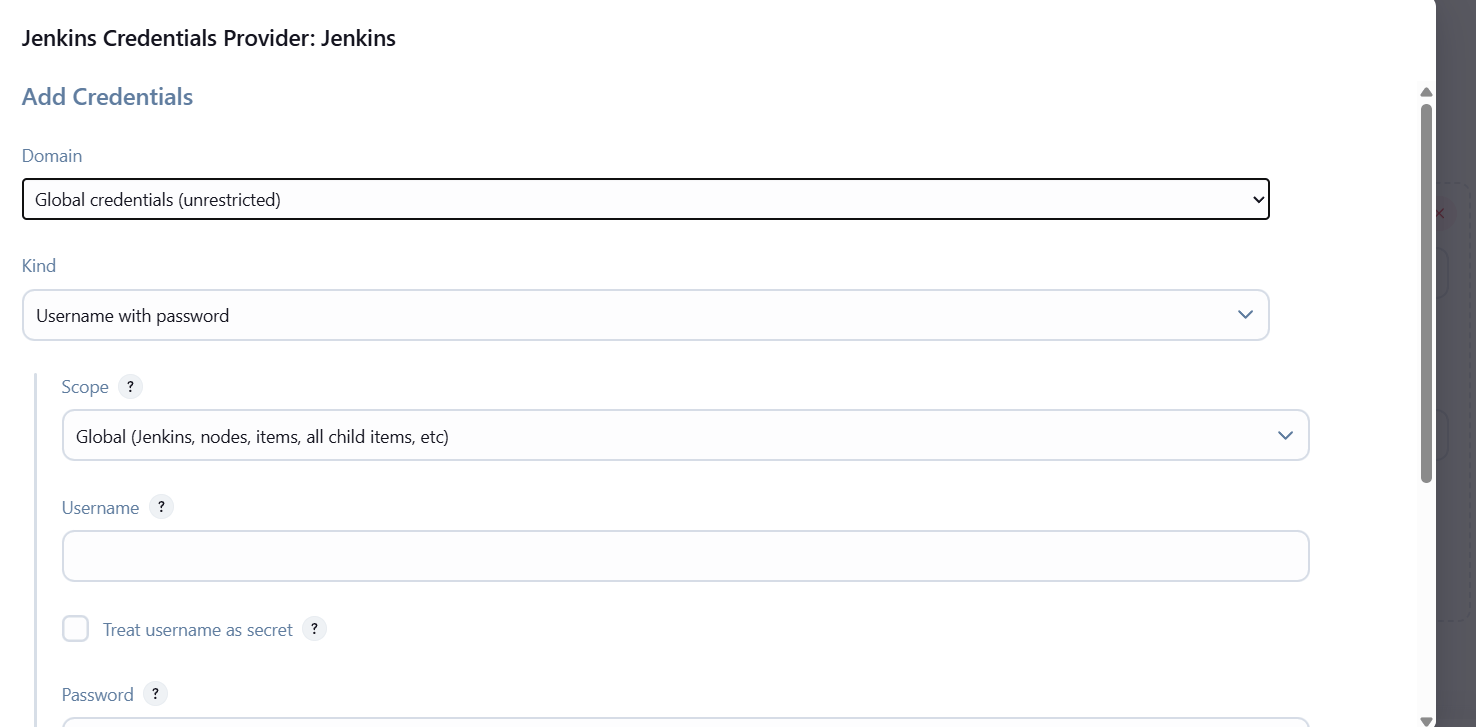
https://github.com/your-repo.git). - If your repository is private, enter the credentials required to access it (you can set this up by adding your credentials in Jenkins’ Credentials settings).
- Under Branches to build, specify the branch you want to build (usually
mainormaster).
Build Triggers
This section defines when Jenkins should start the build. Common triggers include:
- Poll SCM: Jenkins can check the repository for changes at specified intervals. Enter a cron-style schedule (e.g.,
H/15 * * * *checks every 15 minutes). - GitHub hook trigger for GITScm polling: If you’re using GitHub, Jenkins can be triggered automatically when a change is pushed to the repository. You’ll need to set up a webhook on GitHub to notify Jenkins.
- Build periodically: Schedule builds to run at specific intervals, like nightly or every hour.
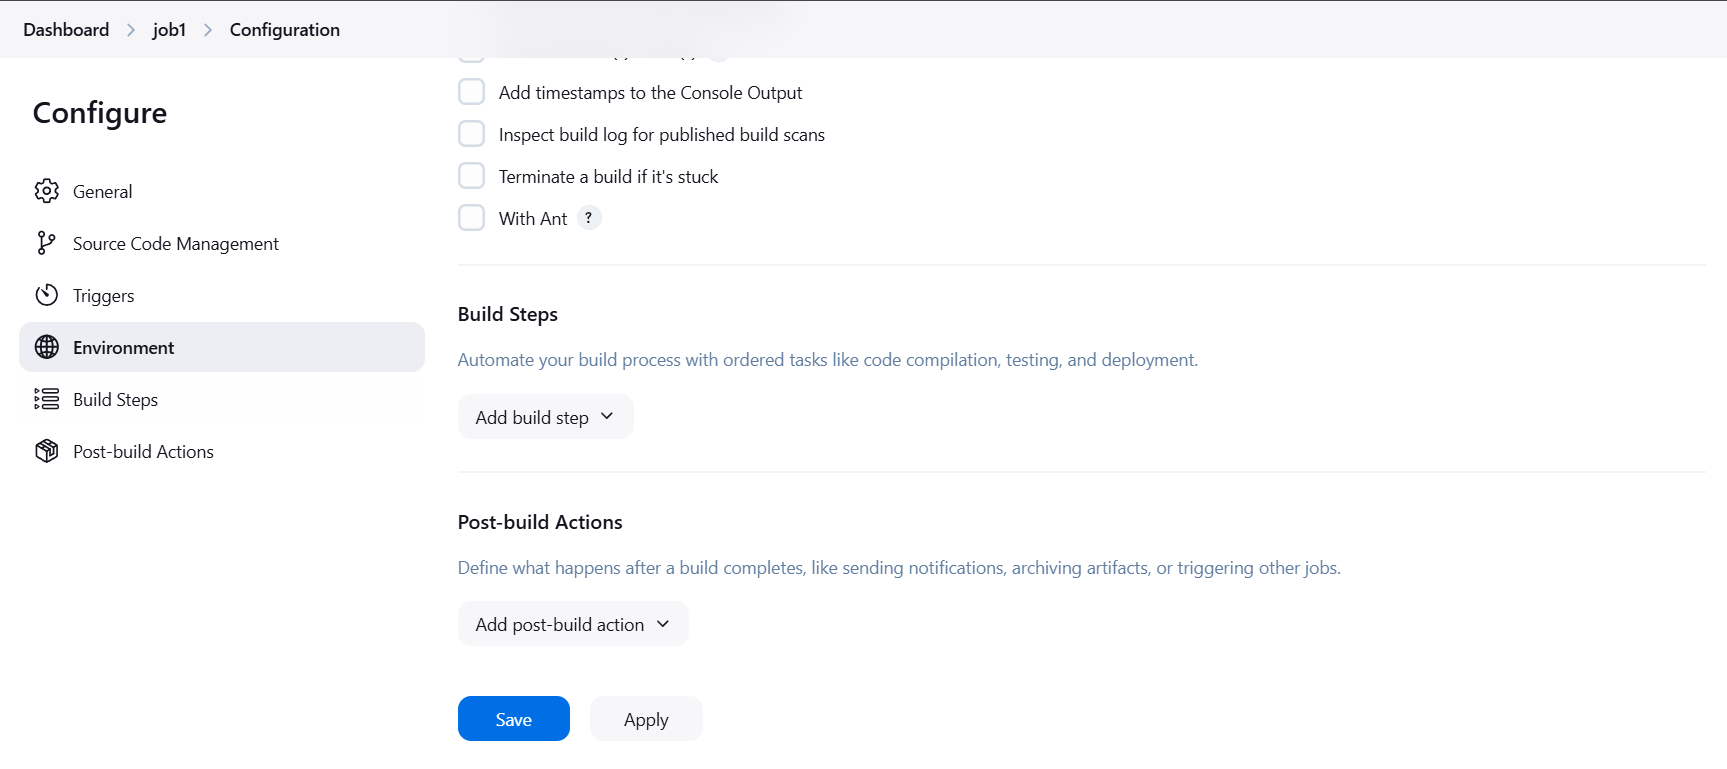
Build Steps
This is where you define the actions Jenkins should take during the build process. You can add multiple build steps, such as compiling code, running tests, or creating artifacts.
- Click on Add build step and select a build tool like Invoke Gradle script, Invoke Maven, or Execute shell.
- For example, if you are using Maven, enter the goal (e.g.,
clean install). - You can add multiple steps, such as:
- Execute shell: Run shell scripts or commands.
- Invoke Gradle: Use Gradle for building or testing.
- Run tests: Configure Jenkins to run your unit or integration tests.
Post-build Actions
Post-build actions define what should happen after the build completes. Common actions include:
- Archive the artifacts: Archive the output (e.g., compiled JARs, WARs, or build logs) from the build process.
- Send email notifications: Notify stakeholders of the build status (success or failure).
- Deploy artifacts: Automatically deploy the build artifacts to a server or repository.
Example Post-build Action Configuration:
- Select Archive the artifacts and in the Files to archive field, enter something like
target/*.jar(for Maven-based projects). - Select E-mail Notification and configure it to send emails upon build completion.
Step 5: Save and Run the Build
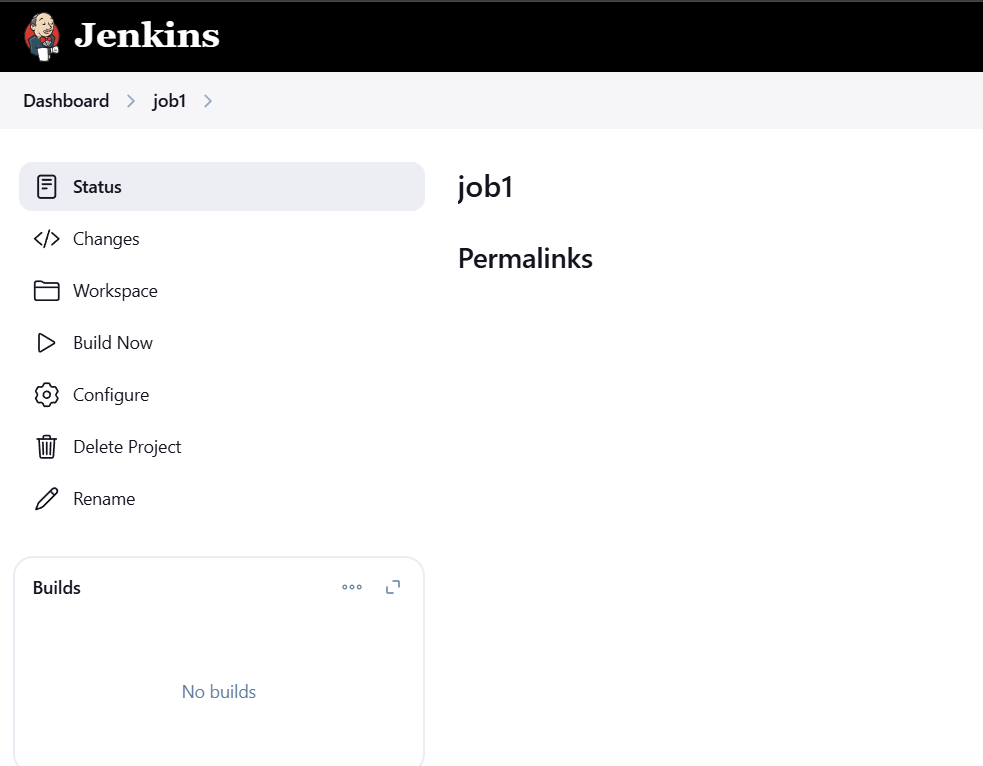
Once you have configured the project, click Save to save the project configuration. You will be redirected to the project dashboard.
To manually trigger the build:
- Go to the project dashboard.
- Click on Build Now to start the build process.
Jenkins will execute the steps you defined in the Build Steps section, and you’ll be able to see the build progress and results.
Step 6: Monitor Build Status and Logs
After the build completes, Jenkins provides detailed logs and feedback about the build:
- On the project dashboard, you’ll see a list of builds along with their status (e.g., successful, failed).
- Click on the build number to view the build logs, which will help you troubleshoot any issues that occurred during the build process.


Conclusion.
In conclusion, Freestyle Projects in Jenkins are an excellent starting point for anyone looking to automate their software development and deployment processes. They offer a straightforward and user-friendly way to set up Continuous Integration (CI) and Continuous Deployment (CD) pipelines without requiring extensive scripting or complex configurations. Whether you are just getting started with Jenkins or looking to optimize your existing CI/CD workflows, Freestyle Projects provide the flexibility and simplicity needed for efficient automation.
By following the steps outlined in this guide, you’ve learned how to create and configure Freestyle Projects, from setting up basic build triggers to adding custom build steps and post-build actions. You’ve seen how Jenkins can be tailored to suit a variety of use cases, from simple builds to more complex automation tasks.
The beauty of Freestyle Projects lies in their versatility. While they may be simple, they allow you to integrate Jenkins with version control systems, external tools, and deployment scripts, making them highly effective for many different workflows. As you grow more comfortable with Jenkins, you can always explore more advanced project types like Pipeline Jobs, which provide even greater flexibility and control.
Remember, Jenkins is not just a tool for automating individual tasks—it’s a central hub for continuous integration and deployment, helping you automate your software lifecycle and improve collaboration across development and operations teams.
With your newfound knowledge of creating and configuring Freestyle Projects, you’re ready to leverage Jenkins to automate your build, test, and deployment processes. Happy automating!
Add a Comment