Introduction.
In today’s cloud-driven world, security and access control are more critical than ever, especially when using powerful platforms like Amazon Web Services (AWS). One of the most effective tools for identifying and auditing resource access within AWS is IAM Access Analyzer. This tool enables security teams, developers, and administrators to pinpoint which of their cloud resources—like IAM roles, S3 buckets, or KMS keys—are accessible from outside the account or organization. By automatically analyzing resource-based policies, IAM Access Analyzer plays a vital role in uncovering unintended data exposure and ensuring that the principle of least privilege is consistently enforced.
With the growing complexity of cloud infrastructure and multi-account AWS environments, organizations often struggle to maintain visibility into who has access to what. Traditional methods of manually auditing policies can be error-prone and time-consuming. This is where IAM Access Analyzer becomes indispensable. It automates the evaluation of permissions and highlights potential security risks in real-time. Whether you’re managing a single AWS account or overseeing a large organization using AWS Organizations, Access Analyzer can help you stay on top of your security game.
Despite its usefulness, many AWS users are either unaware of IAM Access Analyzer or unsure of how to configure and use it effectively. That’s why this step-by-step guide exists. It’s designed to walk you through everything from the basics of what IAM Access Analyzer is, to actually creating and using one in your own AWS environment. You don’t need to be a cloud security expert to follow along. Whether you’re a developer, a DevOps engineer, or just getting started with AWS, this guide will give you a solid understanding of how to implement Access Analyzer and interpret its findings.
Throughout this tutorial, we’ll also discuss real-world examples, use cases, and best practices for making the most of this powerful security feature. We’ll begin by explaining what IAM Access Analyzer does under the hood, then guide you through creating an analyzer using both the AWS Console and the AWS CLI. We’ll also cover how to read and respond to findings, and how to integrate those insights into your organization’s security workflows. By the end, you’ll not only know how to create an analyzer—you’ll know how to use it strategically to protect your AWS environment from unauthorized access.

Ready to dive in and take control of your AWS permissions visibility? Let’s get started.
Step-by-Step: Create IAM Access Analyzer in AWS
Step 1: Log in to AWS Console
- Go to: https://console.aws.amazon.com
- Log in with an account that has permissions to use IAM Access Analyzer (e.g.,
IAMFullAccess,AccessAnalyzerFullAccess)
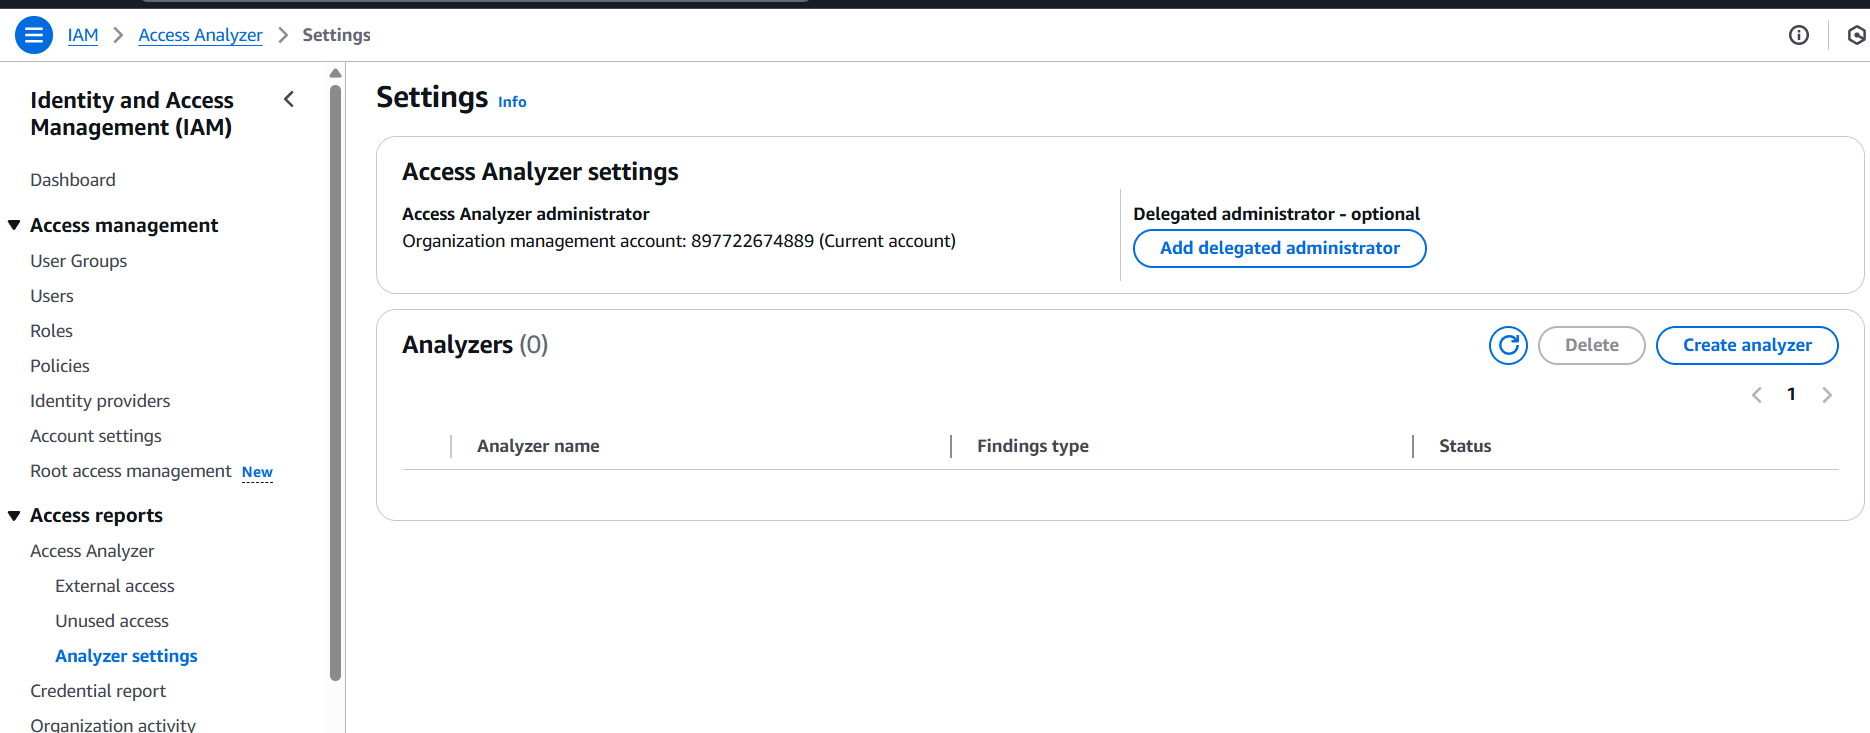
Step 2: Open IAM or Access Analyzer
- Navigate to IAM in the AWS Management Console.
- On the left-hand side, choose Access Analyzer (under “Access reports” or directly in the IAM section).
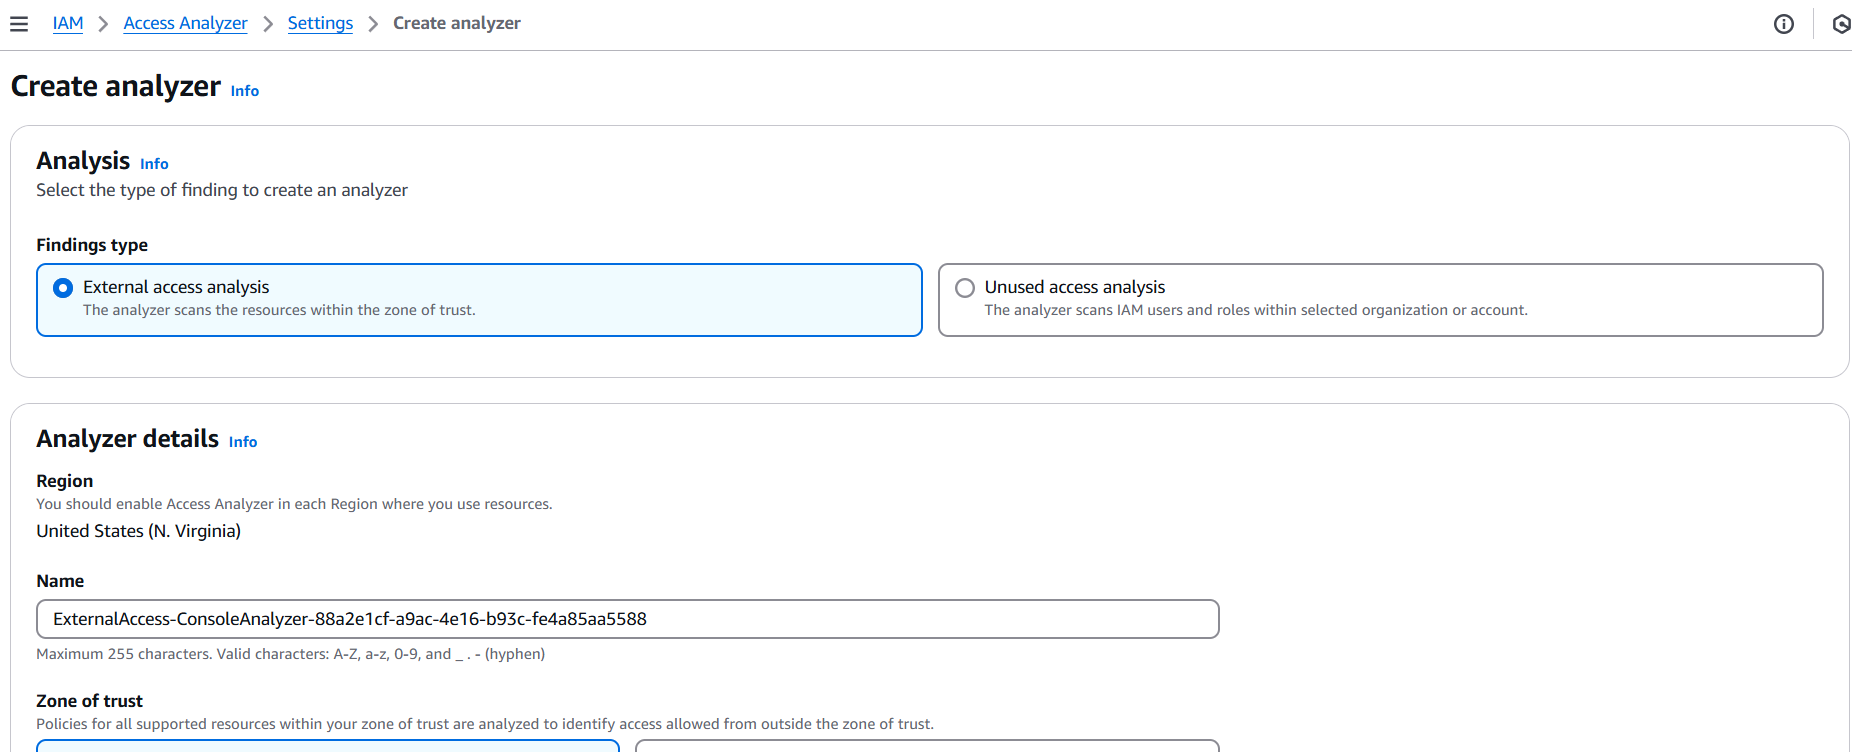
Step 3: Create Analyzer
- Click Create analyzer.
- Fill in the following:
- Name: Give your analyzer a name (e.g.,
MyOrgAccessAnalyzer). - Analyzer type:
- Account – analyzes access to resources within your account.
- Organization – if using AWS Organizations, this lets you analyze access across all accounts.
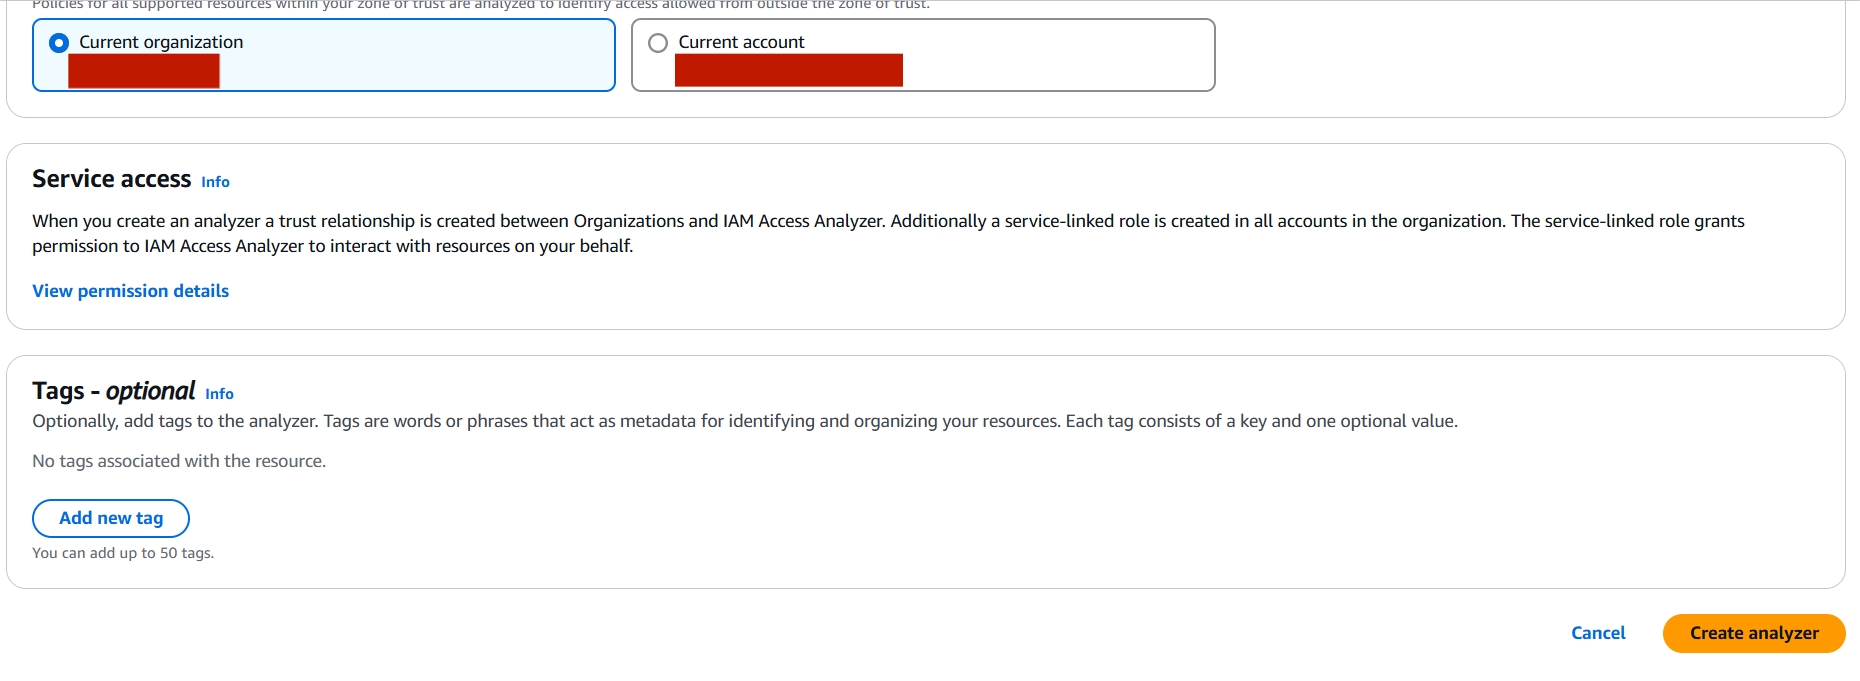
- Zone of trust: Choose
Current accountor your AWS organization, depending on your analyzer type.
- Name: Give your analyzer a name (e.g.,
- Click Create analyzer.


Step 4: View Findings
- Once created, AWS will automatically start analyzing supported resources (e.g., IAM roles, S3 buckets, KMS keys).
- Go to Findings to view results.
- These show external access (like public S3 buckets or cross-account role assumptions).
- You can filter, archive, or act on findings directly.
Step 5: Respond to Findings (Optional)
- Click on any finding to get details.
- Based on the information, you can:
- Modify resource policies.
- Archive the finding if it’s expected/accepted.
- Use it to improve your security posture.
📌 Optional: Create IAM Analyzer with AWS CLI
If you prefer CLI:
aws accessanalyzer create-analyzer \
  --analyzer-name MyAnalyzer \
  --type ACCOUNT
Conclusion.
Securing your AWS environment doesn’t have to be overwhelming, and tools like IAM Access Analyzer make the process significantly easier. By following the step-by-step guide above, you’ve learned how to create an analyzer, understand its findings, and take action to tighten access to your resources. Whether you’re managing a personal AWS account or an enterprise-level cloud infrastructure, having visibility into external access is crucial for maintaining security and compliance.
IAM Access Analyzer does more than just identify risks—it empowers you to actively monitor and respond to policy misconfigurations and access issues before they become security incidents. The proactive use of Access Analyzer can help your team enforce the principle of least privilege, protect sensitive data, and align with industry best practices and regulatory standards.
Remember, security is not a one-time setup—it’s an ongoing effort. Make it a habit to regularly review Access Analyzer findings, archive or address unexpected access, and integrate these insights into your broader cloud governance strategy. As AWS continues to grow and evolve, so should your approach to securing it.
Now that you’ve seen how simple it is to get started, go ahead and put IAM Access Analyzer into action. Stay secure, stay aware, and keep building with confidence on AWS.

Add a Comment