Introduction.
In modern cloud architectures, ensuring secure and efficient communication between services is critical. One of the most effective ways to do this within AWS is by using VPC (Virtual Private Cloud) Endpoint services. This guide will walk you through the process of setting up an end-to-end VPC endpoint service, enabling private and secure communication between your VPC and AWS services or other VPCs.
What is a VPC Endpoint Service?
Start by explaining what a VPC Endpoint Service is, the types of VPC endpoints (Interface and Gateway), and the use cases for implementing them. Include a basic explanation of the VPC endpoint’s role in connecting resources securely without requiring access over the public internet.
- Interface Endpoints (PrivateLink): Direct connection to services like AWS Lambda, EC2, etc.
- Gateway Endpoints: For services like S3 or DynamoDB.

Why Use VPC Endpoint Services?
Discuss the benefits of using VPC endpoints, such as improved security (private connections), lower data transfer costs, and better performance due to reduced internet exposure.
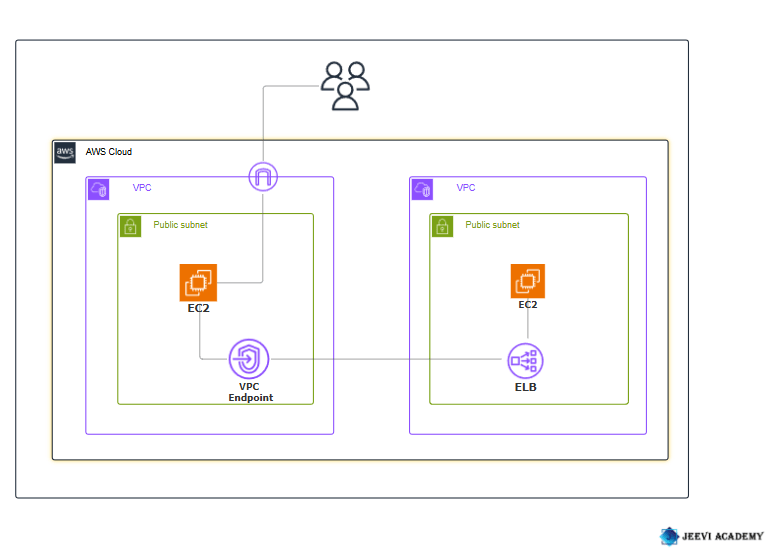
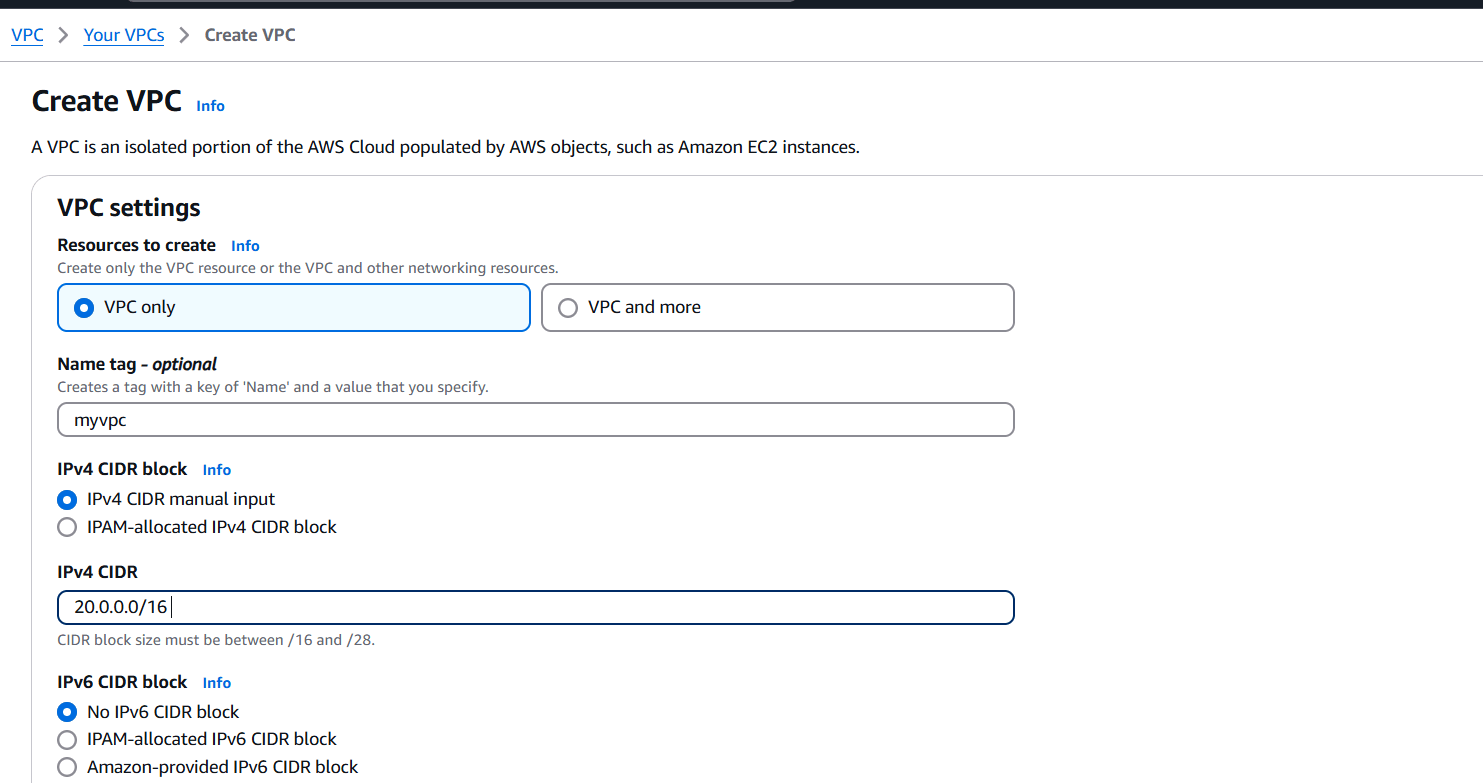
STEP 1: Navigate the VPC and Click on create VPC.
- Enter the VPC name.
- Enter Ipv4 CIDR.
- Click on create VPC.


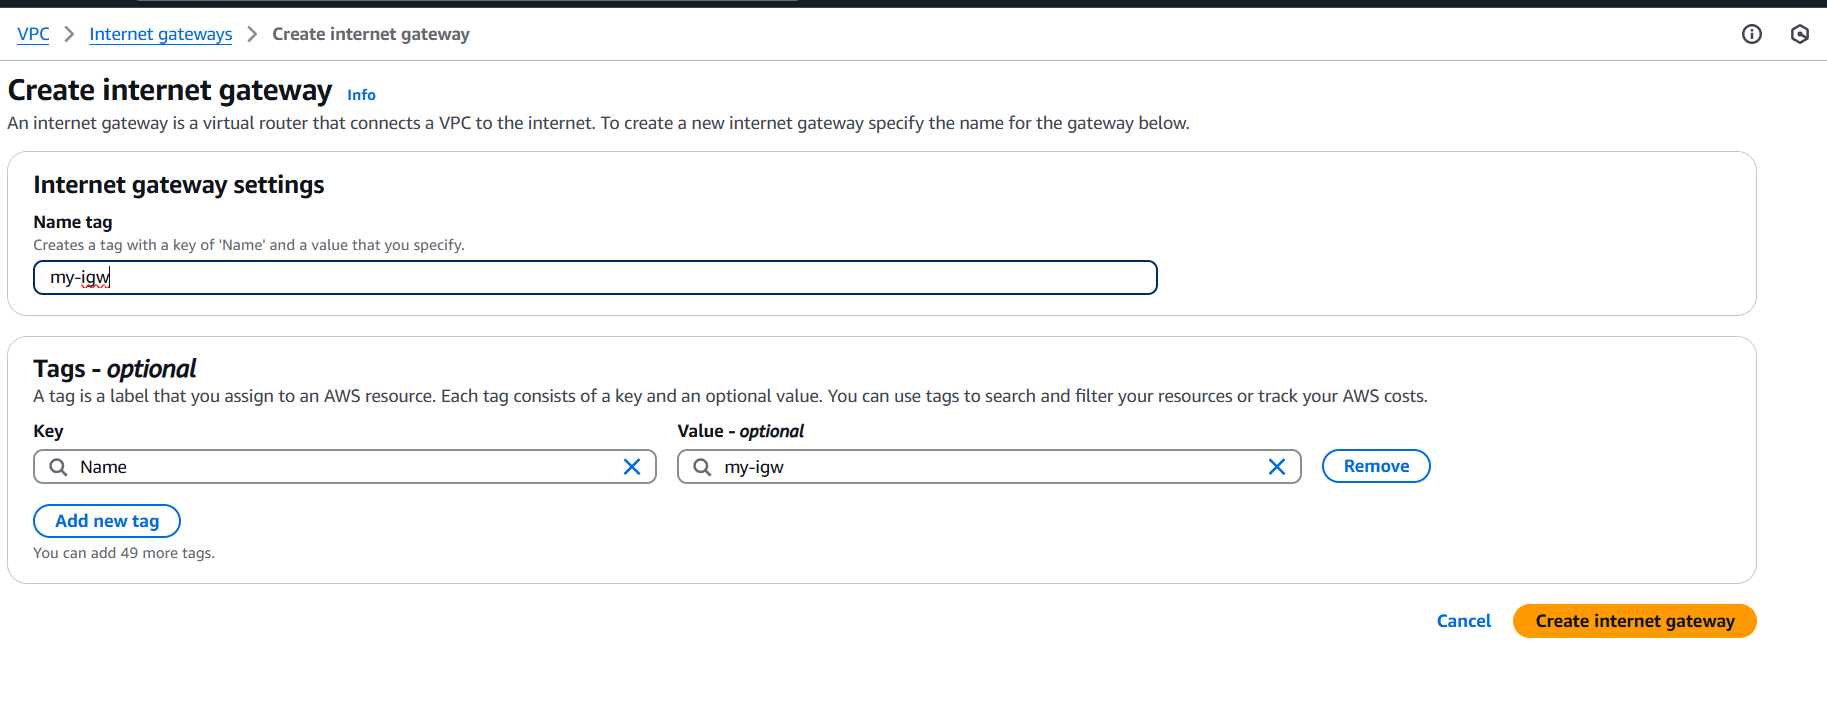
STEP 2: Click on Internet gateway and create internet gateway.
- Enter the gate name.
- Click on create internet gateway.

STEP 3: Click on your created internet gateway and attach to your created VPC.


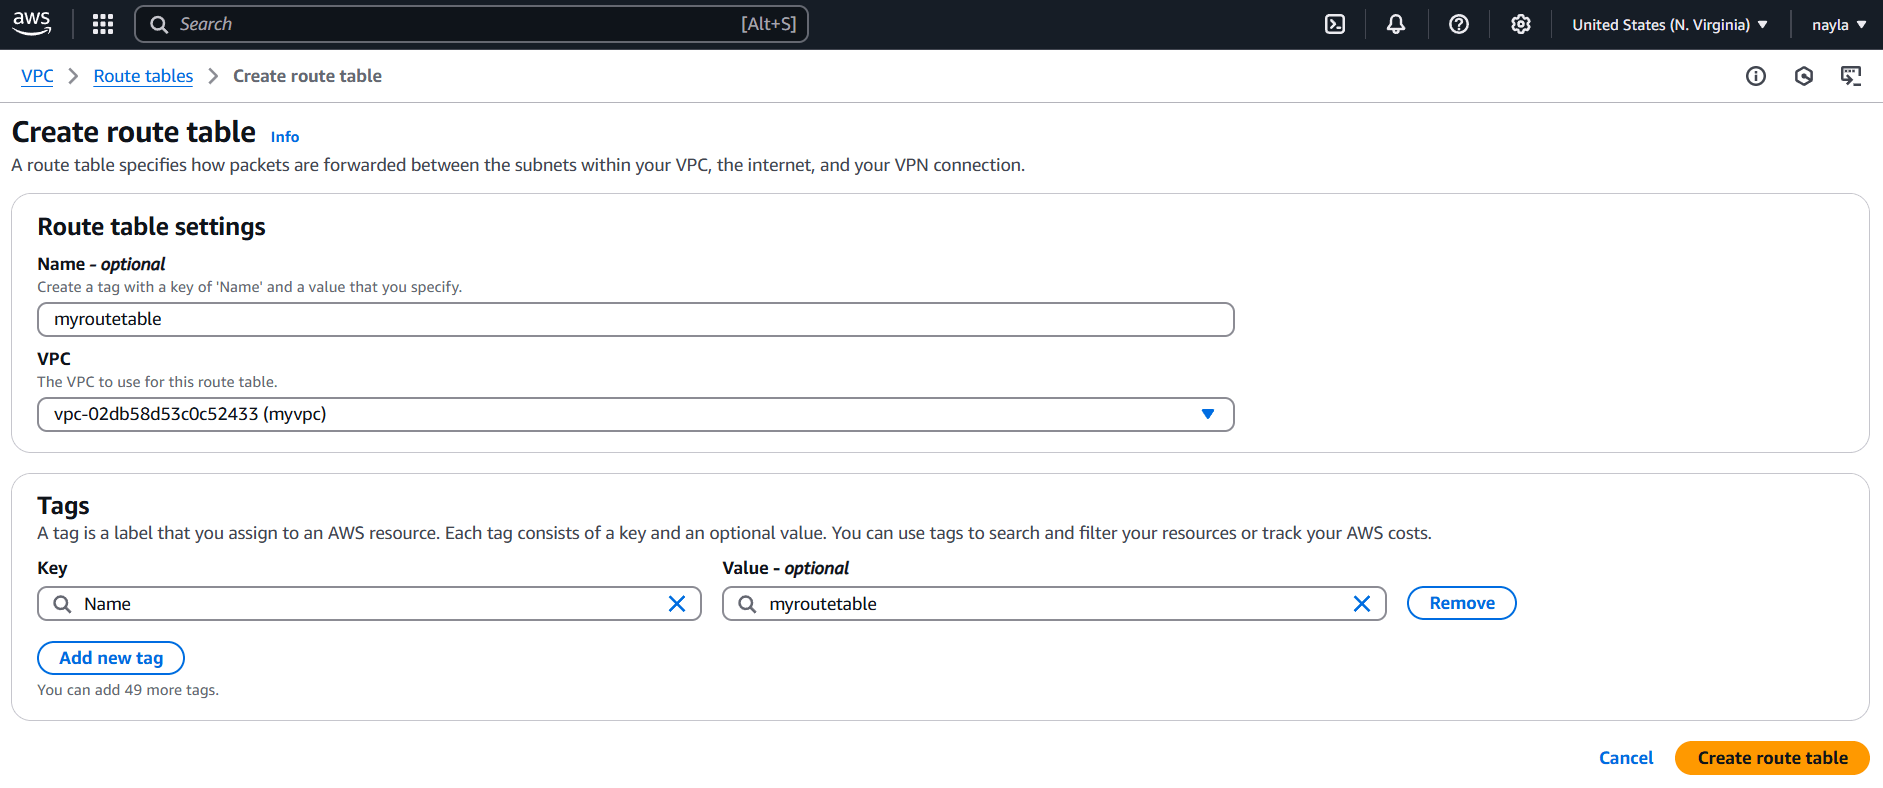
STEP 4: Next, Click on rout tables and Click on create route tables.

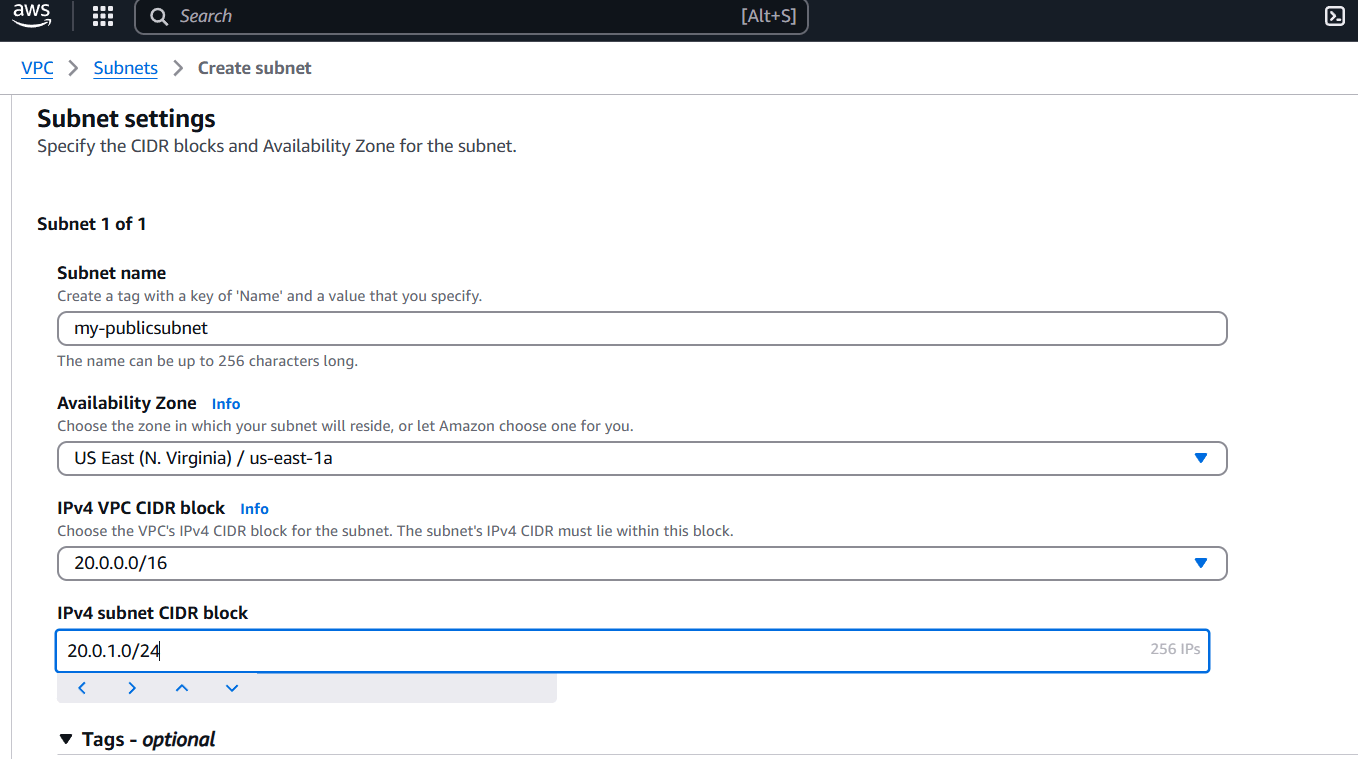
STEP 5: Next, create subnet.
- Enter subnet name.
- Select AZ.
- Enter IPV4.


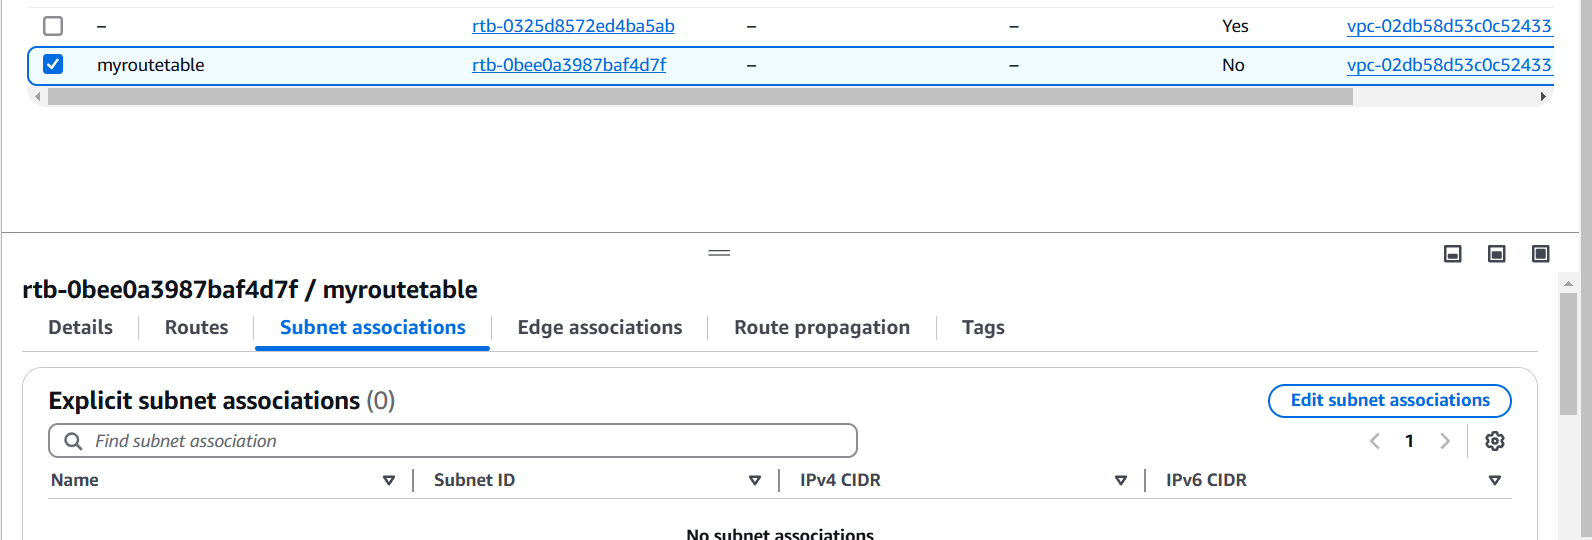
STEP 6: Go to your created route table.
- Select subnet associations.
- Select your subnet.
- Click on save associations.

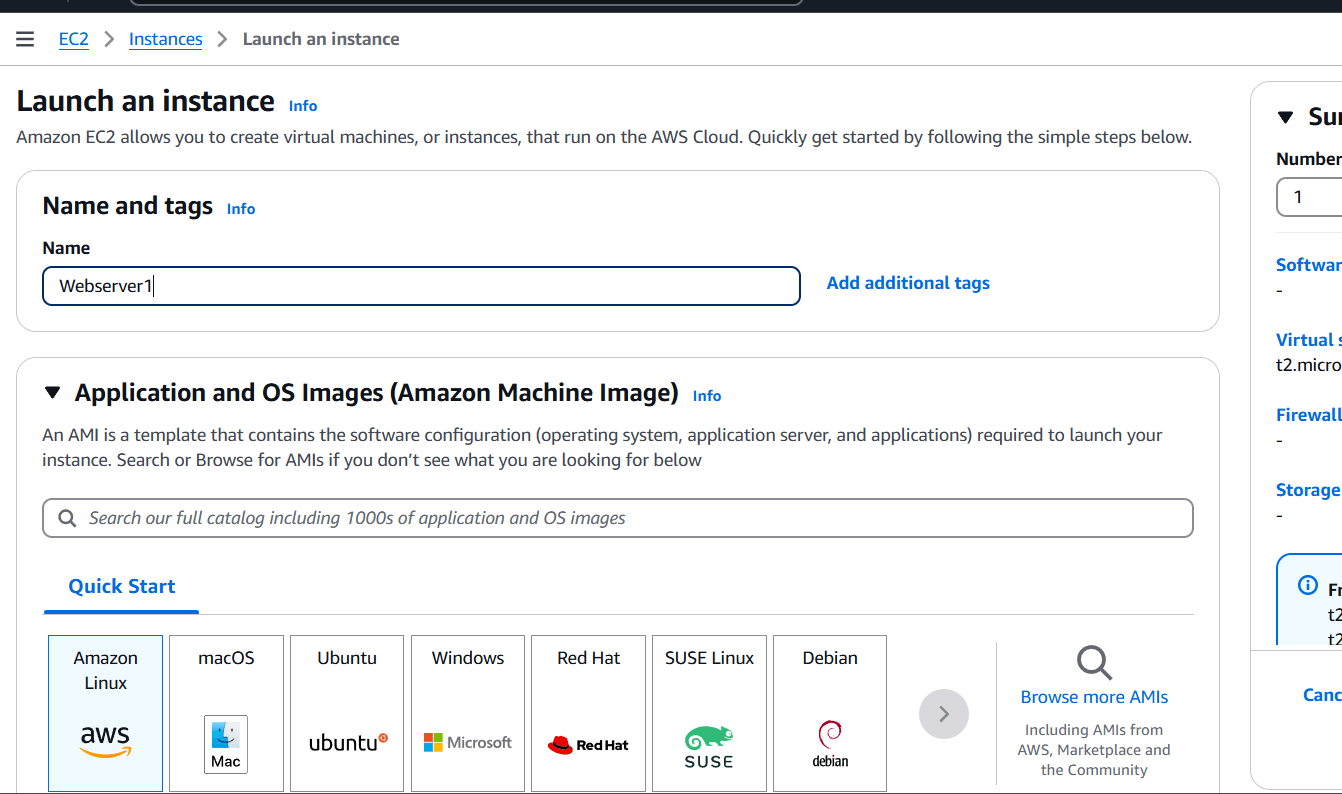
STEP 7: Now, Navigate the EC2 instance and click on create instance.
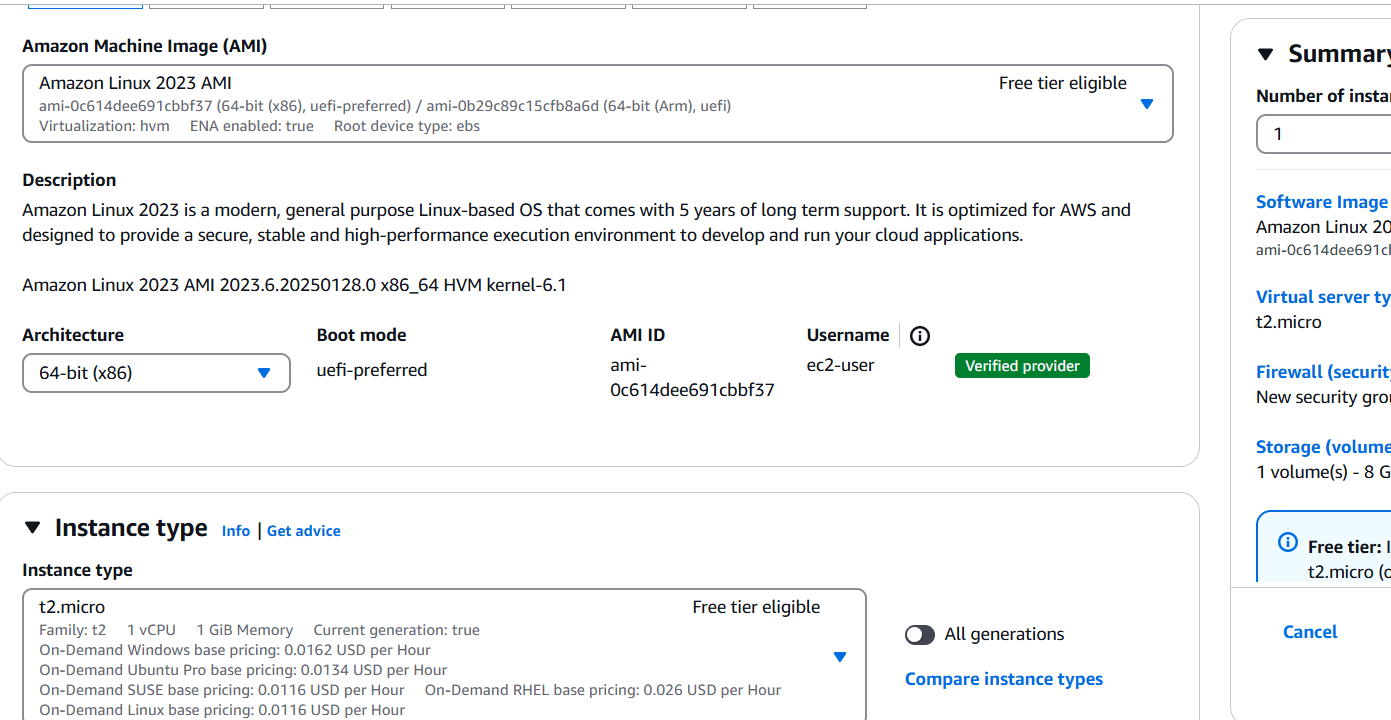
- Enter the name and select AMI, instance type.
- Create keypair.
- Configure the security group with rules allowing SSH, HTTP, and HTTPS traffic from all IP addresses.
- Configure Apache HTTP server on the EC2 instance to serve a custom HTML page.
- Click on create instance.
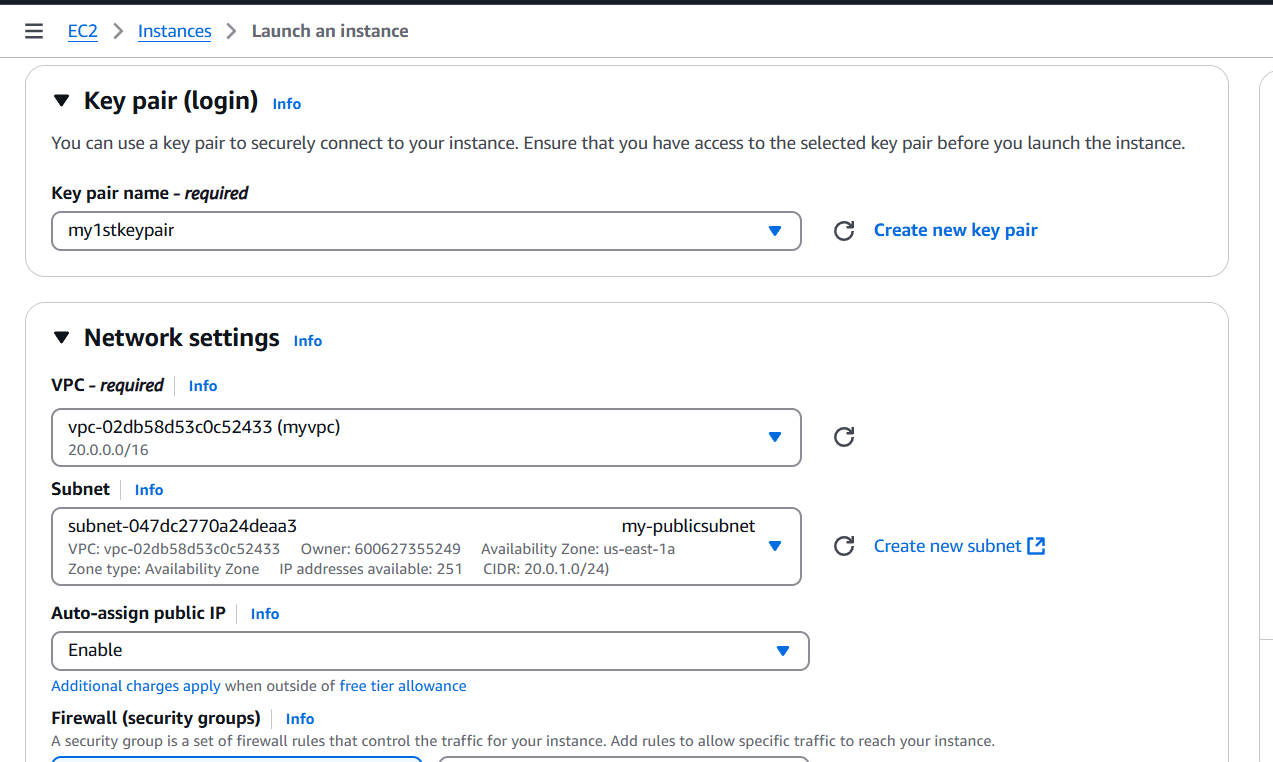
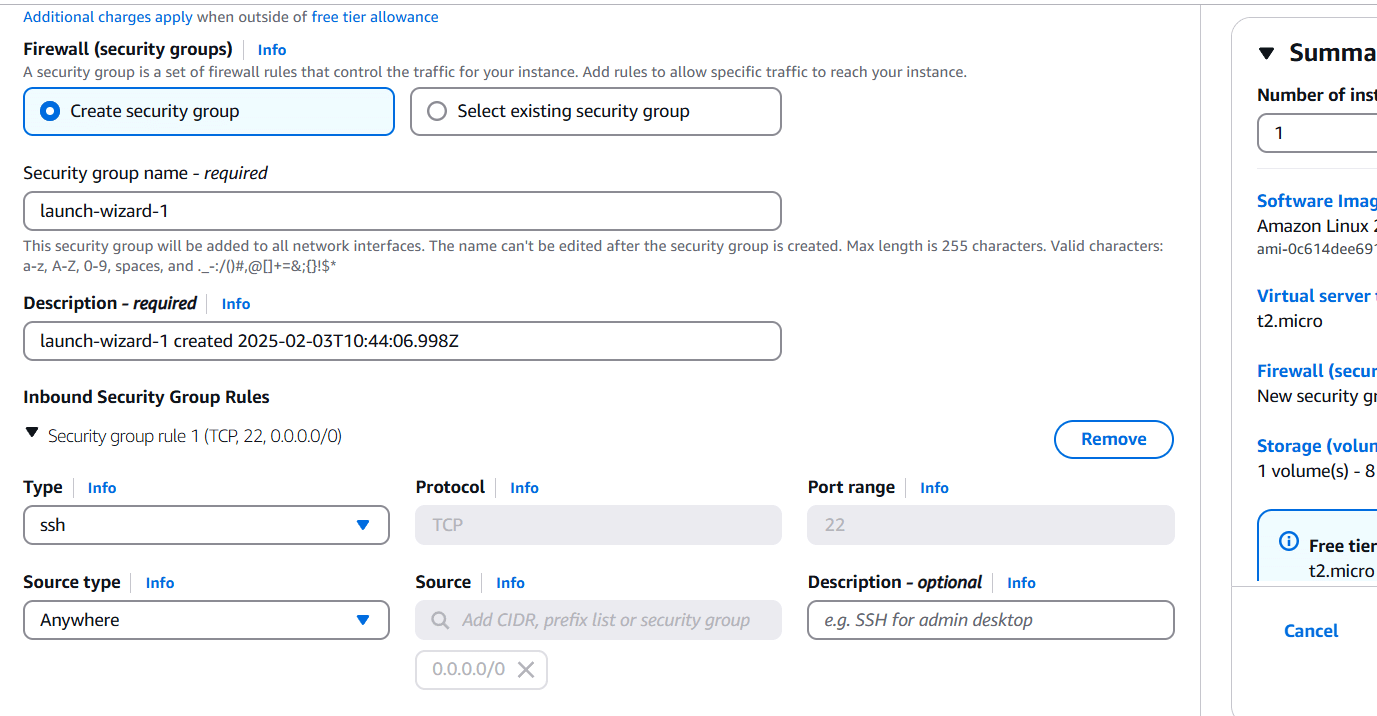
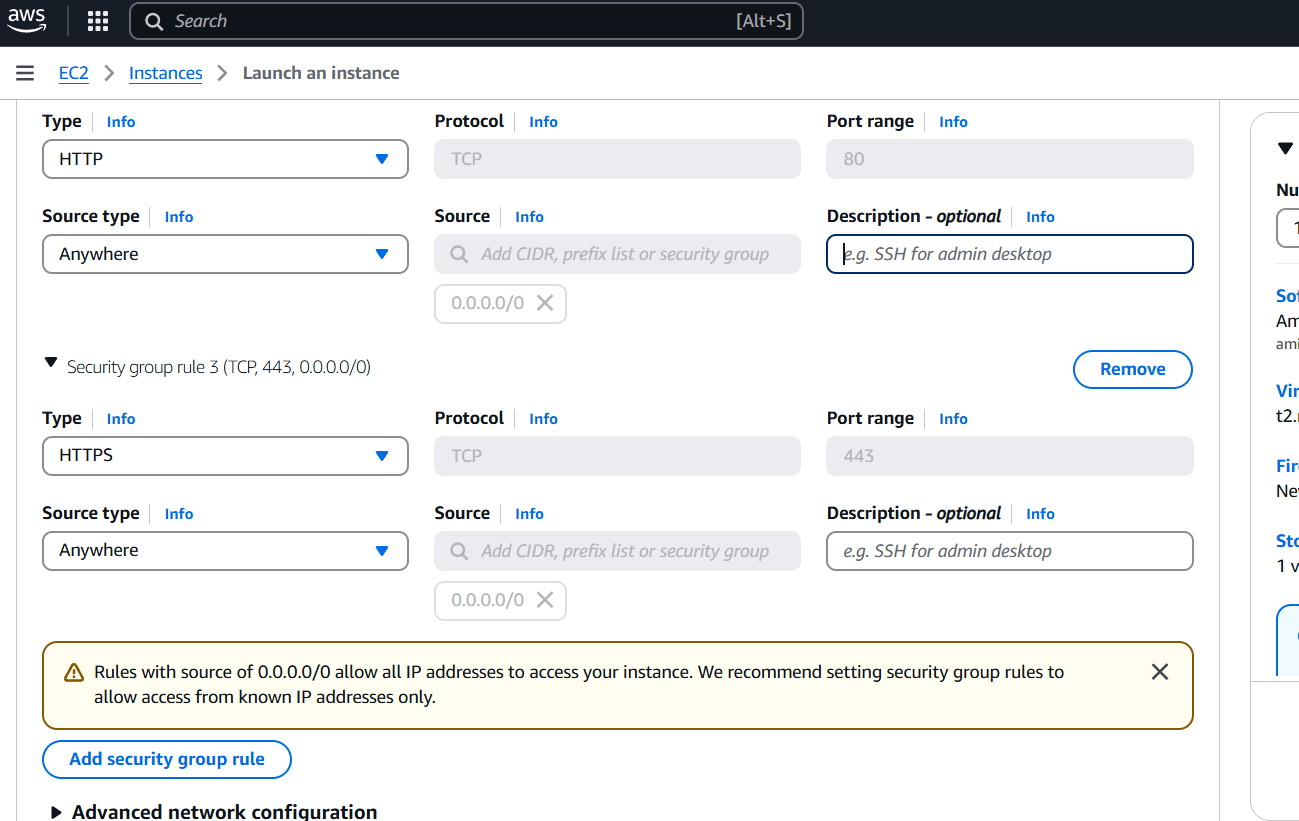

STEP 8: Now you created network load balancer.
- Enter load balancer name.
- Select vpc, security group and target.
- TCP listener on port 80 and associate it with the EC2 instance. Ensure that the load balancer and the EC2 instance use the same security group for consistent security policies.
- Click on create.
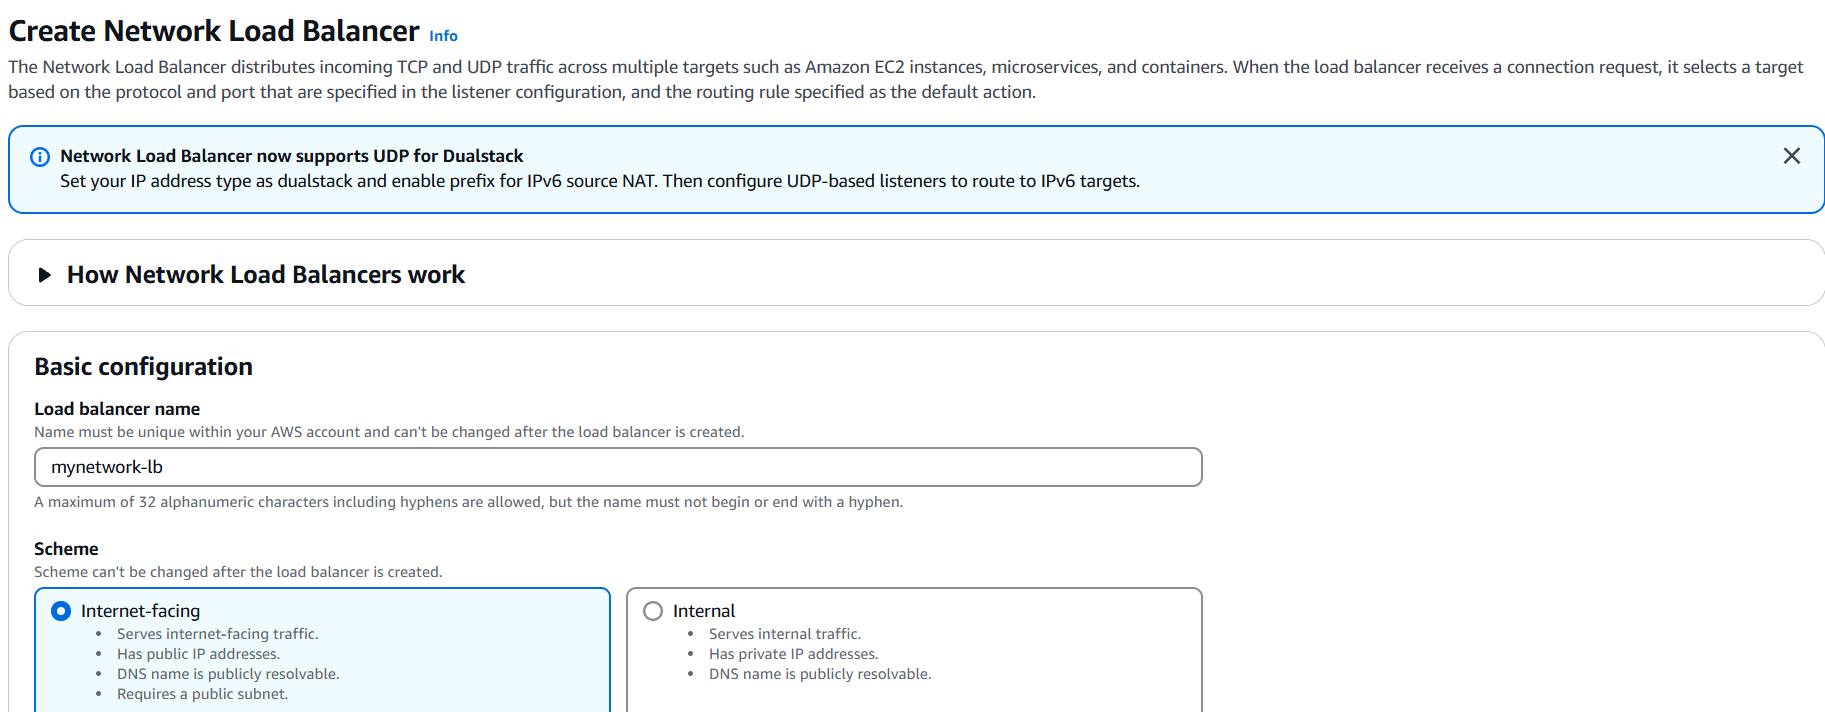
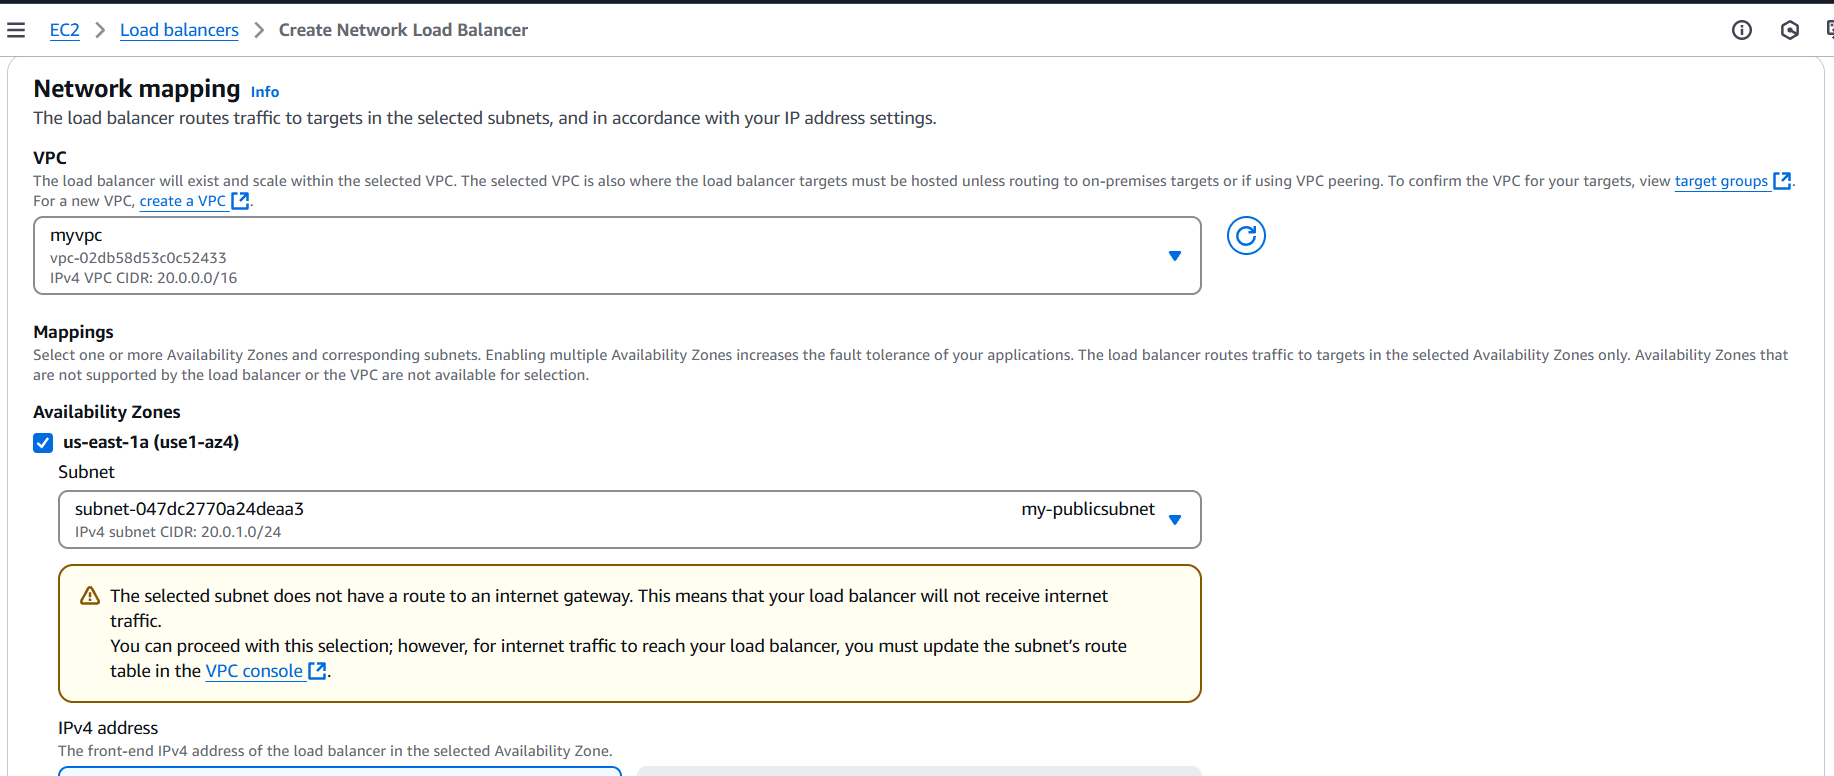
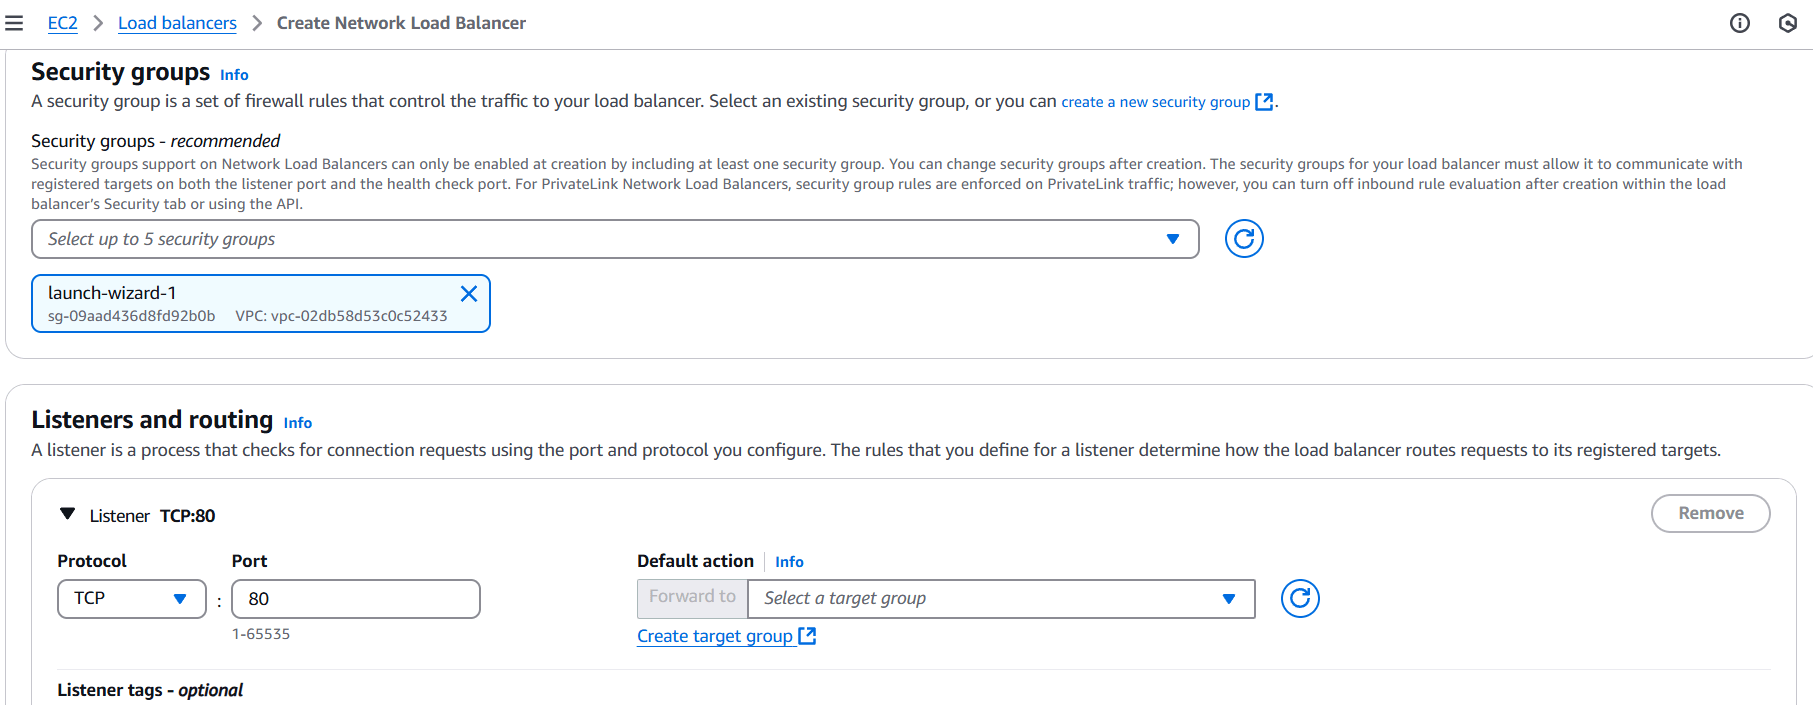

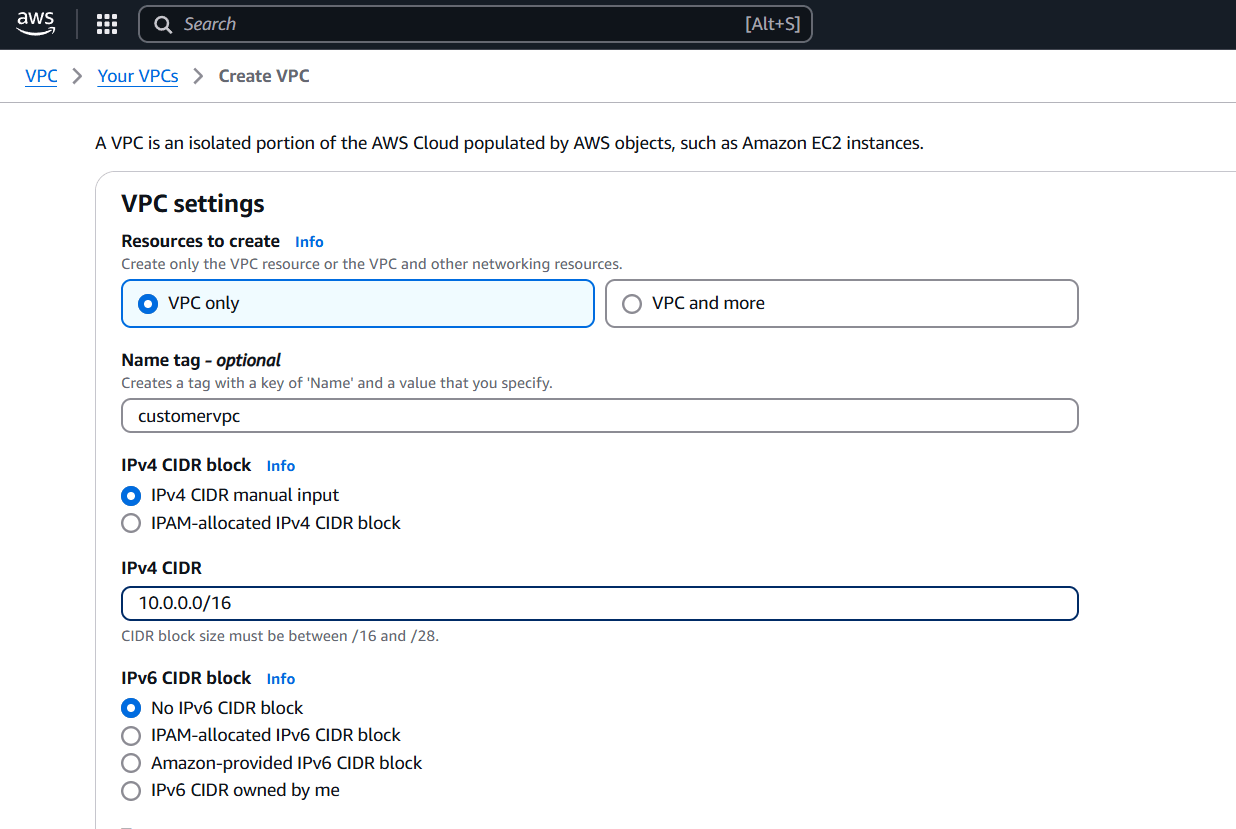
STEP 9: Now, you go to create customer VPC.
- Enter the name.
- Enter IPV4 CIDR.
- Click on create VPC.

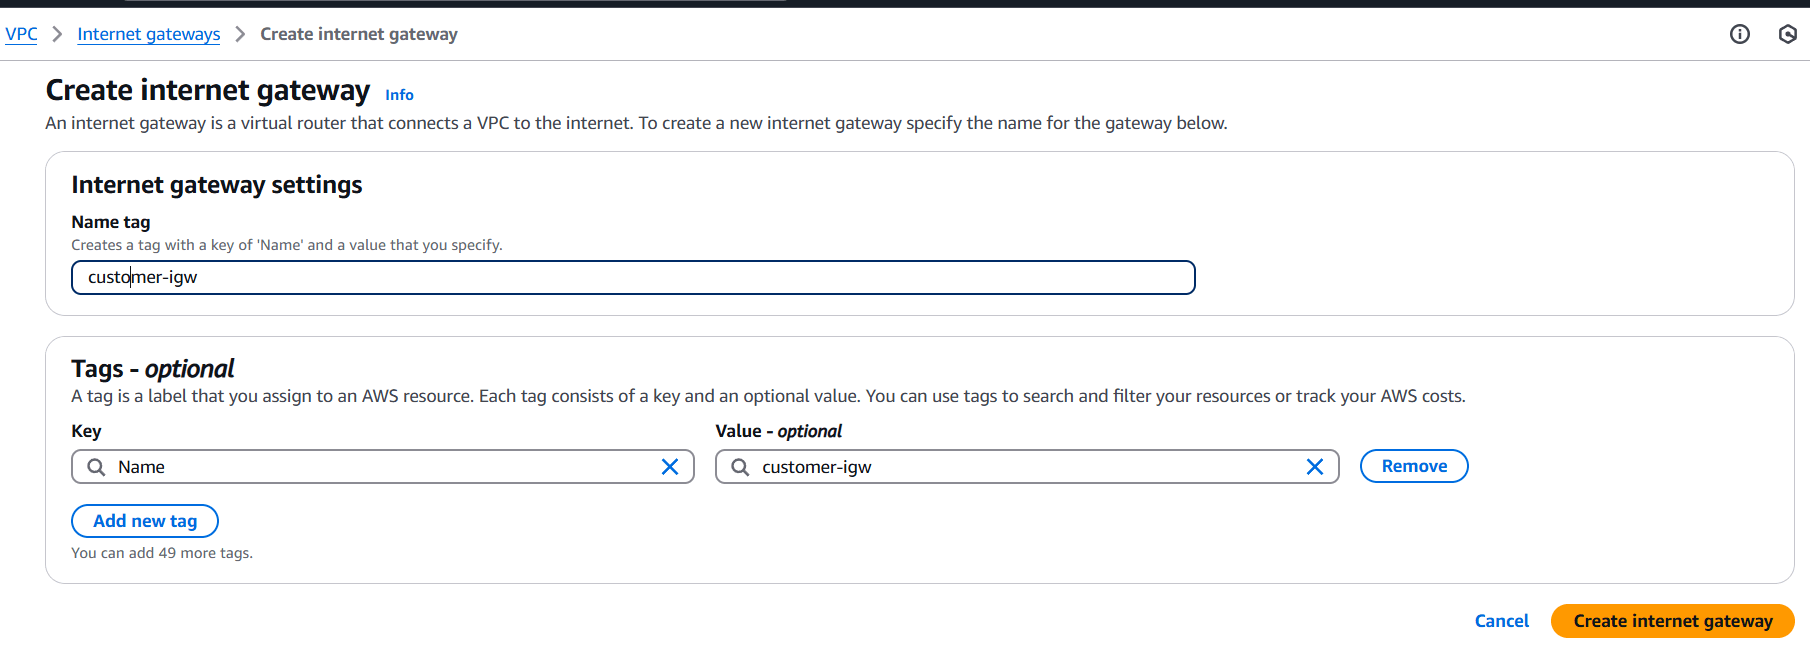
STEP 10: Create customer IGW and attach your created customer VPC.

STEP 11: Create subnet and enter the name.
- Select VPC and IPV4.
- Click on create subnet.
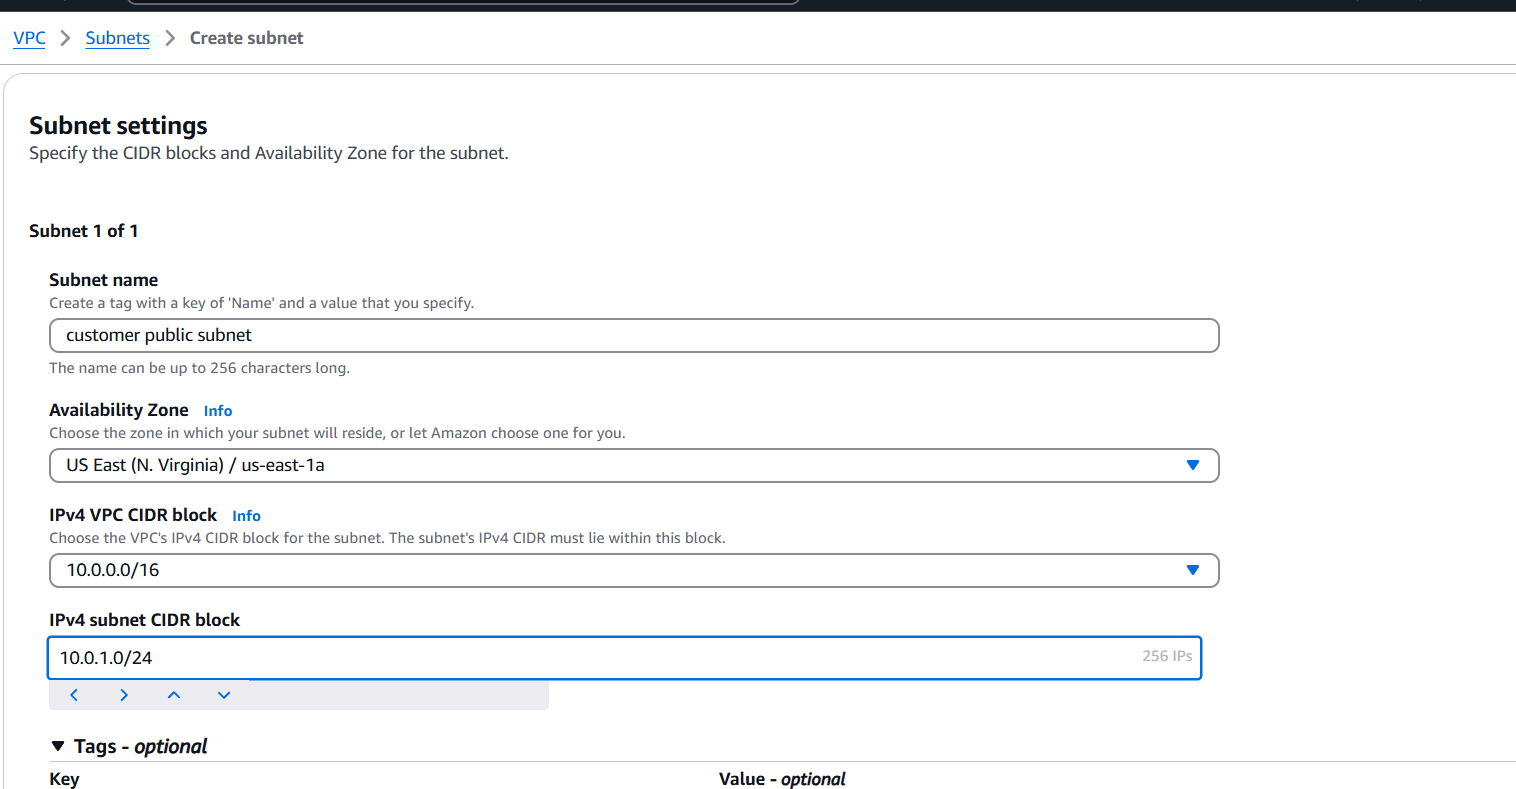
STEP 12: Create route table.
- Enter the name.
- Select VPC.
- Click on create route table.
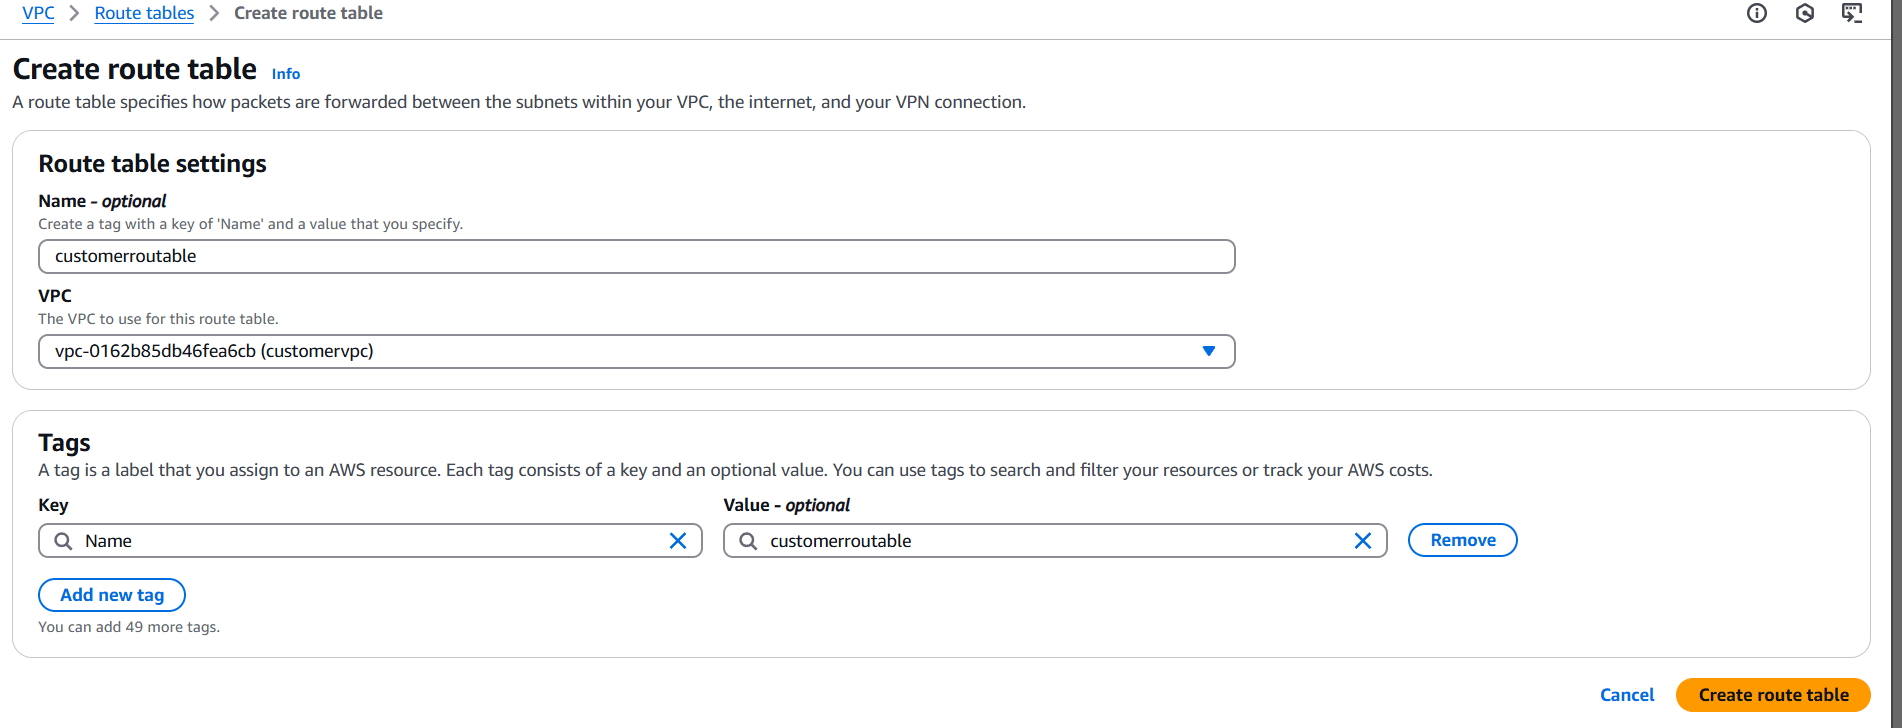
STEP 13: Select your created route table.
- Click on subnet association.
- Select your created subnet.


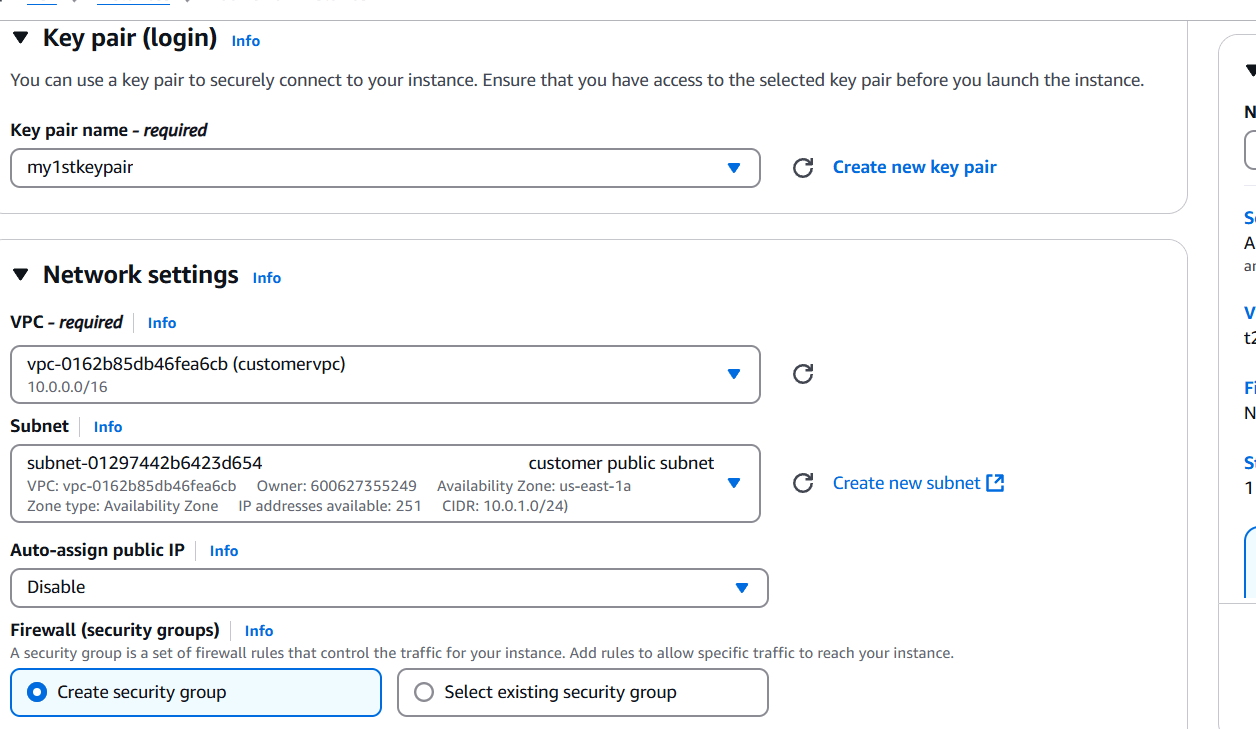
STEP 14: Create instance.
- Enter the instance name, AMI, instance type.
- Select your keypair.
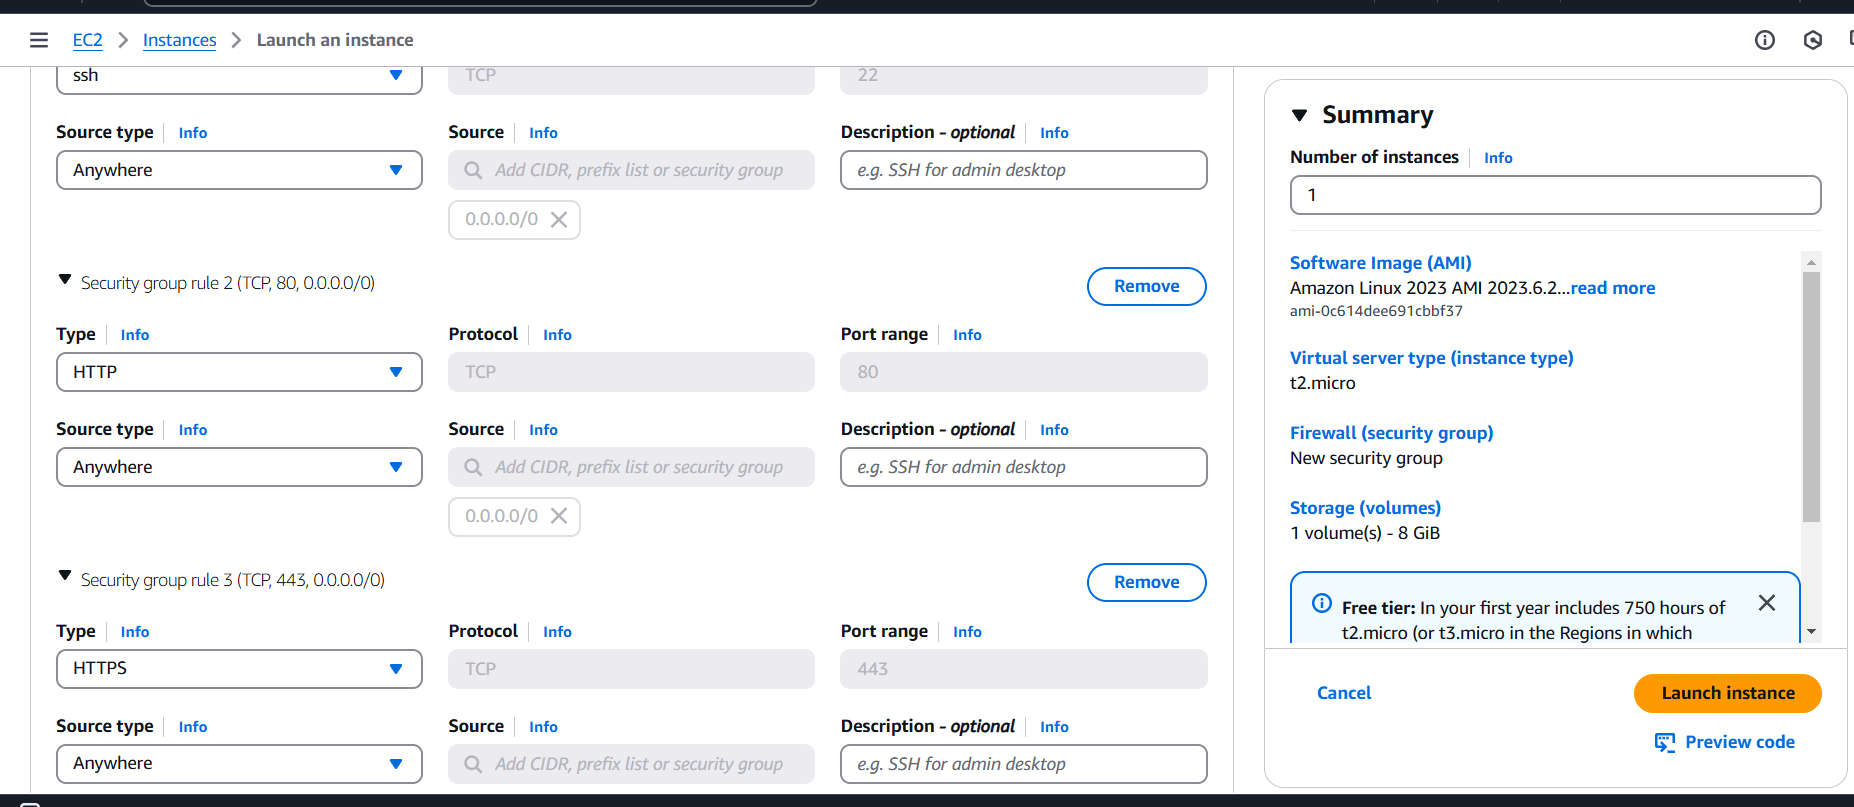
- Configure the security group with rules allowing SSH, HTTP, and HTTPS traffic from all IP addresses.
- Click on create instance.
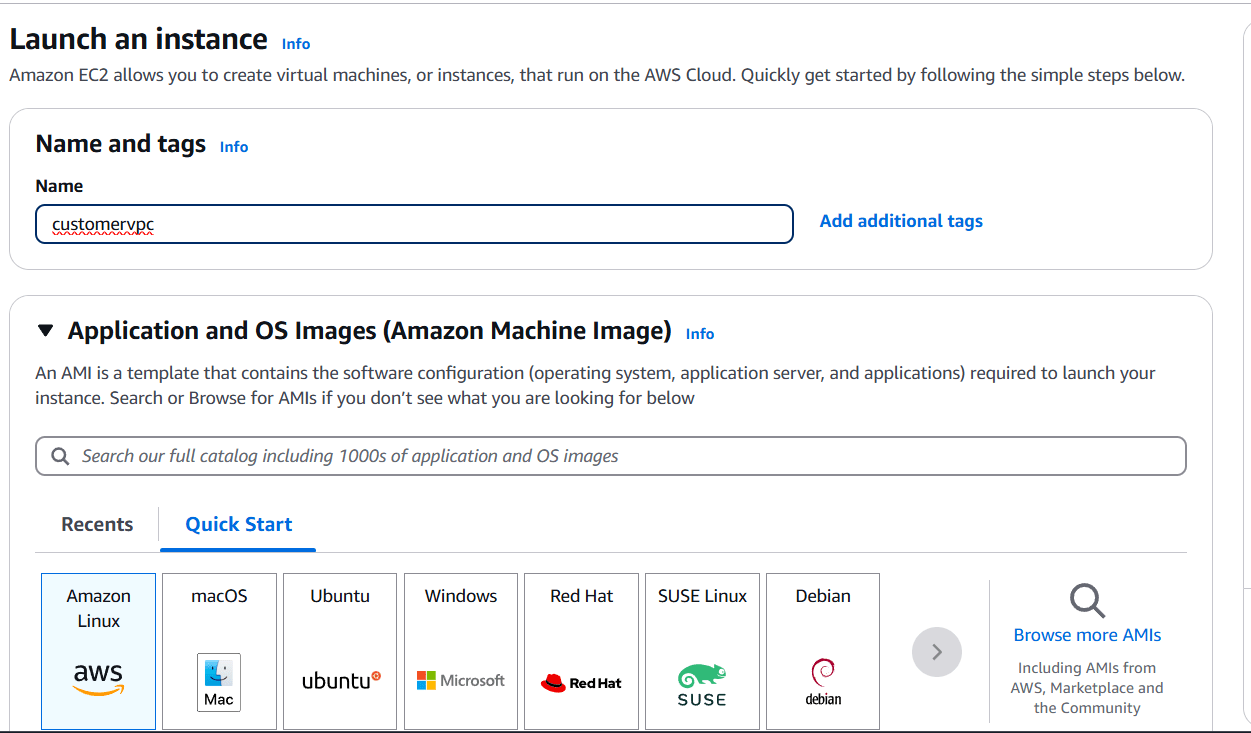
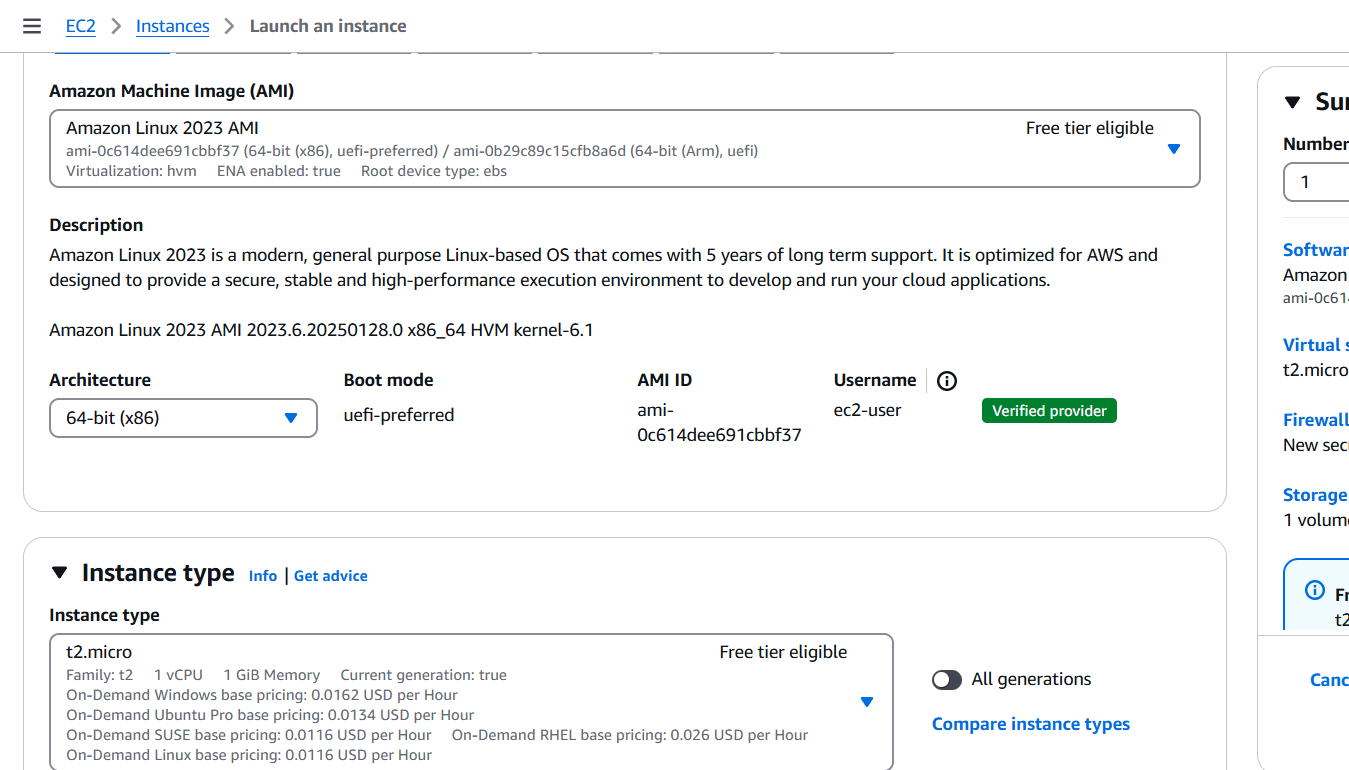

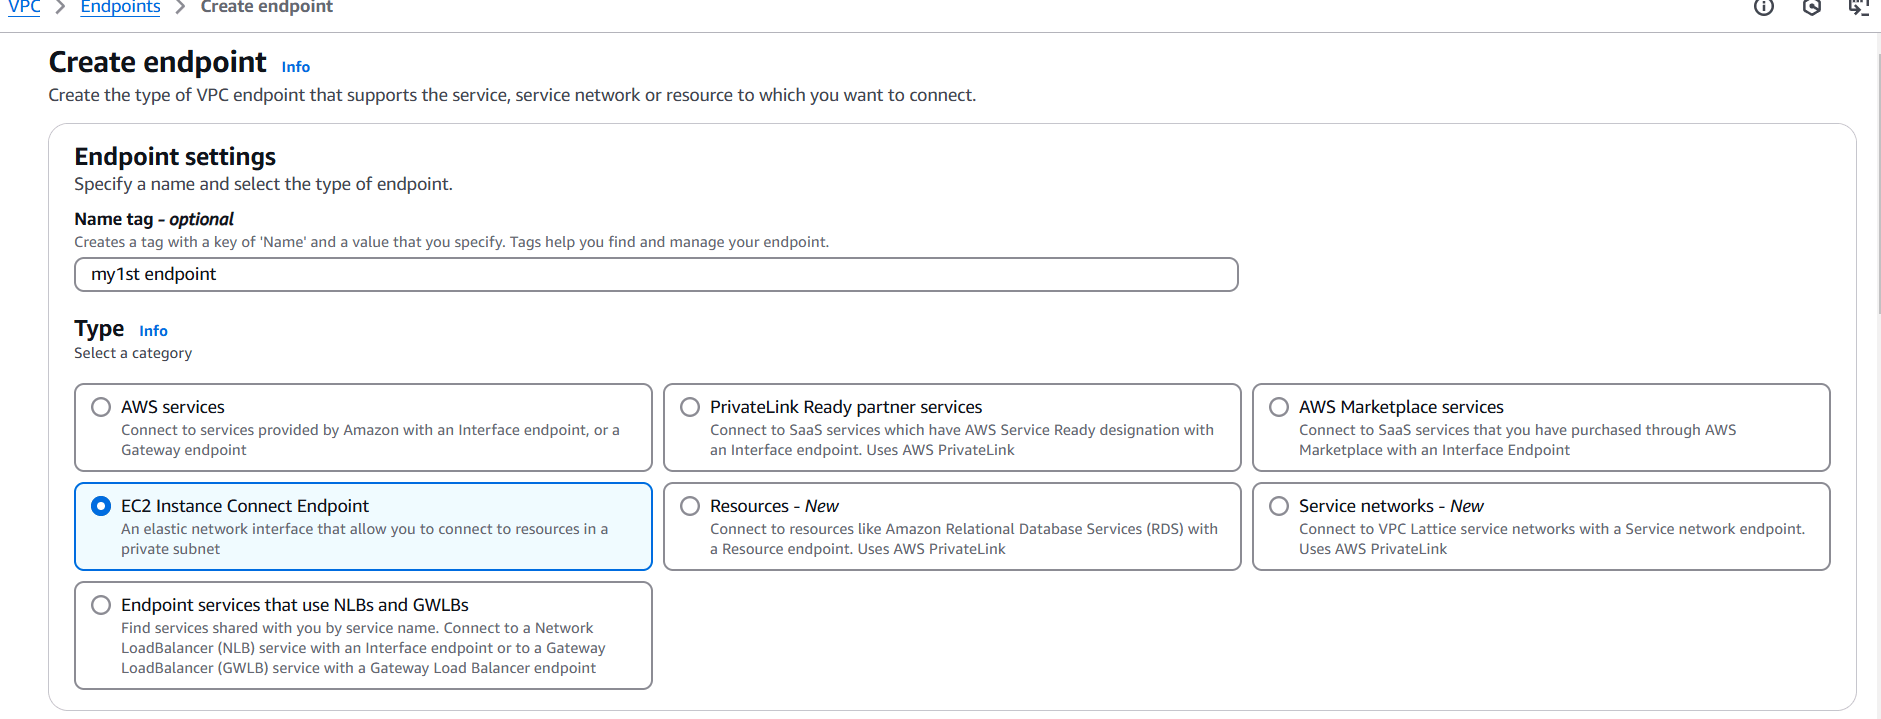
STEP 15: Create VPC End point.
- Enter the name.
- Select type.
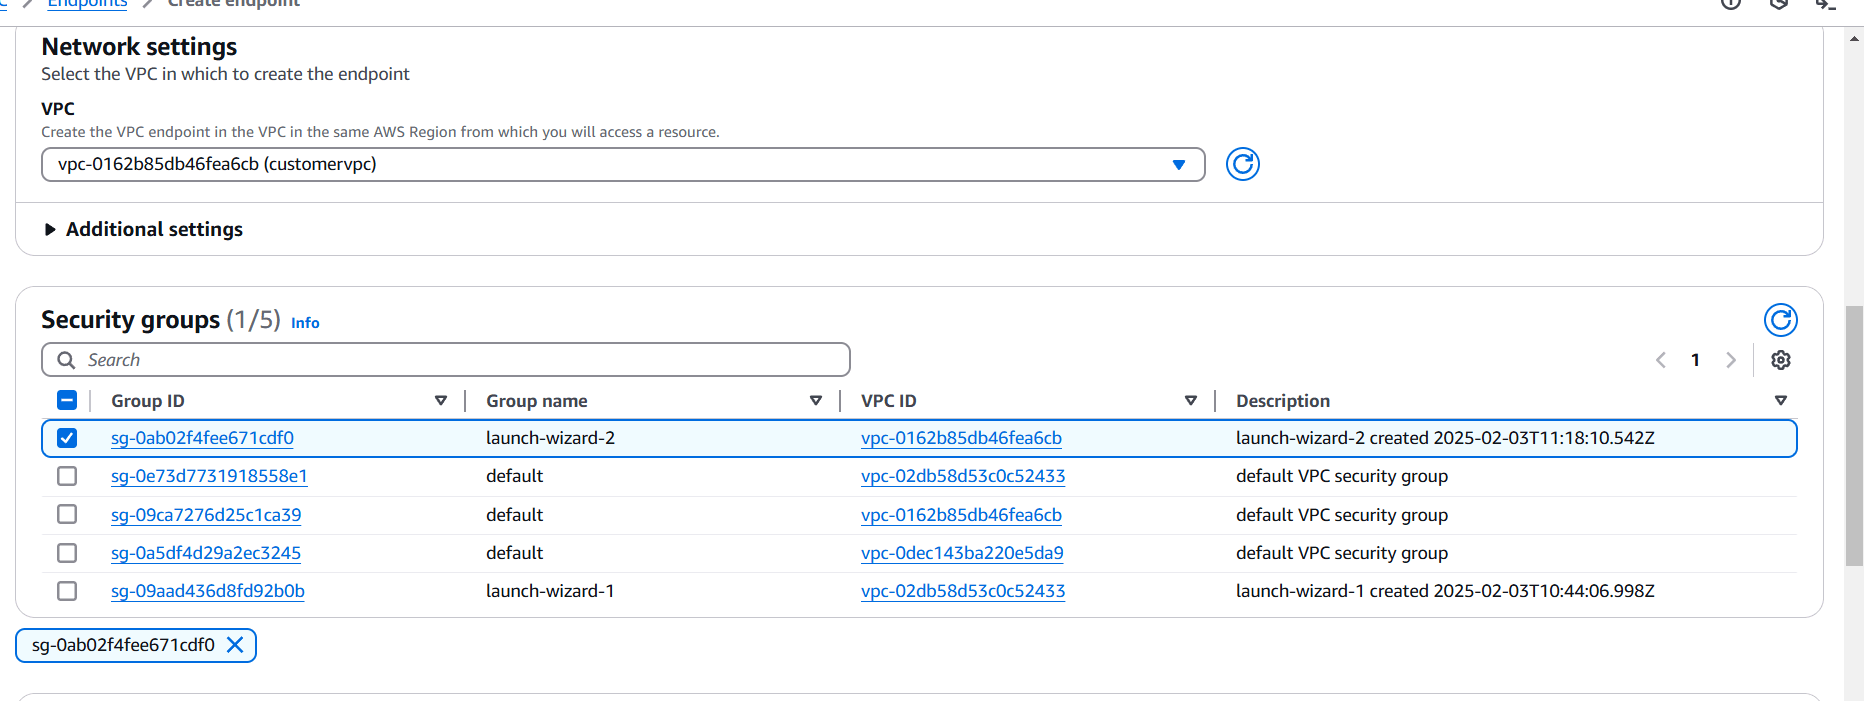
- And select security group and VPC.
Test the End-to-End Connection.
After creating the VPC Endpoint and configuring routing and security, test the connection to ensure that traffic from the consumer VPC can reach the service through the VPC Endpoint:
- From the consumer side, use a tool like
curl,wget, or any application to make a request to the private endpoint. - Monitor logs from your services and load balancer to ensure the requests are being routed correctly.
- Verify DNS resolution if you enabled private DNS. Ensure the correct endpoint DNS resolves to the private IPs.

Conclusion.
Implementing a VPC endpoint service in AWS is an essential step for optimizing security and performance when connecting your VPC to AWS resources or other VPCs. By following this step-by-step guide, you’ll be able to create a secure, private connection for your services with ease.

Add a Comment