Overview.
AWS FSx (Amazon FSx) is a fully managed service provided by Amazon Web Services (AWS) that offers highly scalable, performant, and cost-effective file storage options. It is designed to support workloads that require shared file storage for Windows and Linux-based applications.
There are two main types of Amazon FSx:
- Amazon FSx for Windows File Server: A managed file storage service that is built on Windows Server, providing features like SMB (Server Message Block) protocol support, Active Directory integration, and NTFS file system, making it ideal for applications that need Windows file system compatibility.
- Amazon FSx for Lustre: A managed file system optimized for high-performance computing (HPC), machine learning, and data-intensive workloads, using the Lustre file system. It’s designed for large-scale, high-speed data processing needs.

Now go to create a Amazon FSx.
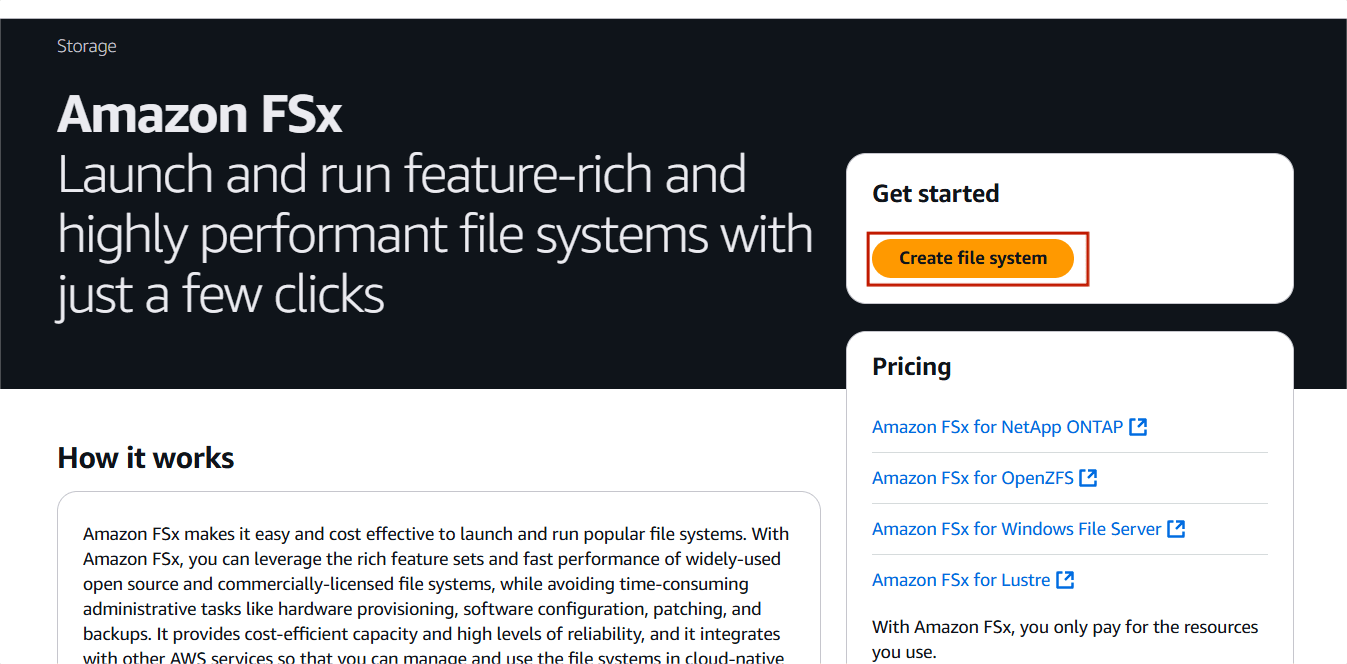
STEP 1: Go to the “Services” section & Search the “FSx”. Click on Create file system.
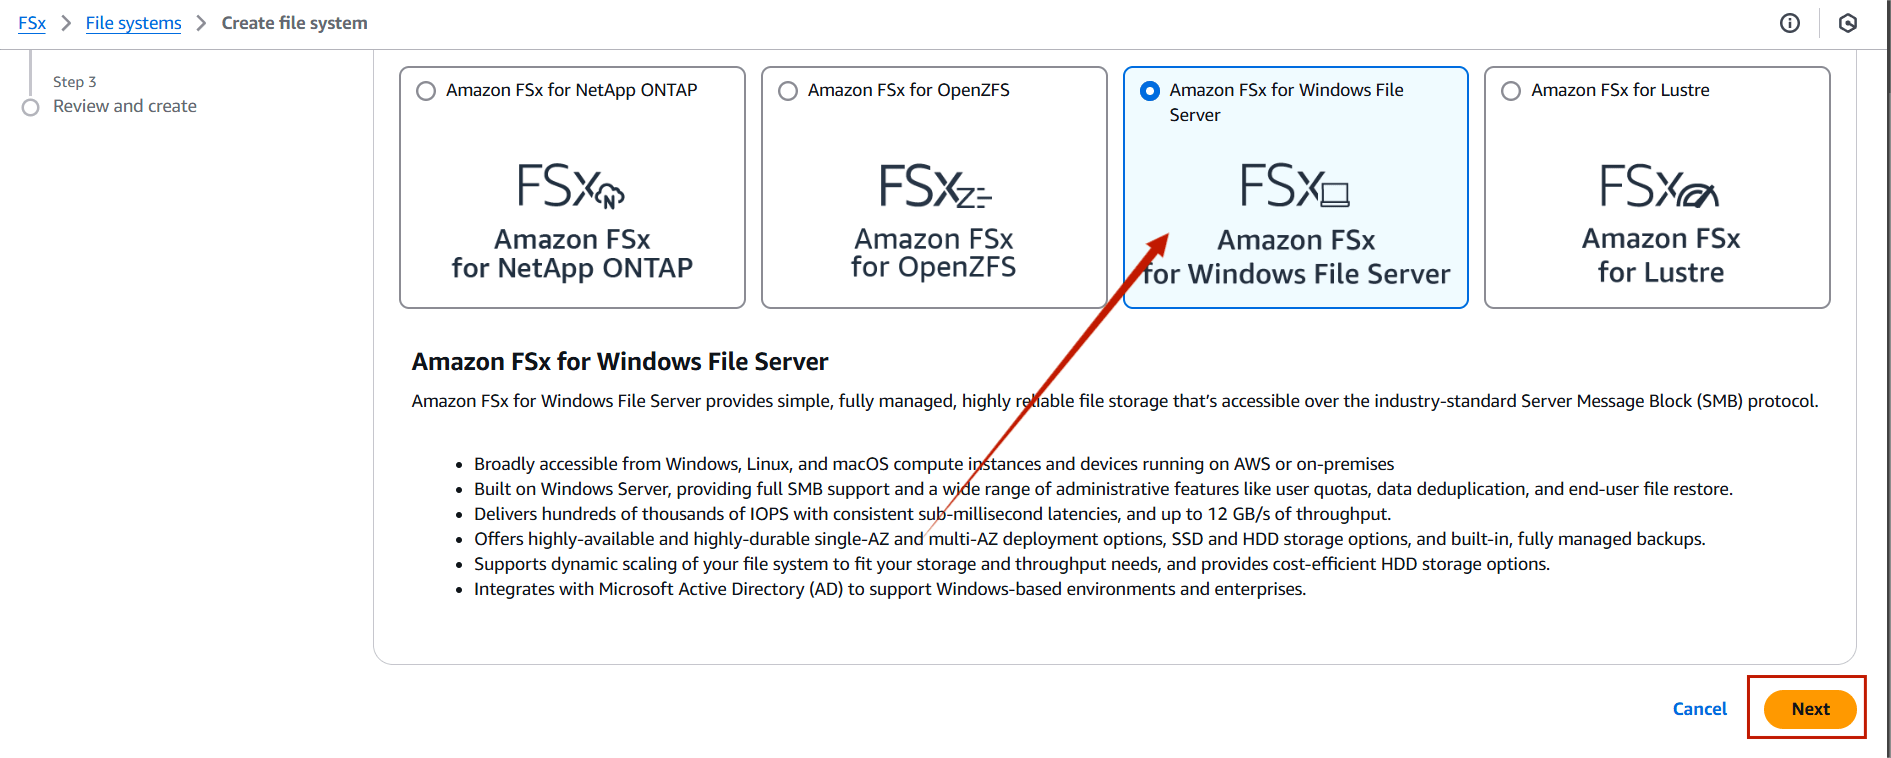
STEP 2: Choose the “Amazon FSx for Window File Server” .
- Click on next.
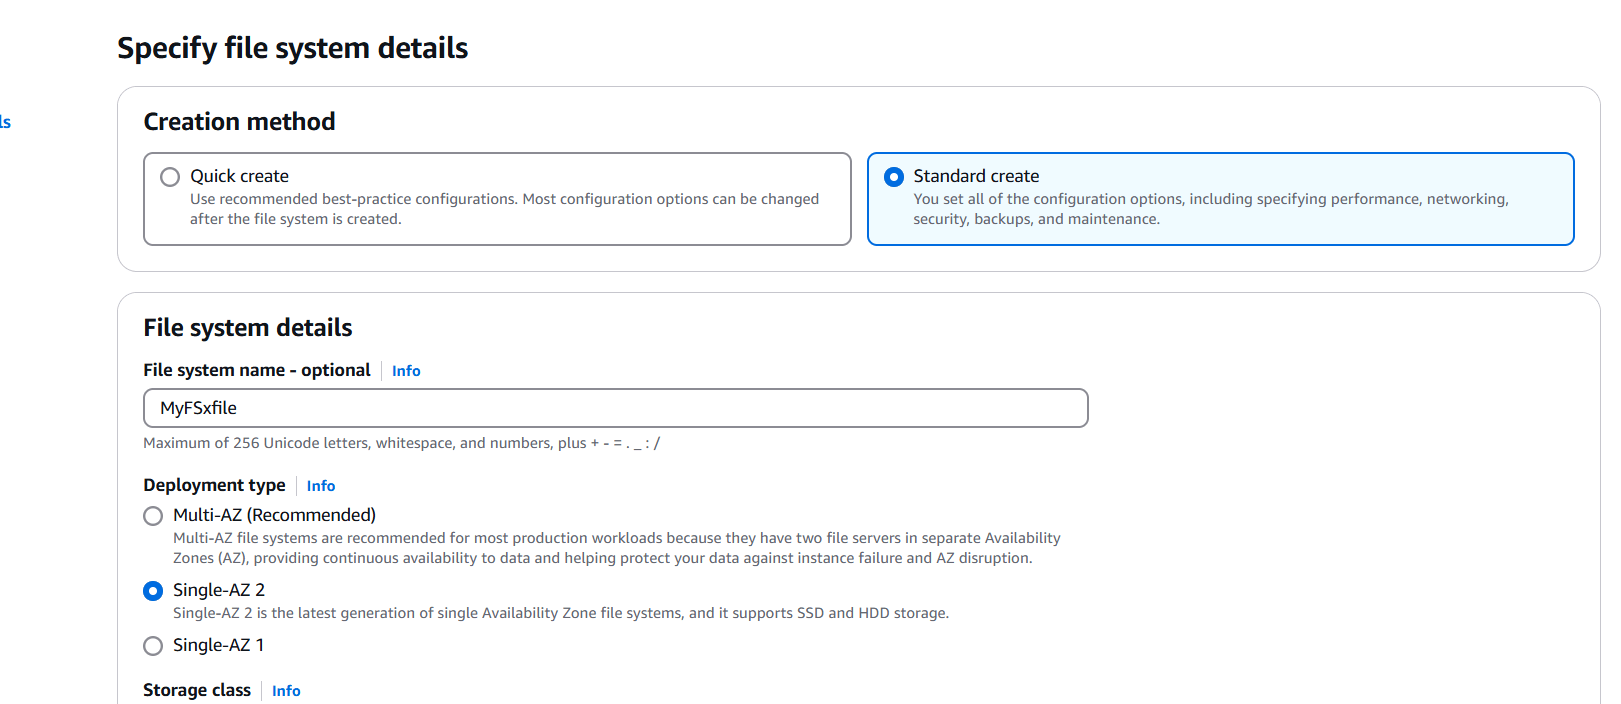
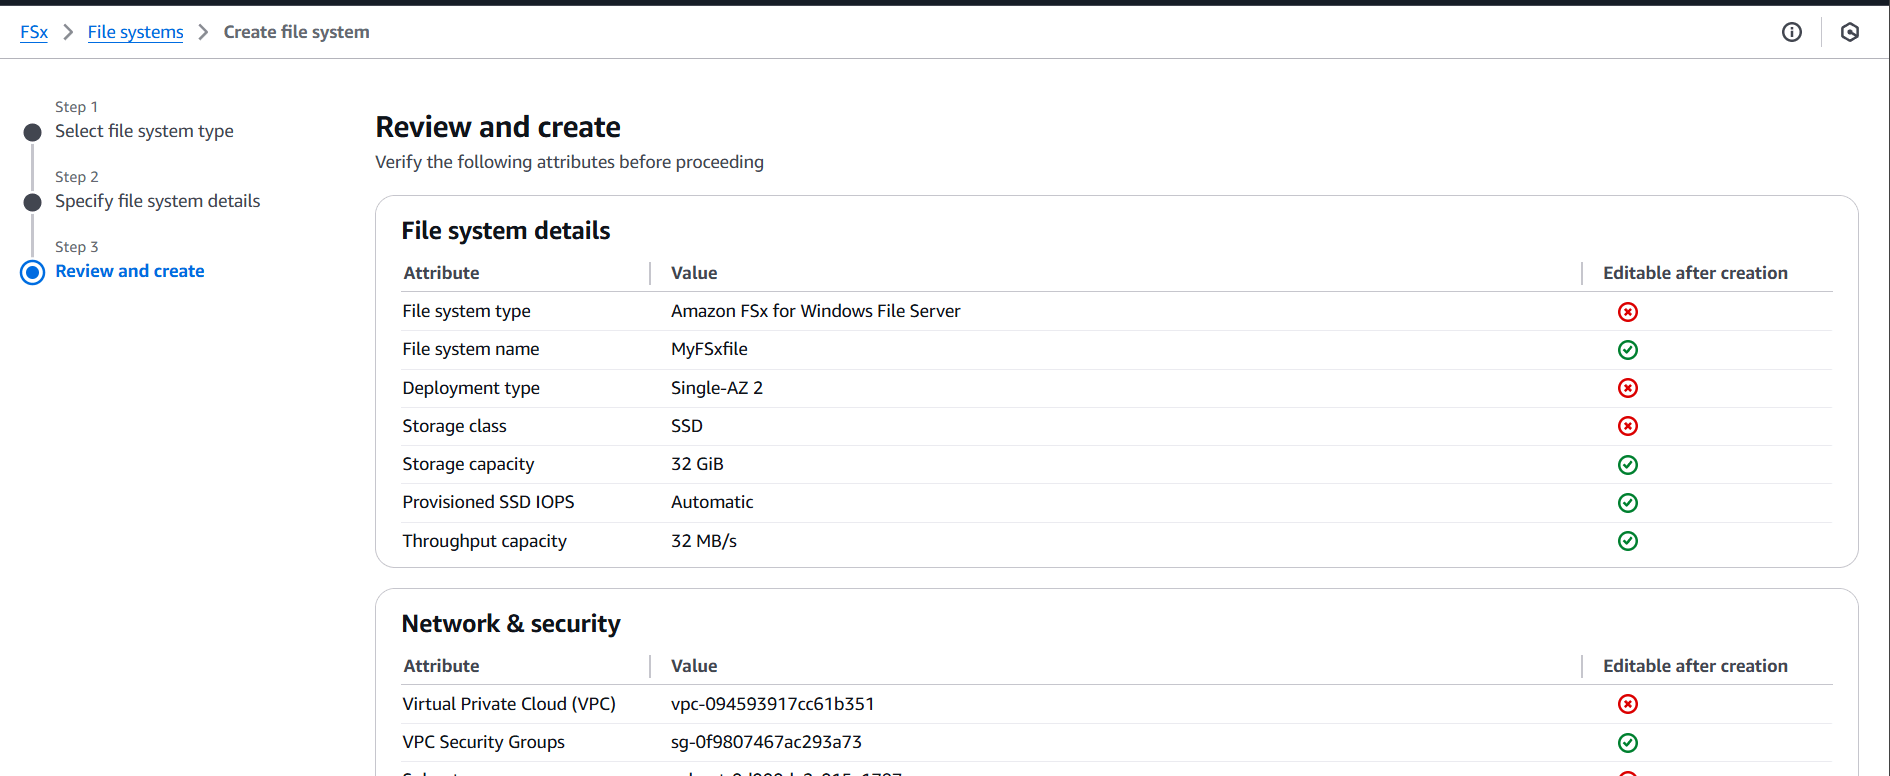
STEP 3: In the “File system details”, we will choose the following options.
- File system name — optional: FSx-For-Windows.
- Deployment Type — Single-AZ–2.
- Storage type — SSD.
- SSD Storage Capacity — 32 GiB.
- Provisioned SSD IOPS — Automatic (3 IOPS per GiB of SSD Storage).
- Throughput capacity- 32 MB/s (recommended).
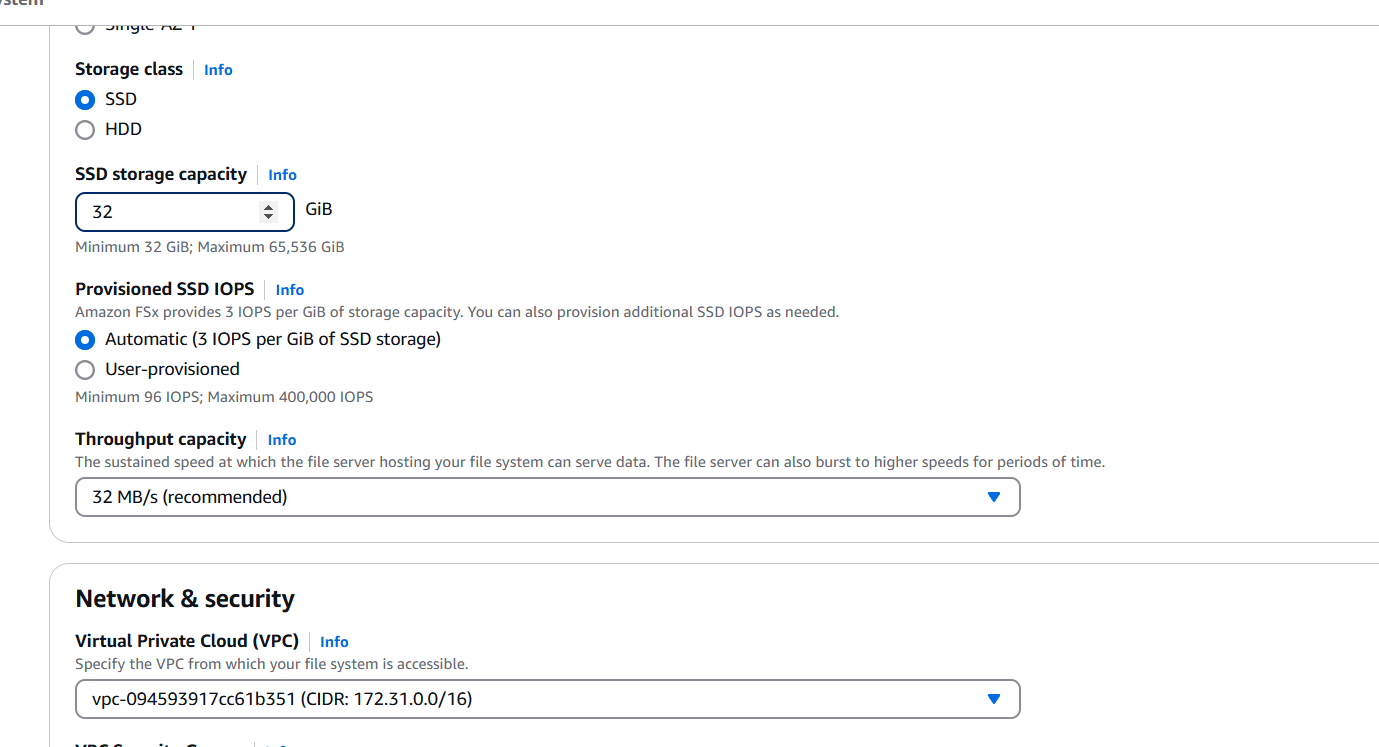
STEP 4: Select VPC, Security group and subnet.
- Windows authentication: AWS Managed Microsoft Active Directory.
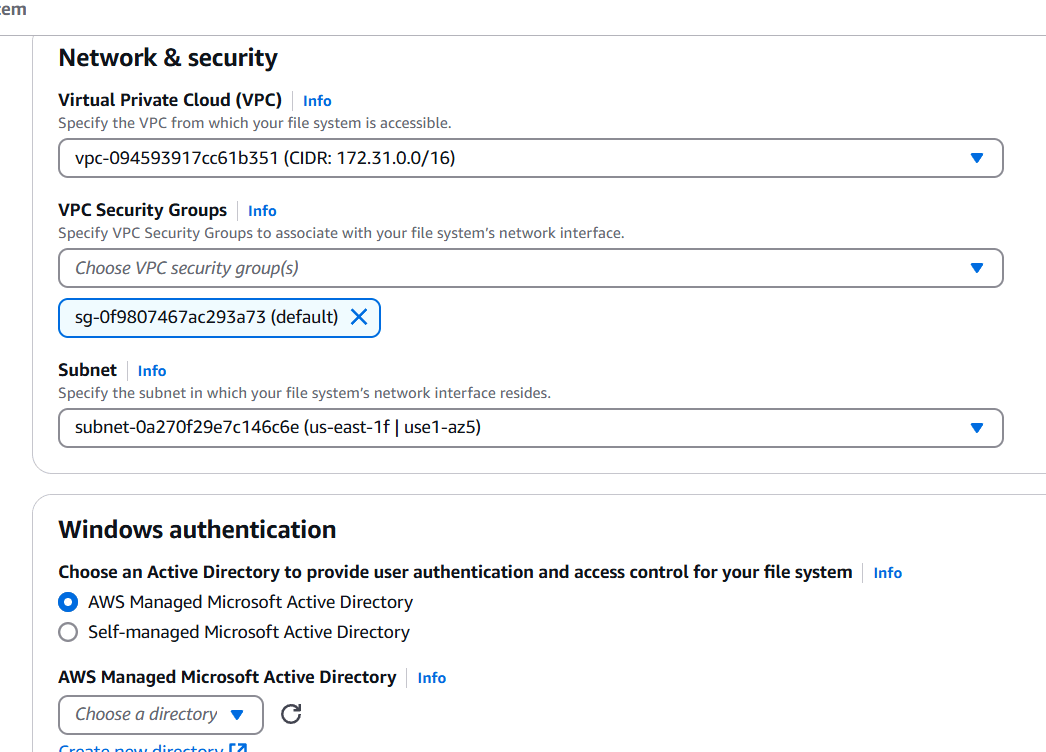
STEP 5: Click on the Create new directory.
- Choose the AWS Managed Microsoft AD.
- Click on next.
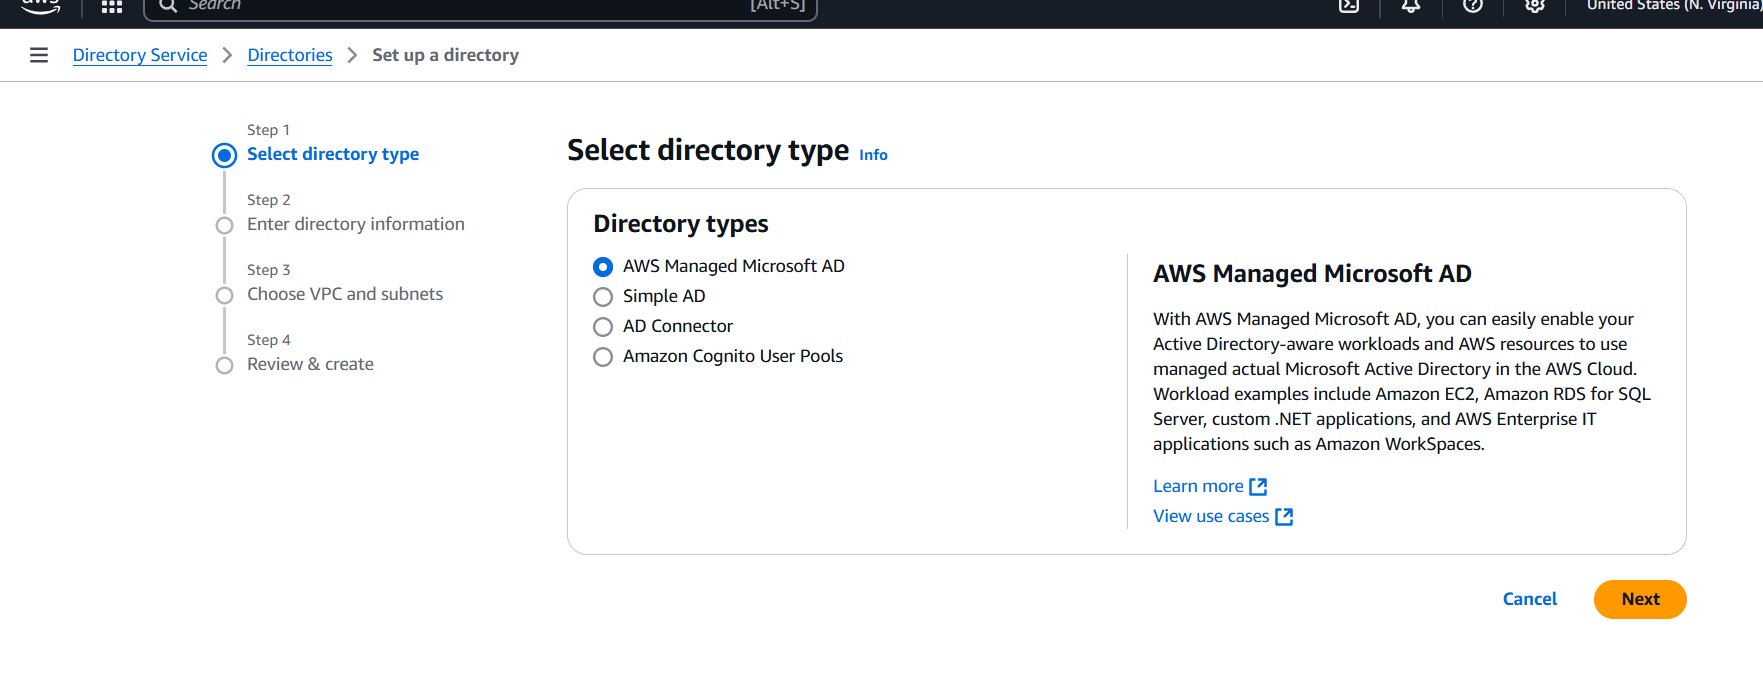
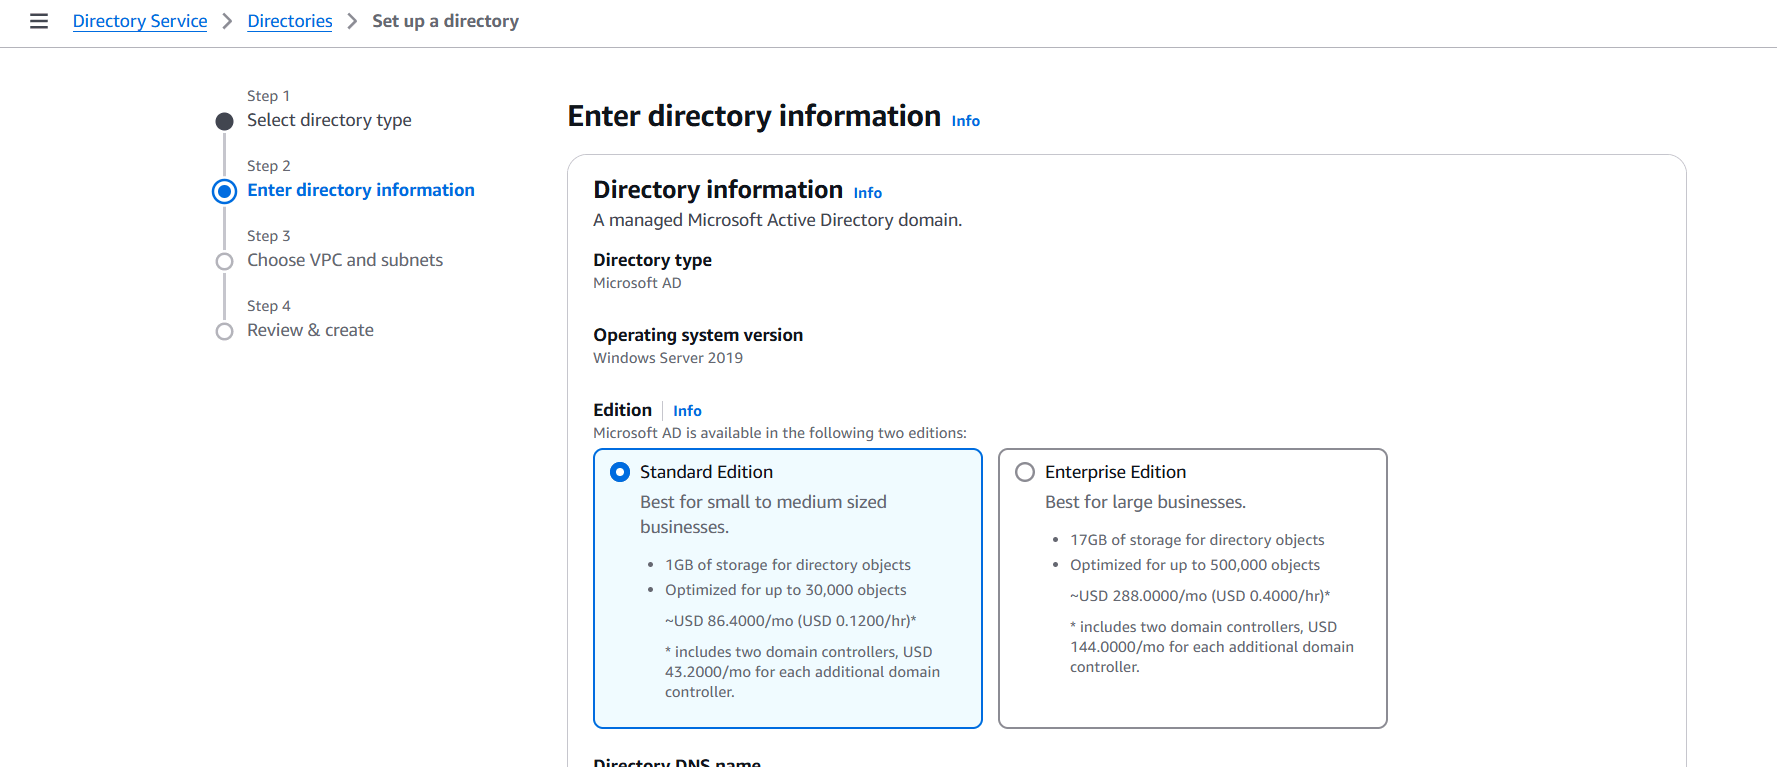
STEP 6: Edition: Standard Edition.
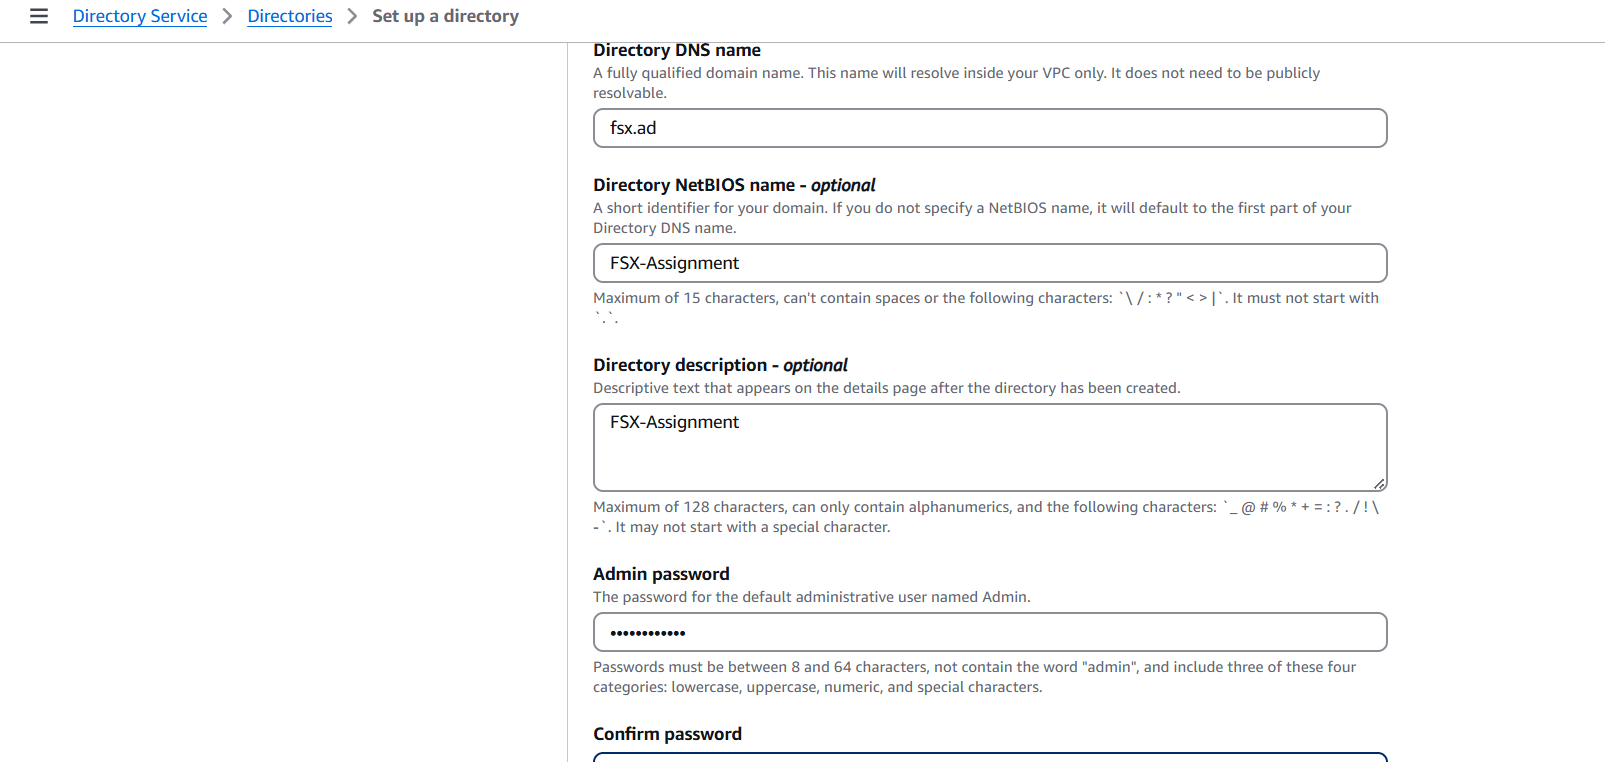
STEP 7: Directory DNS Name: fsx.ad.
- Directory NetBIOS: FSX-Assignment.
- Choose the “Admin password” & also confirm your password over here. Click on the “Next”.
STEP 8: Select VPC and click on next.
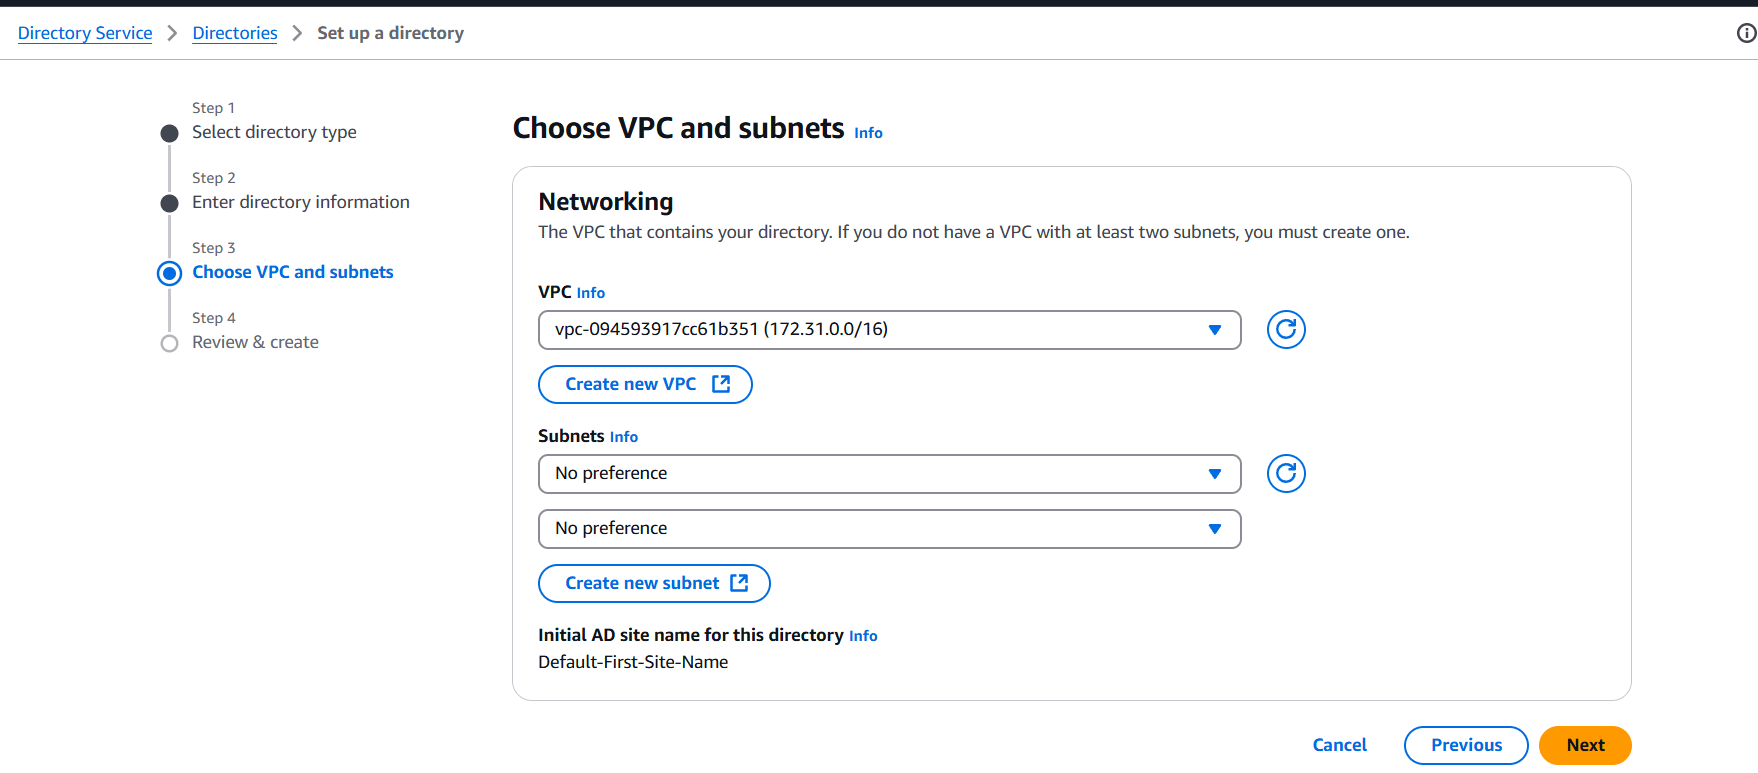
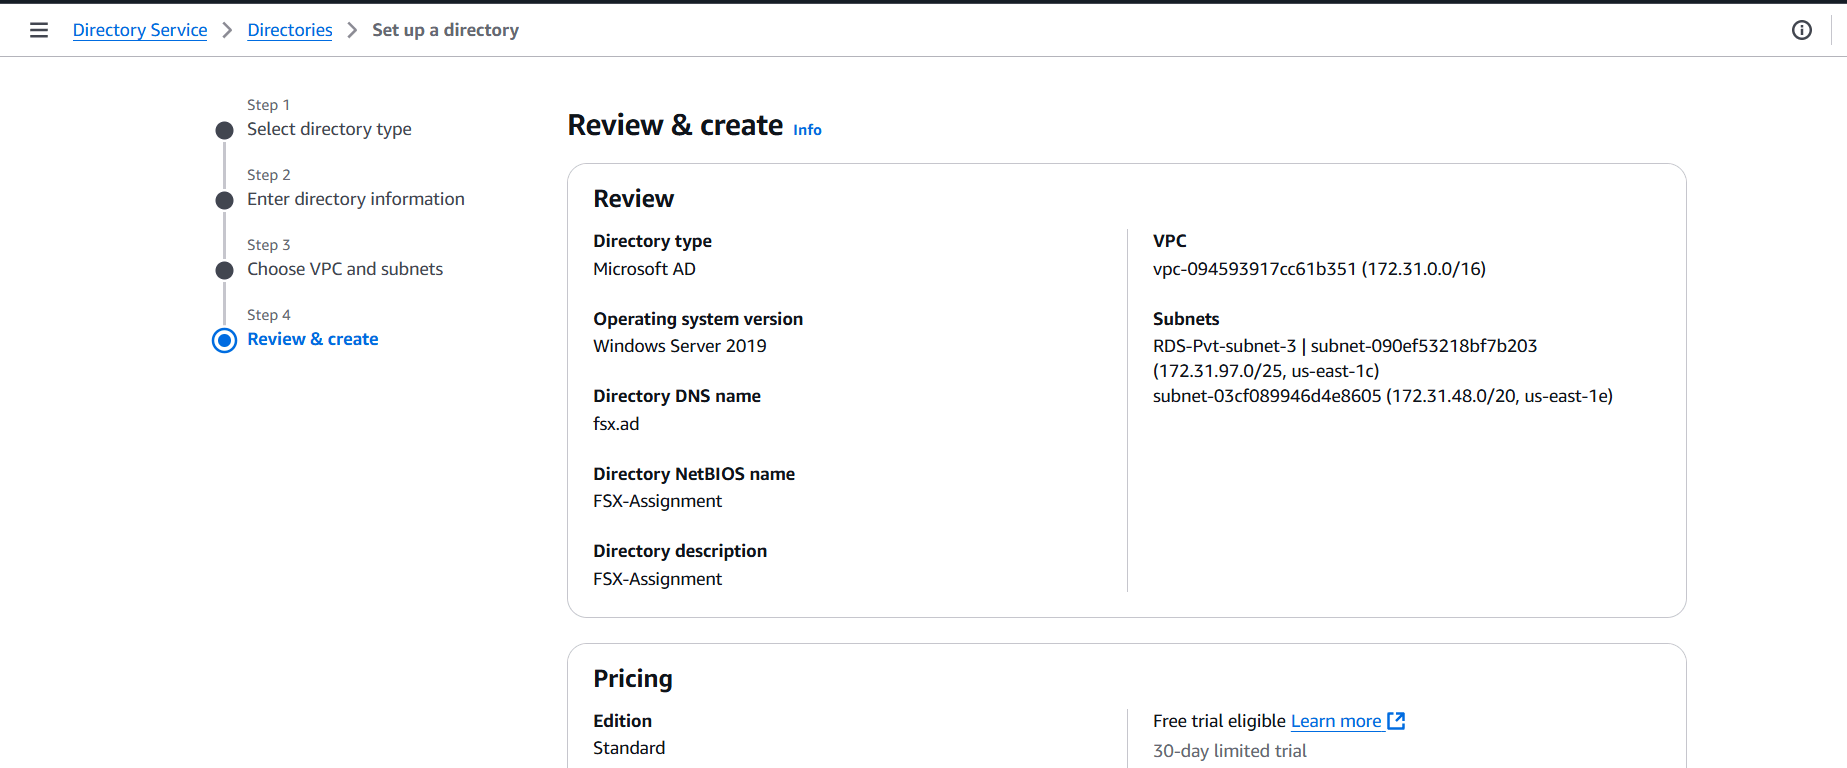
STEP 9: It will be taking 30 Minutes to be go from the “Creating” to the “Active” Status.


STEP 10: Choose your created directory (fsx.ad).
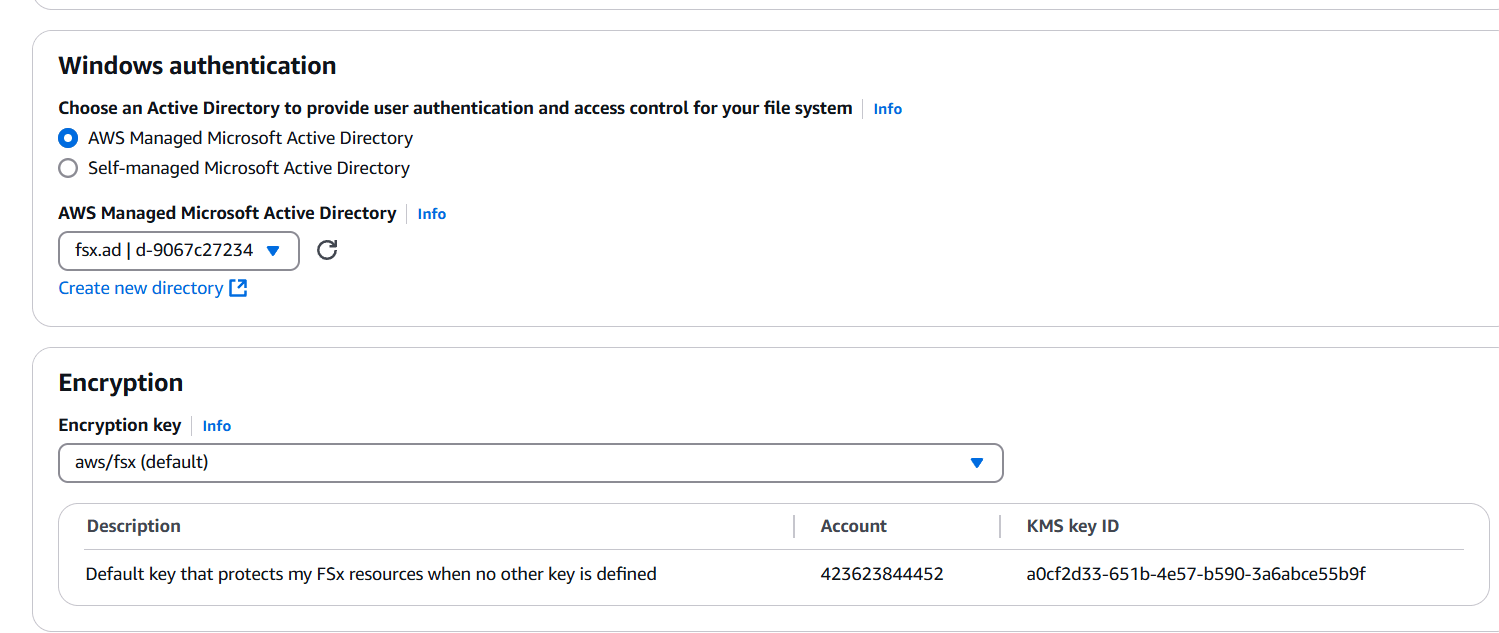
STEP 11: click on the Next.
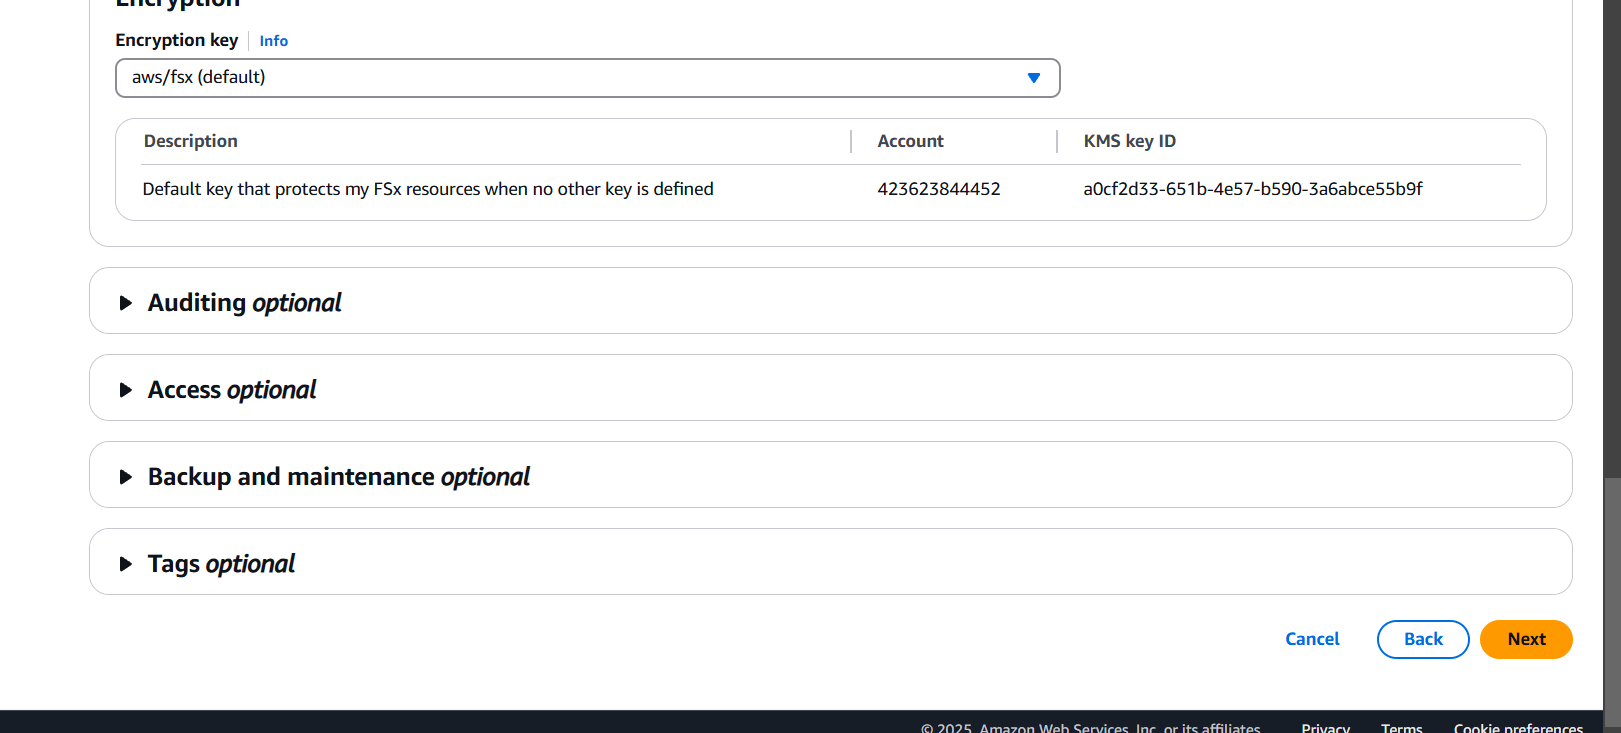
STEP 12: : Click on the “Create file system”.
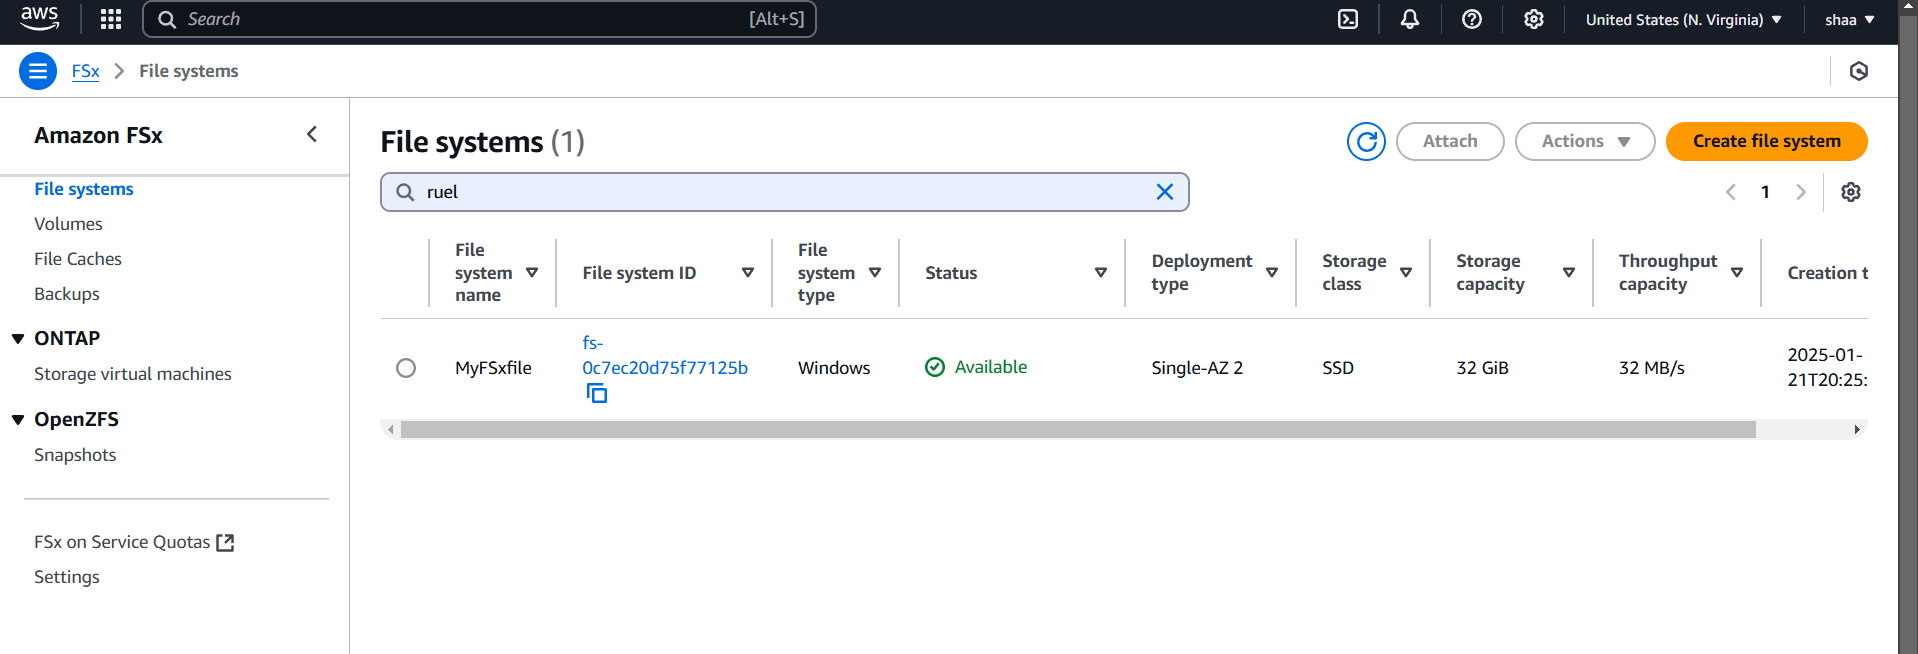
STEP 13: it will show the status as Creating. It will take 30 minutes to be shown Status as Available.

Conclusion.
In conclusion, AWS FSx provides a powerful and flexible file storage solution for a variety of use cases. Whether you need a Windows-compatible file system with Amazon FSx for Windows File Server or require high-performance storage for data-intensive applications with Amazon FSx for Lustre, AWS ensures a fully managed experience with ease of scalability, reliability, and security. By leveraging AWS FSx, businesses can streamline their storage management, reduce administrative overhead, and focus on their core operations while benefiting from high-performance file systems tailored to their specific needs.

Add a Comment