Introduction.
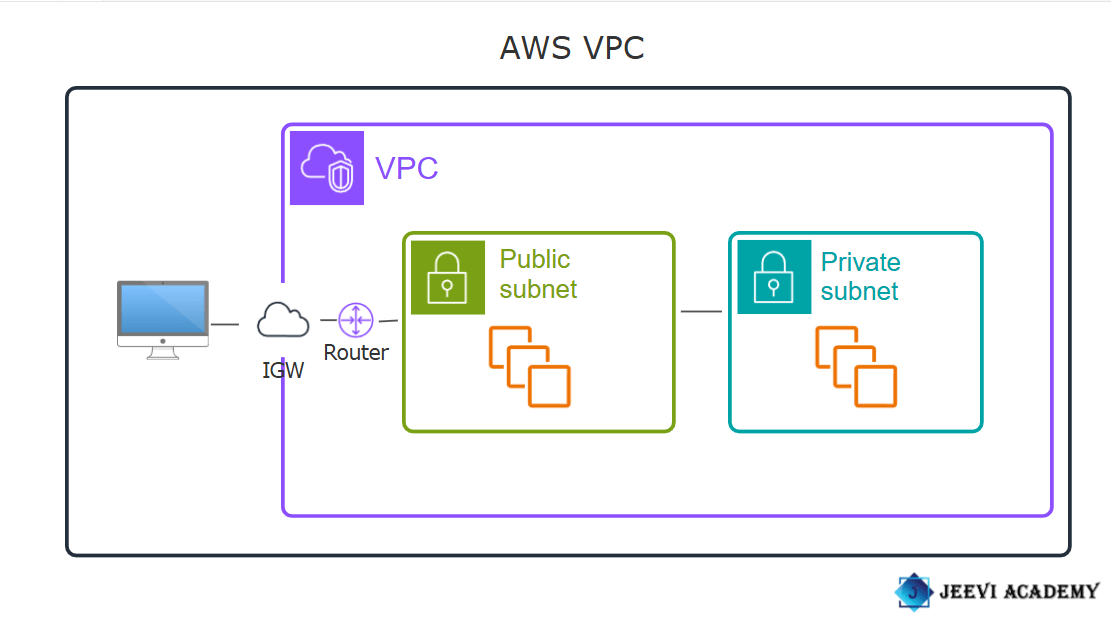
VPC: A VPC (Virtual Private Cloud) in AWS (Amazon Web Services) is a logically isolated section of the AWS cloud where you can define and control a virtual network. It’s like a private data center in the cloud, but with the flexibility and scalability that AWS provides.
Subnets: In AWS, a subnet is a range of IP addresses in your VPC (Virtual Private Cloud) that you can use to organize and isolate resources within the network. Subnets allow you to group instances based on security, performance, or application needs, and you can use them to create a tiered architecture, such as separating web servers, application servers, and databases into different subnets.
Route Table: A Route Table in AWS is a set of rules (routes) that determine where network traffic is directed within your Virtual Private Cloud (VPC). It essentially controls the flow of traffic between subnets in your VPC, as well as between your VPC and external networks like the internet, on-premises networks, or other VPCs. Each subnet in a VPC is associated with a route table that defines how traffic is routed. You can customize the route tables to suit your networking needs, and AWS allows you to define routes for various network destinations.
Internet Gateway(IGW): An Internet Gateway (IGW) in AWS is a scalable, redundant, and highly available component that allows communication between resources in your VPC (Virtual Private Cloud) and the internet. It serves as a bridge between the VPC and the public internet, enabling instances in a public subnet to access the internet (for things like downloading updates or communicating with external services) and allowing inbound traffic to reach those instances.

Diagram:
Now, let’s go ahead and create a VPC!
Task 1 : Create VPC.
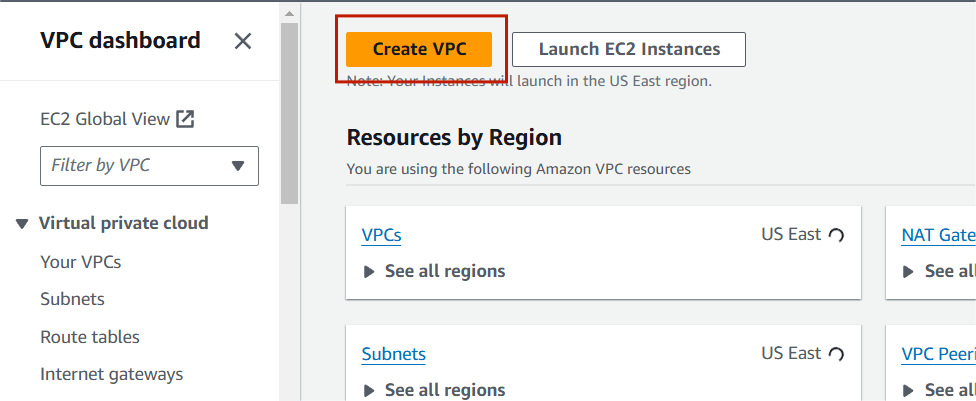
Step 1: Navigate the VPC. Click on create VPC.

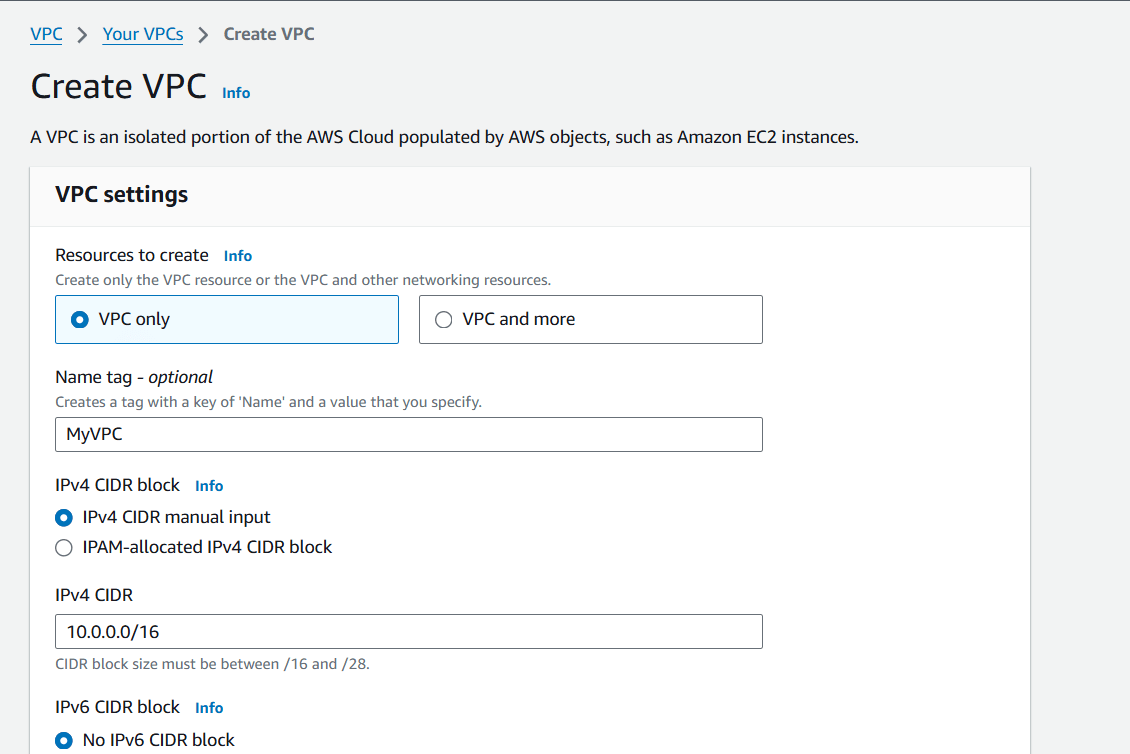
STEP 2 : Select the following details.
Resources to create : vpc only.
Name : My VPC.
IPV4CIDR : 10.0.0.0/16.
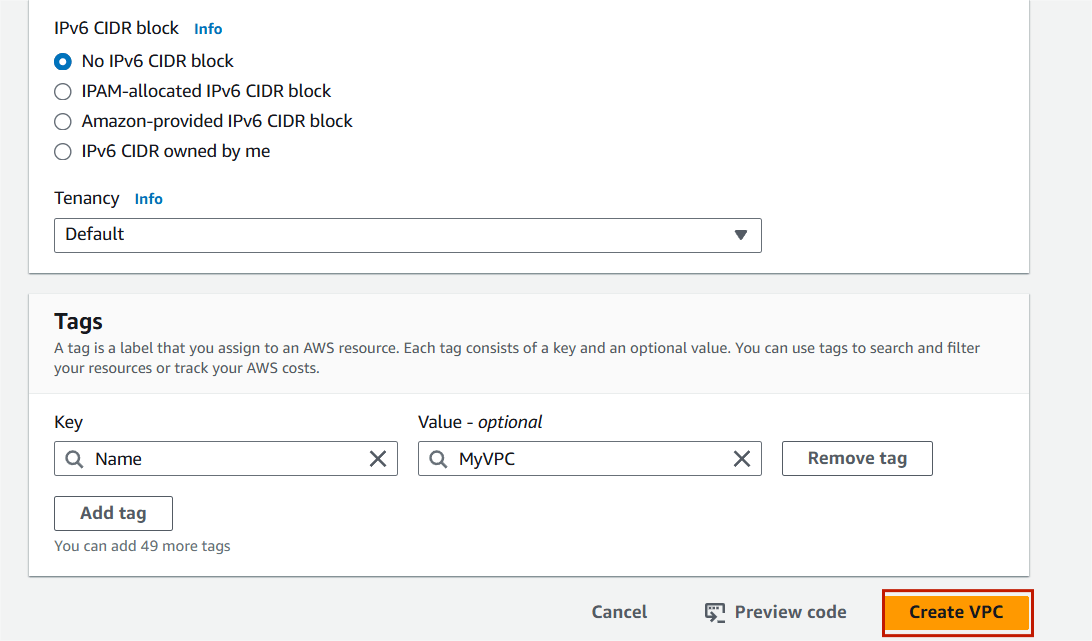
Step 3 : Click on create VPC.
Task 2 : Create Subnets.
Public subnet.
Step 1 : Click on subnet on your left side panel.
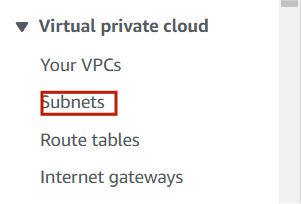
Step 2 : Click on Create Subnet.

Step 3 : Select your VPC (My VPC).
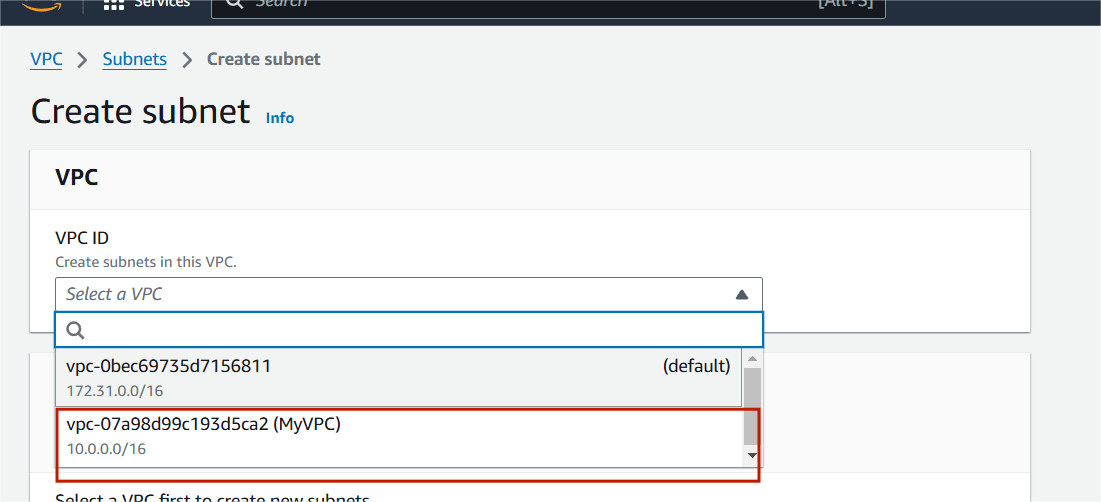
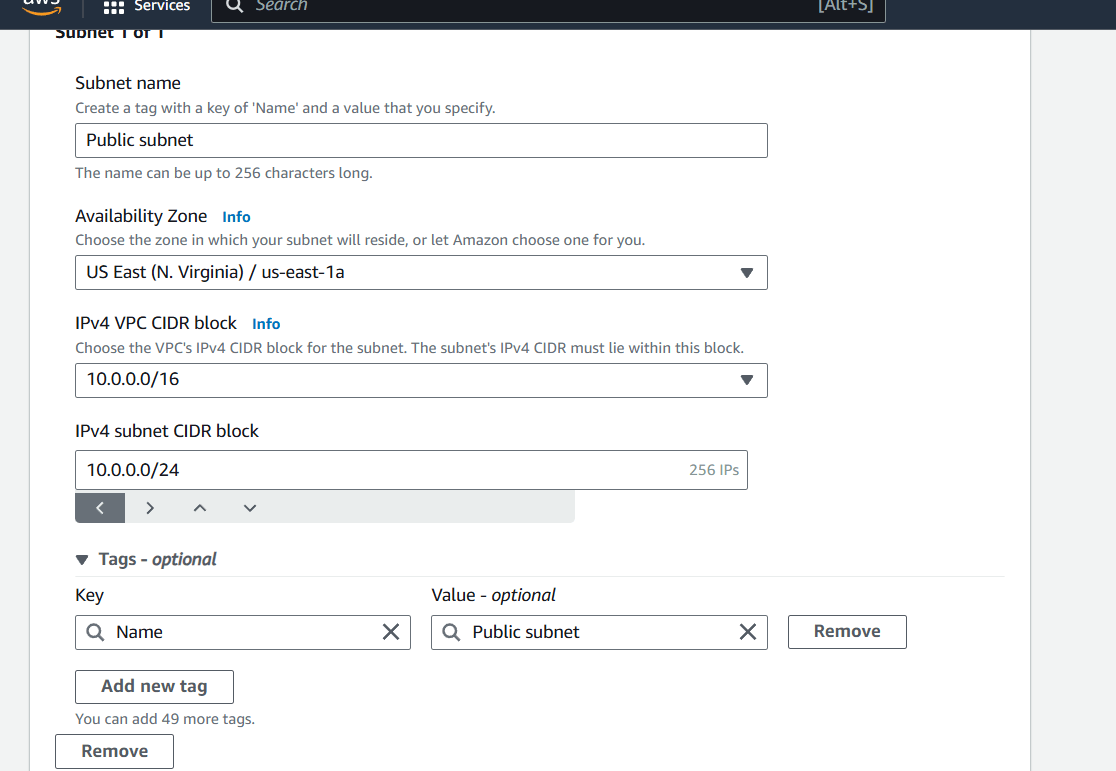
Step 4 : Subnet Name : Public Subnet.
IPv4CIDR : 10.0.0.0/24.
Then , next click on create subnet.
private subnet.
Step 5 : Now , Click Create Subnet.
Step 6 : Select your VPC (My VPC).
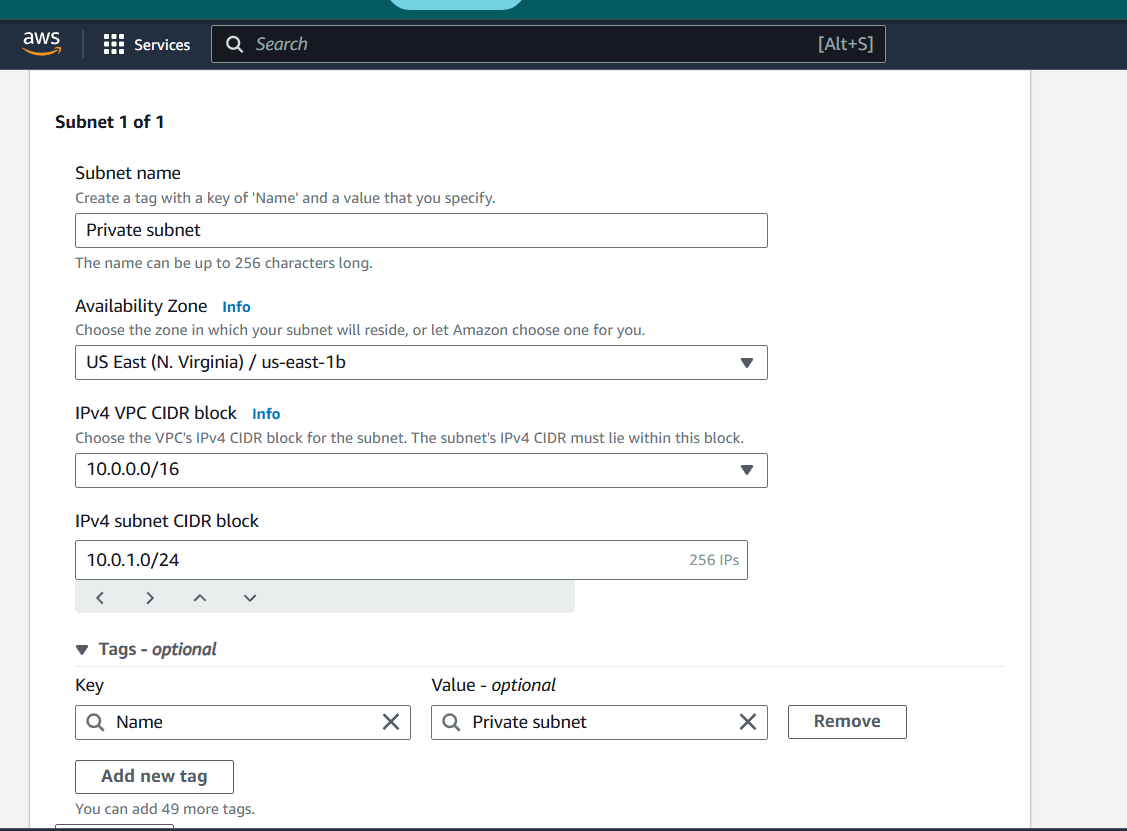
Step 7 : Subnet Name : Private Subnet.
IPv4CIDR :10.0.1.0/24.
Then , next click on Create subnet.
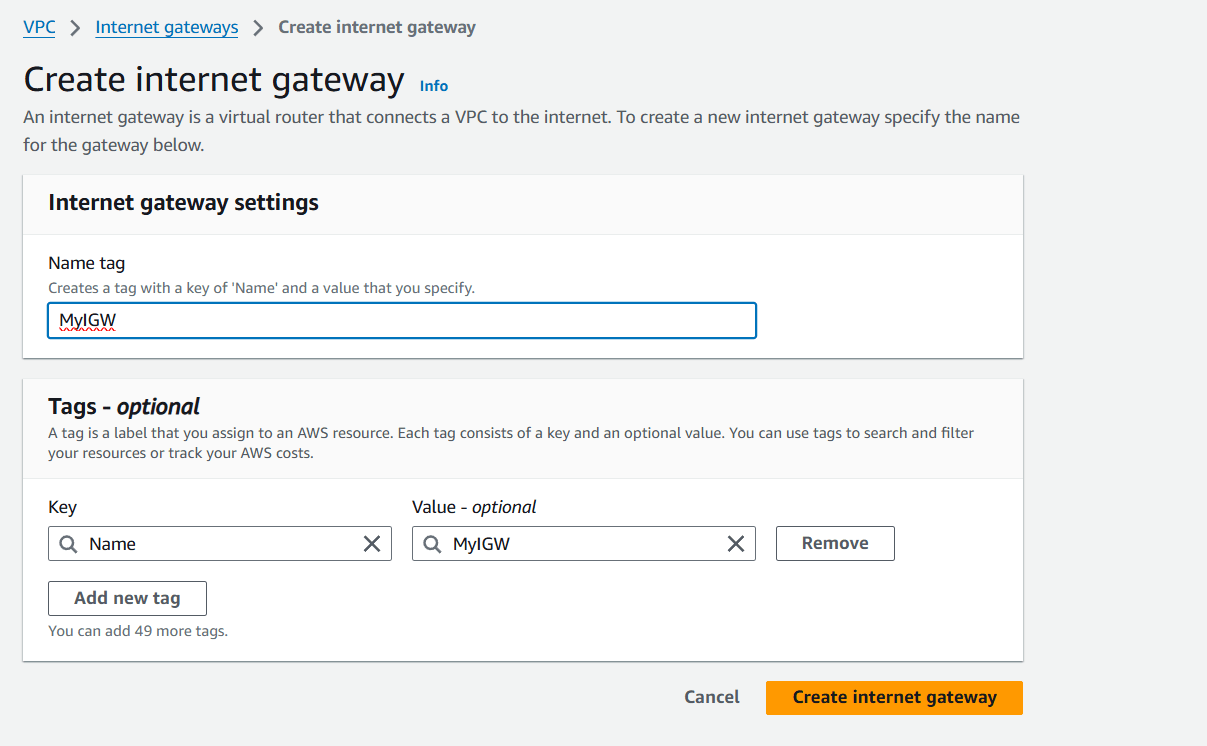
Task 3 : Create Internet Gateway.
Step 1 : Click on Internet Gateway on your left side panel.
Step 2 : Name : MyIGW.
Step 3 : Click on create internet gateway.
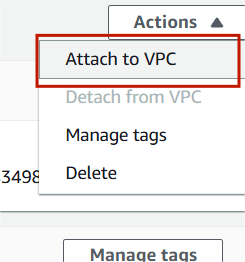
Step 4 : Select your IGW , Click on action and select Attach to VPC.
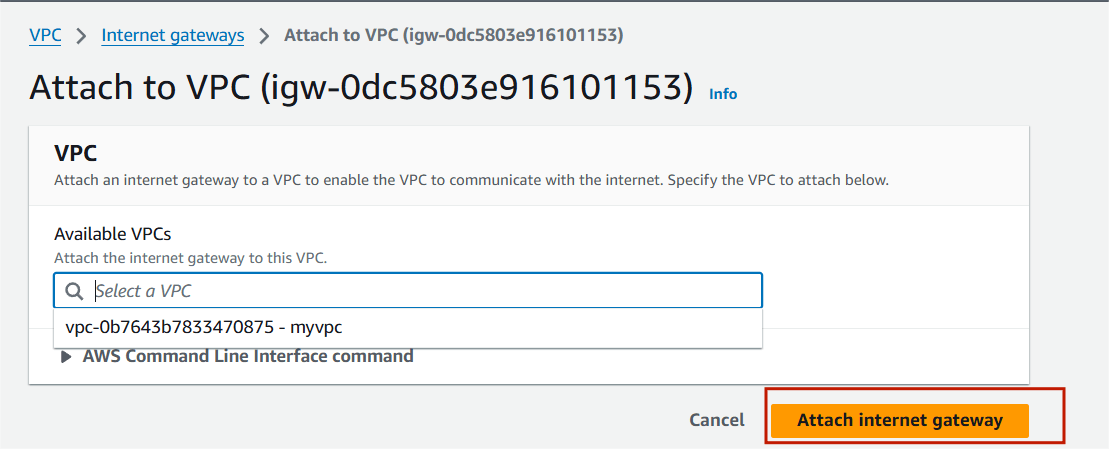
Step 5 : Select your VPC and attach internet gateway.
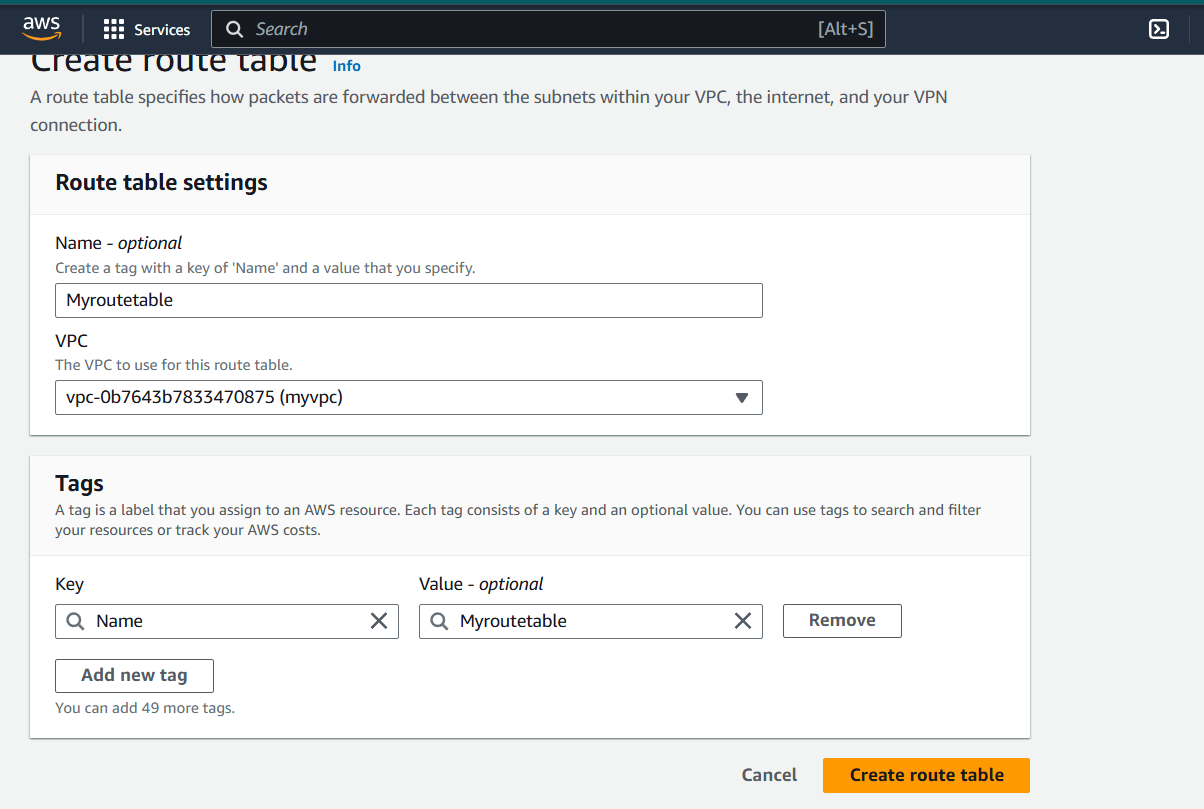
Task 4 : Create Route Table.
Step 1 : Select Route table and click on create route table.

Step 2 : Name : MyRoutetable and select your VPC.
Step 3 : Click on Createroutetable.
Step 4 : Select routes and click on Edit routes.

Step 5 : Add route and select the internet gateway.
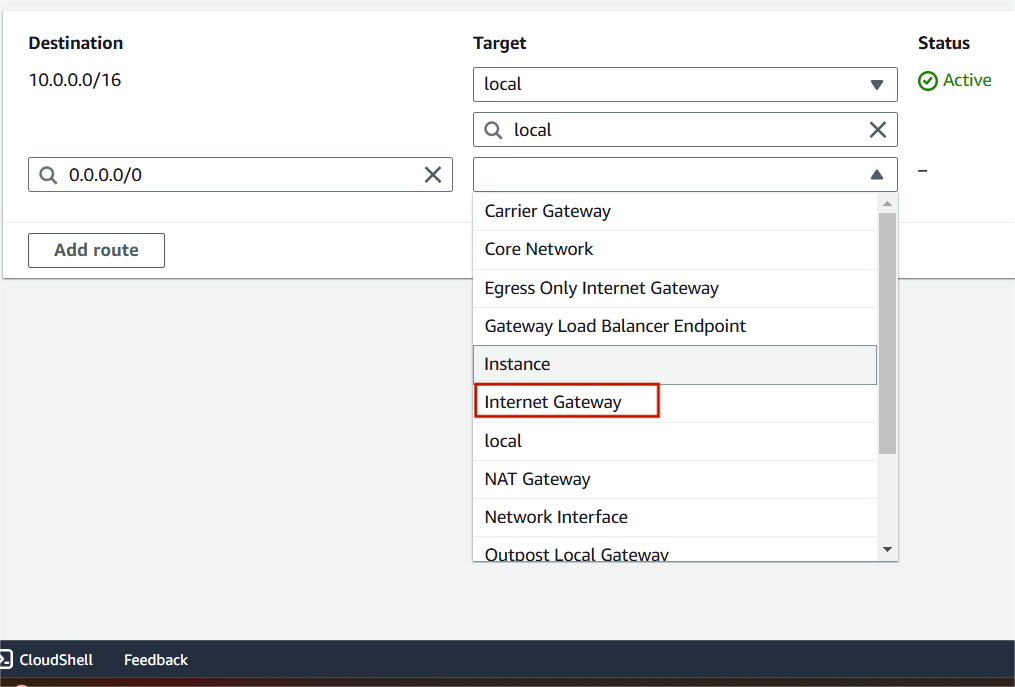
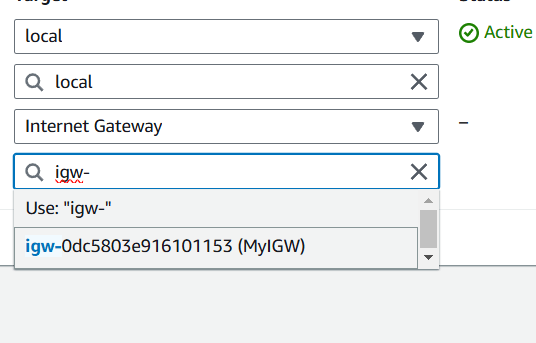
Step 6 : Attach your IGW and click on save changes.

Step 7 : Select on subnet associations and click on edit subnet associations.

Step 8 : Select public subnet and save associations.


Conclusion:
In conclusion, a Virtual Private Cloud (VPC) is an essential component for creating a secure, isolated network within a public cloud environment. By defining your own VPC, you can control your network’s IP address range, subnets, routing, and security settings to meet the specific needs of your applications and workloads. Whether you’re setting up a simple environment or a complex multi-tier architecture, understanding how to design and manage a VPC is key to building scalable and secure cloud-based systems.

Add a Comment